TEC Ma-1350 owners manual - 4S Business Systems Inc.
TEC Ma-1350 owners manual - 4S Business Systems Inc.
TEC Ma-1350 owners manual - 4S Business Systems Inc.

Create successful ePaper yourself
Turn your PDF publications into a flip-book with our unique Google optimized e-Paper software.
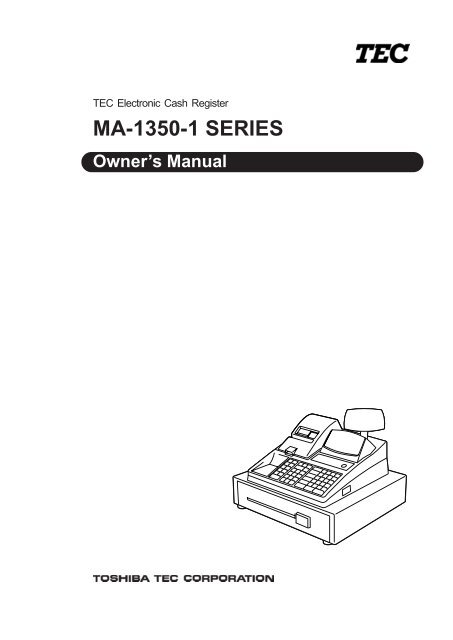
<strong>TEC</strong> Electronic Cash Register<br />
MA-<strong>1350</strong>-1 SERIES<br />
Owner’s <strong>Ma</strong>nual
FCC Notice<br />
This equipment has been tested and found to comply with the limits for a Class A digital<br />
device, pursuant to Part15 of the FCC Rules. These limits are designed to provide reasonable<br />
protection against harmful interference when the equipment is operated in a commercial<br />
environment. This equipment generates, uses, and can radiate radio frequency energy and,<br />
if not installed and used in accordance with the instruction <strong>manual</strong>, may cause harmful<br />
interference to radio communications. Operation of this equipment in a residential area is<br />
likely to cause harmful interference in which case the user will be required to correct the<br />
interference at his own expense.<br />
Changes or modification not expressly approved by manufacturer for compliance could void<br />
the user’s authority to operate the equipment.<br />
Caution : Danger of explosion if battery is incorrectly replaced.<br />
Replace only with the same or equivalent type recommended by the manufacturer. Dispose<br />
of used batteries according to the manufacturer’s instructions.<br />
Attention<br />
Il y a danger d’explosion s’il y a remplacement incorrect de la batterie. Remplacer<br />
uniquement avec une batterie de même type ou d’un type recommandé par le constructeur.<br />
Mettre au rébut les batteries usagées conformément aux instructions du fabricant.<br />
The socket-outlet shall be installed near the equipment and shall be easily accessible.<br />
Le socle de prise de courant doit être installé à proximité du matériel et doit être aisément<br />
accessible.<br />
CE Compliance (for EU only)<br />
This product complies with the requirements of EMC and Low Voltage Directives including<br />
their amendments.<br />
Copyright © 2001<br />
by TOSHIBA <strong>TEC</strong> CORPORATION<br />
All Rights Reserved<br />
570 Ohito, Izunokuni-shi, Shizuoka-ken, JAPAN
Safety Summary<br />
(i)<br />
EO1-11137<br />
EO1-11099<br />
Safety Summary<br />
Personal safety in handling or maintaining the equipment is extremely important. Warnings and Cautions<br />
necessary for safe handling are included in this <strong>manual</strong>. All warnings and cautions contained in this<br />
<strong>manual</strong> should be read and understood before handling or maintaining the equipment.<br />
Do not attempt to effect repairs or modifications to this equipment. If a fault occurs that cannot be rectified<br />
using the procedures described in this <strong>manual</strong>, turn off the power, unplug the machine, then contact your<br />
authorized TOSHIBA <strong>TEC</strong> representative for assistance.<br />
Meanings of Each Symbol<br />
This symbol indicates warning items (including cautions).<br />
Specific warning contents are drawn inside the symbol.<br />
(The symbol on the left indicates a general caution.)<br />
This symbol indicates prohibited actions (prohibited items).<br />
Specific prohibited contents are drawn inside or near the symbol.<br />
(The symbol on the left indicates “no disassembling”.)<br />
This symbol indicates actions which must be performed.<br />
Specific instructions are drawn inside or near the symbol.<br />
(The symbol on the left indicates “disconnect the power cord plug from the outlet”.)<br />
WARNING<br />
Prohibited<br />
Do not plug in or unplug the power<br />
cord plug with wet hands as this may<br />
cause electric shock.<br />
This indicates that there is the risk of death or serious injury if the<br />
machines are improperly handled contrary to this indication.<br />
Any other than the<br />
specified AC voltage<br />
is prohibited.<br />
Prohibited<br />
If the machines share the same<br />
outlet with any other electrical<br />
appliances which consume large<br />
amounts of power, the voltage will<br />
fluctuate widely each time these<br />
appliances operate. Be sure to<br />
provide an exclusive outlet for the<br />
machine as this may cause the<br />
machines to malfunction.<br />
Prohibited<br />
Prohibited<br />
Do not insert or drop metal,<br />
flammable or other foreign objects into<br />
the machines through the ventilation<br />
slits, as this may cause fire or electric<br />
shock.<br />
Prohibited<br />
Disconnect<br />
the plug.<br />
If the machines are dropped or their<br />
cabinets damaged, first turn off the<br />
power switches and disconnect the<br />
power cord plugs from the outlet, and<br />
then contact your authorized<br />
TOSHIBA <strong>TEC</strong> representative for<br />
assistance. Continued use of the<br />
machine in that condition may cause<br />
fire or electric shock.<br />
Disconnect<br />
the plug.<br />
Do not use voltages other than the<br />
voltage (AC) specified on the rating<br />
plate, as this may cause fire or<br />
electric shock.<br />
Do not place metal objects or<br />
water-filled containers such as flower<br />
vases, flower pots or mugs, etc. on<br />
top of the machines. If metal objects<br />
or spilled liquid enter the machines,<br />
this may cause fire or electric<br />
shock.<br />
Do not scratch, damage or modify<br />
the power cords. Also, do not place<br />
heavy objects on, pull on, or excessively<br />
bend the cords, as this may<br />
cause fire or electric shock.<br />
Continued use of the machines in an<br />
abnormal condition such as when the<br />
machines are producing smoke or<br />
strange smells may cause fire or electric<br />
shock. In these cases, immediately<br />
turn off the power switches and<br />
disconnect the power cord plugs from<br />
the outlet. Then, contact your authorized<br />
TOSHIBA <strong>TEC</strong> representative for<br />
assistance.
Safety Summary<br />
Disconnect<br />
the plug.<br />
Connect a<br />
grounding<br />
wire.<br />
If foreign objects (metal fragments,<br />
water, liquids) enter the machines,<br />
first turn off the power switches and<br />
disconnect the power cord plugs from<br />
the outlet, and then contact your<br />
authorized TOSHIBA <strong>TEC</strong> representative<br />
for assistance. Continued<br />
use of the machine in that condition<br />
may cause fire or electric shock.<br />
Ensure that the equipment is<br />
properly grounded. Extension cables<br />
should also be grounded. Fire or<br />
electric shock can occur on improperly<br />
grounded equipment.<br />
(ii)<br />
Disconnect<br />
the plug.<br />
No<br />
disassembling.<br />
EO1-11137<br />
EO1-11099<br />
When unplugging the power<br />
cords, be sure to hold and pull on<br />
the plug portion. Pulling on the cord<br />
portion may cut or expose the internal<br />
wires and cause fire or electric<br />
shock.<br />
Do not remove covers, repair or<br />
modify the machine by yourself. You<br />
may be injured by high voltage, very<br />
hot parts or sharp edges inside the<br />
machine.<br />
Unauthorized modification is prohibited.<br />
This indicates that there is the risk of personal Injury or damage to<br />
CAUTION objects if the machines are improperly handled contrary to this indication.<br />
Precaution<br />
The following precautions will help to ensure that this machine will continue to function correctly.<br />
• Try to avoid locations that have the following adverse conditions:<br />
* Temperatures out of the specification * Direct sunlight * High humidity<br />
* Shared power socket * Excessive vibration * Dust/Gas<br />
• Do not subject the machine to sudden shocks.<br />
• Do not press the keys too hard. Keys will operate correctly if they are touched lightly.<br />
• Clean the cover and keyboard, etc. by wiping with a dry cloth or a cloth soaked with detergent and wrung out<br />
thoroughly. Never use thinner or other volatile solvent for cleaning.<br />
• At the end of the day, turn the power OFF, then clean and inspect the exterior of the machine.<br />
• Try to avoid using this equipment on the same power supply as high voltage equipment or equipment likely to<br />
cause mains interference.<br />
• USE ONLY TOSHIBA <strong>TEC</strong> SPECIFIED consumables.<br />
• DO NOT STORE the consumables where they might be exposed to direct sunlight, high temperatures, high<br />
humidity, dust, or gas.<br />
• When moving the machine, take hold of the drawer and lift the machine.<br />
• Do not place heavy objects on top of the machines, as these items may become unbalanced and fall causing<br />
injury.<br />
• Do not block the ventilation slits of the machines, as this will cause heat to build up inside the machines and<br />
may cause fire.<br />
• Do not lean against the machine. It may fall on you and could cause injury.<br />
Request Regarding <strong>Ma</strong>intenance<br />
• Utilize our maintenance services.<br />
After purchasing the machines, contact your authorized TOSHIBA <strong>TEC</strong> representative for assistance once per year or<br />
so to have the inside of the machines cleaned. Otherwise, dust will build up inside the machines and may cause fire or<br />
malfunction. Cleaning is particularly effective before humid rainy seasons.<br />
• Our maintenance service performs the periodic checks and other work required to maintain the quality and<br />
performance of the machines, preventing accidents beforehand.<br />
For details, please consult your authorized TOSHIBA <strong>TEC</strong> representative for assistance.<br />
• Using insecticides and other chemicals<br />
Do not expose the machines to insecticides or other volatile solvents, as this will deteriorate the cabinet or other parts<br />
or cause the paint to peel.
TABLE OF CONTENTS<br />
EO1-11137<br />
MA-<strong>1350</strong>-1 SERIES<br />
Page<br />
1. INTRODUCTION................................................................................................. 1-1<br />
1.1 Applicable Model .............................................................................................................. 1-1<br />
1.2 Accessories ...................................................................................................................... 1-2<br />
2. SPECIFICATION................................................................................................. 2-1<br />
2.1 ECR .................................................................................................................................. 2-1<br />
2.2 Hardware Option .............................................................................................................. 2-2<br />
3. OUTLINE OF PREPARATION PROCEDURE BEFORE<br />
OPERATING THE ECR ...................................................................................... 3-1<br />
4. APPEARANCE AND NOMENCLATURE ........................................................... 4-1<br />
5. CONTROL LOCK AND CONTROL KEYS ......................................................... 5-1<br />
5.1 Control Keys ..................................................................................................................... 5-1<br />
5.2 Control Lock ..................................................................................................................... 5-1<br />
6. DISPLAY ............................................................................................................. 6-1<br />
6.1 Operator’s Display ............................................................................................................ 6-1<br />
6.2 Customer’s Display ........................................................................................................... 6-1<br />
6.3 Numeric Display ............................................................................................................... 6-1<br />
6.4 Message Descriptors (Status Lamps) .............................................................................. 6-2<br />
7. KEYBOARD........................................................................................................ 7-1<br />
7.1 Keyboard Layout .............................................................................................................. 7-1<br />
7.2 Functions of Each Key ...................................................................................................... 7-2<br />
8. INSTALLING AND REPLACING THE RECEIPT/JOURNAL ROLL .................. 8-1<br />
8.1 Installing the Receipt Roll ................................................................................................. 8-1<br />
8.2 Replacing the Receipt Roll ............................................................................................... 8-2<br />
8.3 Installing the Journal Roll ................................................................................................. 8-3<br />
8.4 Replacing the Journal Roll ................................................................................................ 8-4<br />
9. INSTALLING THE RIBBON CASSETTE ........................................................... 9-1<br />
9.1 Installing the Ribbon Cassette .......................................................................................... 9-1<br />
9.2 Replacing the Ribbon Cassette ........................................................................................ 9-2<br />
10. SETTING THE TIME AND DATE...................................................................... 10-1<br />
10.1 Setting the Time .............................................................................................................. 10-1<br />
10.2 Setting the Date .............................................................................................................. 10-2<br />
10.3 Displaying the Time ........................................................................................................ 10-3<br />
10.4 Printing the Time and Date ............................................................................................. 10-3<br />
11. TAX TABLE SETTING ..................................................................................... 11-1<br />
11.1 Setting the U.S. Tax Tables (also applicable to PST in Canada) .................................... 11-1<br />
11.2 Setting the GST Rate (applicable to Canada only) ......................................................... 11-4<br />
11.3 Setting the Non-taxable Limit Amount (applicable to only certain areas in Canada) ...... 11-5<br />
11.4 Tax Calculation Test ........................................................................................................ 11-6<br />
12. REGISTER NO. SETTING ................................................................................ 12-1<br />
13. PROGRAMMING YOUR OWN MESSAGE AND VARIOUS NAMES .............. 13-1<br />
13.1 Character Entries for Programming Operations ............................................................. 13-1<br />
13.2 Store Message and Commercial Message Programming .............................................. 13-6<br />
13.3 Financial Total Name Programming................................................................................ 13-9<br />
13.4 Print Line Item Name Programming ............................................................................. 13-12
EO1-11137<br />
MA-<strong>1350</strong>-1 SERIES<br />
14. OPTIONAL KEY SETTING............................................................................... 14-1<br />
14.1 List of Keys ..................................................................................................................... 14-1<br />
14.2 Key Installation Setting ................................................................................................... 14-2<br />
15. DAILY OPERATION FLOW .............................................................................. 15-1<br />
16. CASHIER IDENTIFYING OPERATION ............................................................ 16-1<br />
16.1 Signing Method Cashier Sign ON & Sign OFF ............................................................... 16-1<br />
16.2 Cashier Key Method (Push LED Key) ............................................................................ 16-2<br />
16.3 Cashier Key Method (Barrel Lock) ................................................................................. 16-3<br />
16.4 Cashier Key Method ([CLK] Key) ................................................................................... 16-3<br />
16.5 Cashier Reports .............................................................................................................. 16-3<br />
16.6 Cashier Name Programming .......................................................................................... 16-4<br />
17. TRAINING ......................................................................................................... 17-1<br />
17.1 Operation for Training Mode Start .................................................................................. 17-1<br />
17.2 Entries in Training Mode ................................................................................................. 17-1<br />
17.3 Operation for Training Mode End ................................................................................... 17-1<br />
18. SETTING PREPARATION OF EACH KEY,<br />
AND TRANSACTION ENTRIES....................................................................... 18-1<br />
18.1 Receipt-issue/Non-issue Selection ................................................................................. 18-1<br />
18.2 Clearing Errors, or Clearing Wrong Declaration Key or Wrong Numeric Entries ............ 18-2<br />
18.3 Department Key .............................................................................................................. 18-3<br />
18.4 PLU (Price-Look-Up) .................................................................................................... 18-16<br />
18.5 PLU Price Shift Entry .................................................................................................... 18-28<br />
18.6 Preset Price Open ........................................................................................................ 18-29<br />
18.7 Listing Capacity Open .................................................................................................. 18-29<br />
18.8 Percent Charge, Percent Discount ............................................................................... 18-30<br />
18.9 Dollar Discount ............................................................................................................. 18-32<br />
18.10 Vendor Coupon ............................................................................................................. 18-32<br />
18.11 Store Coupon ............................................................................................................... 18-33<br />
18.12 Tax Status Modification ................................................................................................. 18-34<br />
18.13 Food Stamp Modification .............................................................................................. 18-35<br />
18.14 Item Correction (Last Line Voiding) .............................................................................. 18-35<br />
18.15 Returned Merchandise ................................................................................................. 18-36<br />
18.16 Void (Designated Line Voiding) .................................................................................... 18-37<br />
18.17 All Void (Transaction Cancel) ....................................................................................... 18-38<br />
18.18 Non-add Number Print .................................................................................................. 18-38<br />
18.19 Subtotal Read & Print ................................................................................................... 18-39<br />
18.20 Taxable Total Read ....................................................................................................... 18-40<br />
18.21 <strong>Ma</strong>nual Tax Entry .......................................................................................................... 18-40<br />
18.22 Food Stamp Tender ...................................................................................................... 18-40<br />
18.23 Media Keys ................................................................................................................... 18-42<br />
18.24 Previous Balance, Charge Posting ............................................................................... 18-46<br />
18.25 Check Cashing (Cashing Non-cash Media) ................................................................. 18-47<br />
18.26 Post-issue Receipt ........................................................................................................ 18-48<br />
18.27 No-sale (Exchange) ...................................................................................................... 18-48<br />
18.28 Received-on-Account Payment .................................................................................... 18-49<br />
18.29 Paid Out ........................................................................................................................ 18-49<br />
18.30 Tax Exemption .............................................................................................................. 18-50<br />
18.31 Foreign Currency Keys ................................................................................................. 18-51<br />
18.32 No-sale Exchange from a Foreign Currency to the Domestic Currency ....................... 18-53<br />
18.33 Validation Print .............................................................................................................. 18-54<br />
18.34 Remote Slip Printer (hardware option) Operation ........................................................ 18-55<br />
19. OPERATIONS IN “MGR” MODE ..................................................................... 19-1<br />
19.1 Items programmed to require <strong>Ma</strong>nager Intervention ...................................................... 19-1<br />
19.2 Listing Capacity Release ................................................................................................ 19-2
EO1-11137<br />
MA-<strong>1350</strong>-1 SERIES<br />
20. OPERATIONS IN “ - ” MODE ........................................................................ 20-1<br />
21. READ AND RESET REPORTS ........................................................................ 21-1<br />
21.1 Hourly Range Table Programming.................................................................................. 21-1<br />
21.2 Selecting Print/Non-print Items on Reports .................................................................... 21-2<br />
21.3 Daily Reports .................................................................................................................. 21-3<br />
21.4 Periodic Reports ............................................................................................................. 21-4<br />
21.5 Report Sample Format ................................................................................................... 21-4<br />
22. SYSTEM OPTION SETTING ............................................................................ 22-1<br />
23. PROGRAM DATA VERIFICATION ................................................................... 23-1<br />
23.1 Operating Procedure ...................................................................................................... 23-1<br />
24. GENERAL MAINTENANCE ............................................................................. 24-1<br />
24.1 Replenishing Ink to the Store Name Stamp ................................................................... 24-1<br />
24.2 <strong>Ma</strong>nual Drawer Release and Lock ................................................................................. 24-2<br />
24.3 Removing the Drawer ..................................................................................................... 24-3<br />
24.4 Media Slot ....................................................................................................................... 24-4<br />
24.5 CDC (Cash Drawer Cover; Option) Lock ........................................................................ 24-4<br />
25. IN CASE OF THE POWER FAILURE .............................................................. 25-1<br />
26. TROUBLESHOOTING...................................................................................... 26-1<br />
26.1 Trouble concerning Power Supply .................................................................................. 26-1<br />
26.2 Trouble concerning Printer ............................................................................................. 26-1<br />
26.3 Trouble concerning Keyboard ......................................................................................... 26-3<br />
26.4 Trouble concerning Drawer ............................................................................................ 26-3<br />
26.5 Trouble concerning Display ............................................................................................ 26-4<br />
26.6 Trouble during Normal Operations ................................................................................. 26-4<br />
26.7 Trouble in the REG Position ........................................................................................... 26-5<br />
26.8 Trouble in the SET Position ............................................................................................ 26-5<br />
27. STATUS CLEAR AND MEMORY CLEAR OPERATIONS ............................... 27-1<br />
27.1 Status Clear .................................................................................................................... 27-1<br />
27.2 Sales Memory Clear ....................................................................................................... 27-2<br />
27.3 All Memory Clear ............................................................................................................ 27-3<br />
Appendix 1 ........................................................................................................ A-1<br />
Appendix 2 ........................................................................................................ A-2<br />
CAUTION:<br />
1. This <strong>manual</strong> may not be copied in whole or in part without prior written permission of<br />
TOSHIBA <strong>TEC</strong>.<br />
2. The contents of this <strong>manual</strong> may be changed without notification.<br />
3. Please refer to your local Authorized Service representative with regard to any queries<br />
you may have in this <strong>manual</strong>.<br />
Copyright © 1999<br />
by TOSHIBA <strong>TEC</strong> CORPORATION<br />
All Rights Reserved<br />
570 Ohito, Ohito-cho, Tagata-gun, Shizuoka-ken, JAPAN
1. INTRODUCTION EO1-11137<br />
1. INTRODUCTION<br />
1-1<br />
1.1 Applicable Model<br />
Thank you for choosing the <strong>TEC</strong> electronic cash register MA-<strong>1350</strong>-1 series. This owner’s <strong>manual</strong> provides a<br />
description of the functions and handling of this register and should be read carefully to ensure optimum<br />
performance. Since every consideration has been given to safety and reliability, there is no danger of damaging<br />
the machine by incorrect operation.<br />
Please refer to this <strong>manual</strong> whenever you have any questions concerning the machine. This machine has been<br />
manufactured under strict quality control and should give you full satisfaction.<br />
For supplies, service or assistance call:<br />
Please have the following information available when<br />
you call:<br />
Product Name: <strong>TEC</strong> Electronic Cash Register<br />
Model: MA-<strong>1350</strong>-1<br />
Serial Number:<br />
Place Purchased:<br />
Date of Purchase:<br />
If for any reason this product is to be returned to the store where purchased, it must be packed in the original<br />
carton.<br />
• The specifications described in this <strong>manual</strong> may be modified by TOSHIBA <strong>TEC</strong>, if necessary.<br />
• Be sure to keep this <strong>manual</strong> for future reference.<br />
1.1 Applicable Model<br />
• MA-<strong>1350</strong>-1-S-US<br />
• MA-<strong>1350</strong>-1F-S-US, etc.<br />
M A - 1 3 5 0 - 1 2 2 2 - 2 -<br />
Destination (Nation Code)<br />
(US, etc.)<br />
Drawer Type<br />
A: PSP Drawer<br />
S: SP Drawer<br />
Cashier Type<br />
Blank: Code Entry Type<br />
B: Barrel Lock<br />
RAM Size<br />
Blank: 32KB<br />
E: 128KB<br />
Keyboard Type<br />
Blank: Normal<br />
F: Flat
1. INTRODUCTION EO1-11137<br />
1.2 Accessories<br />
1-2<br />
1.2 Accessories<br />
Owner’s <strong>Ma</strong>nual Control Key Paper Roll<br />
(EO1-11137; 1 pc.) (REG Key, MGR Key, MA Key, (45 mm x ø50 mm; 2 pcs.)<br />
S Key; 2 pcs. respectively)<br />
Ribbon Cassette Drawer Key Printer Cover Key<br />
(1 pc.) (2 pcs.) (2 pcs.)<br />
Journal Take-up Reel Stamp Ink Warranty Registration (US only)<br />
(1 pc.) (1 pc.) (1 pc.)
2. SPECIFICATION EO1-11137<br />
2. SPECIFICATION<br />
2.1 ECR<br />
Software Item<br />
Capacity of Cashier Memory <strong>Ma</strong>ximum 4 cashiers for Push LED Cashier Key and Barrel Lock<br />
<strong>Ma</strong>ximum 8 cashiers for Cashier Signing and the [CLK] Key<br />
2-1<br />
2.1 ECR<br />
Capacity of Department Memory <strong>Ma</strong>ximum 40 departments<br />
Capacity of Department <strong>Ma</strong>ximum 15 groups<br />
Group Memory<br />
Capacity of PLU Memory <strong>Ma</strong>ximum 500 PLUs when the RAM of the capacity 32 KB is installed.<br />
<strong>Ma</strong>ximum 1000 PLUs when the RAM of the capacity 128 KB is installed.<br />
Unit Price Programmable <strong>Ma</strong>ximum 6 digits; 0.00 to 9999.99 (zero-suppress form; 0.00) or<br />
maximum 6 digits; 0 to 999999 (zero-suppress form; .000)<br />
Hardware Item<br />
Size 460 mm (width) x 400 mm (depth) x 305 mm (height including rubber feet)<br />
(or 337 mm (height) when Customer’s Display is popped up.)<br />
Weight 13.5 kg<br />
Power Required 117 V ± 10 %, 60 Hz ± 10 %<br />
Power Consumed 19 W ± 20 % (operating), 9 W ± 20 % (non-operating)<br />
Ambient Temperature 0 °C to 40 °C<br />
Relative Humidity 10% to 90% RH (non-condensing)<br />
Size of Receipt and Journal Rolls 45 mm (width) x maximum 80 mm (diameter)<br />
Validation Slip Number of Sheets ....... <strong>Ma</strong>ximum 2 sheets (Original + Duplicate)<br />
Thickness .................... Non-carbon Slip ... 0.07 mm to 0.14 mm<br />
Carbon Slip .......... 0.14 mm or less for total<br />
thickness of original sheet<br />
and duplicate sheet<br />
Size ............................. 70 mm or more in height, 135 mm to 210 mm in<br />
width<br />
* Use a slip which has no curl (especially on edges), no bend, no<br />
wrinkle, no fold.<br />
Memory Protection Long-lasting rechargeable lithium battery is provided.<br />
Specifications are subject to change without notice.
2. SPECIFICATION EO1-11137<br />
2.2 Hardware Option<br />
Option Name Description Source<br />
DRS-207 The remote slip printer DRS-207 prints registering<br />
contents on a required slip. For details, refer to page 18-54.<br />
PK-2 PLU Preset-code Key can be assigned to the PLU<br />
keyboard PK-2 in order to quicken PLU entry in a sale.<br />
Also, this keyboard can be used to directly enter a Contact your<br />
character for programming operations including the TOSHIBA <strong>TEC</strong><br />
character entries. For details, refer to page 13-5. representative.<br />
KPCL-<strong>1350</strong> This push LED cashier key kit is used to identify each<br />
cashier. For details, refer to page 16-2.<br />
KBLK-<strong>1350</strong> The function of this barrel lock cashier key kit is the<br />
same as “KPCL-<strong>1350</strong>” described above.<br />
RD-N8 Addition of the expansion drawer realizes the Multi-drawer<br />
Feature. For details, refer to Chapter 22. SYSTEM OPTION<br />
SETTING, Address 21 - Bit 3 on page 22-23.<br />
2-2<br />
2.2 Hardware Option
3. OUTLINE OF PREPARATION PROCEDURE BEFORE OPERATING THE ECR EO1-11137<br />
3. OUTLINE OF PREPARATION PROCEDURE BEFORE OPERATING THE ECR<br />
3. OUTLINE OF PREPARATION PROCEDURE BEFORE<br />
OPERATING THE ECR<br />
This chapter shows the outline of set-up procedure of the ECR before actually starting the ECR operation.<br />
1 Remove the cash register from the carton and take out all the<br />
parts and accessories.<br />
2 Remove the tapes and seals for holding parts or protecting the<br />
register surfaces.<br />
3 Plug the power cord of the register into a wall outlet. <strong>Ma</strong>ke sure<br />
that the outlet voltage matches that of the power required for the<br />
register.<br />
4 Insert the REG key into the Control Lock.<br />
5 Turn the Control Lock to the REG position.<br />
6 Install the paper roll (referring to Chapter 8. INSTALLING AND<br />
REPLACING THE RECEIPT/JOURNAL ROLL). Also, install the<br />
Ribbon Cassette (referring to Chapter 9. INSTALLING THE RIB-<br />
BON CASSETTE).<br />
3-1<br />
REG<br />
OFF<br />
(1) (2) (3) (4) (5) (6) (7) (8) (9)<br />
SET<br />
REG<br />
OFF<br />
SET<br />
X<br />
X<br />
MGR -<br />
MGR -<br />
Z<br />
Z
3. OUTLINE OF PREPARATION PROCEDURE BEFORE OPERATING THE ECR EO1-11137<br />
7<br />
8<br />
9<br />
10<br />
11<br />
If any optional keys are installed or relocated on the keyboard, the<br />
optional key setting programming must be performed first before<br />
any other programming. Refer to Chapter 14. OPTIONAL KEY<br />
SETTING.<br />
Set the time and date correctly, referring to Chapter 10. SETTING<br />
THE TIME AND DATE.<br />
Set the tax tables, referring to Chapter 11. TAX TABLE SETTING.<br />
When multiple registers are used in one store, or to distinguish<br />
this register from others used by other stores in the same chain,<br />
set the Register Number, referring to Chapter 12. REGISTER NO.<br />
SETTING.<br />
Perform programming of the register, such as Departments and<br />
PLUs, according to the requirement of the market and your store<br />
(refer to Chapter 18 and thereafter) .<br />
3. OUTLINE OF PREPARATION PROCEDURE BEFORE OPERATING THE ECR<br />
3-2
4. APPEARANCE AND NOMENCLATURE EO1-11137<br />
4. APPEARANCE AND NOMENCLATURE<br />
Drawer<br />
Printer Cover<br />
Journal Window<br />
Receipt Outlet<br />
Validation Slot<br />
Keyboard<br />
Operator’s Display<br />
Used by the operator to confirm the entry contents<br />
and the status of the register. (page 6-1)<br />
Customer’s Display<br />
Provided for the customer to see the amount entered<br />
for each item and sale total. (page 6-1)<br />
Receipt Outlet<br />
The receipt for the finalized sale is issued.<br />
Journal Window<br />
The operator can see which items have already<br />
been entered through this window.<br />
Validation Slot<br />
Used to print the required item on the validation<br />
slip. (page 18-53)<br />
4-1<br />
PC Interface<br />
4. APPEARANCE AND NOMENCLATURE<br />
Customer’s Display<br />
Operator’s Display<br />
Control Lock<br />
Power Cord<br />
Printer Cover<br />
The cover for the Receipt/Journal printer.<br />
Control Lock<br />
It selects the type of register operations. (page 5-1)<br />
Keyboard<br />
Used to enter sale items. (page 7-1)<br />
Drawer<br />
Cash and other media are kept here. It automatically<br />
opens on finalizing a sale.<br />
PC Interface<br />
Used to connect a personal computer.
5. CONTROL LOCK AND CONTROL KEYS EO1-11137<br />
5. CONTROL LOCK AND CONTROL KEYS<br />
5.1 Control Keys<br />
There are four types of Control keys: the REG key, the MGR key, the MA key, and the S key.<br />
REG<br />
OFF<br />
SET<br />
REG<br />
MA MGR<br />
S<br />
X<br />
MGR -<br />
Z<br />
BLIND<br />
* not actually<br />
printed<br />
5-1<br />
5.1 Control Keys<br />
REG Key: The REG key is used by the cashier or clerk who operates ordinary transaction entries.<br />
This key can access the positions of OFF and REG of the Control Lock.<br />
MGR key: The MGR key is used by the store manager. This key can access the positions of OFF,<br />
REG, X, and MGR.<br />
MA Key: The MA key is used by the owner who will daily supervise the collection of money and<br />
printout of transactions recorded by the register. This key is also used when<br />
programming the register. This key can access the positions of SET, OFF, REG, X,<br />
MGR, - and Z.<br />
S Key: The S key is used by the owner. This key can access any position including BLIND of<br />
the Control Lock. However, to prevent the programmed data and the sales data from<br />
being changed by mistake, use the REG, MGR or MA key for transaction entries and<br />
report taking purposes.<br />
5.2 Control Lock<br />
The Control Lock has eight effective positions for different modes of operation, which are accessed by the appropriate<br />
Control Keys.<br />
(position) (function)<br />
SET ............... The register allows programming and training operations.<br />
OFF ............... Nothing appears on the display in this position. However,<br />
the power is being supplied to the register.<br />
REG .............. Transaction entries are carried out in this mode. Displays<br />
the current time while no entries are under way.<br />
X ................. The sale totals in memory can be read (X reports) and the<br />
programmed data can be verified in this position.<br />
MGR .............. This position allows to enter operations requiring <strong>Ma</strong>nager<br />
Intervention as well as all ordinary transaction entries<br />
to be carried out in the “REG” mode.<br />
- .................. This is the “Negative Mode” position, which makes entered<br />
data processed reversely to the REG or MGR<br />
mode. It is used to cancel or adjust sales data already<br />
finalized.<br />
Z ................. All the resettable totals and their respective counters in<br />
memory will be read and reset in this position (Z reports)<br />
BLIND ............. The register allows special programming operations and<br />
memory clear operations.<br />
The keys may be inserted or pulled out at the “OFF” or “REG” position.
6. DISPLAY EO1-11137<br />
6. DISPLAY<br />
The display has two types of display portions—numeric display and message descriptors (status lamps).<br />
6.1 Operator’s Display<br />
PLU<br />
6.2 Customer’s Display<br />
6.3 Numeric Display<br />
DPT RPT<br />
AMOUNT<br />
PC SLIP R ALM SIGN TL ST CG<br />
OFF ON<br />
I I<br />
CLERK PRICE<br />
AMOUNT<br />
6-1<br />
TL ST CG<br />
6.1 Operator’s Display<br />
AMOUNT (10 digits for total display, 7 digits for entries):<br />
Displays the numeric data, such as amount, quantity, etc. When the obtained total or subtotal<br />
amount is 10-digit value, the RPT and DPT digits are also used for the amount display. When<br />
no entries are under way and the Control Lock is in the REG position, the current time is<br />
displayed.<br />
DPT (2 digits): Displays the code which represents each Department key. It stays lit when repeating the<br />
same department entry.<br />
RPT (1 digit): Displays the repeat count of the same item. The count is indicated from the second entry on,<br />
and only the last digit will be displayed even if the count exceeds nine.<br />
PLU (3 digits of the DPT and RPT are used for this purpose):<br />
Displays the PLU code when any PLU is entered. It goes out when repeating the same PLU<br />
entry, then only the RPT digit will be displayed for the repeat entry count. When a sale item of<br />
PLU code 1000 or more is entered, only the lowest 3 digits in the 4-digit code will be<br />
displayed.<br />
CLERK (1 digit): Displays a cashier code instead of a department code by the system option. (Refer to Chapter<br />
22. SYSTEM OPTION SETTING, Address 23 - Bit 5 on page 22-26.)<br />
PRICE (1 digit): Displays PLU price shift No. instead of a department code by the system option. (Refer to<br />
Chapter 22. SYSTEM OPTION SETTING, Address 23 - Bit 6 on page 22-26.)
6. DISPLAY EO1-11137<br />
6.4 Message Descriptors (Status Lamps)<br />
PC: Illuminates during data communication between the cash register and a personal computer.<br />
SLIP: Illuminates when a validation slip is properly inserted to allow the validation print. It flickers to<br />
inform that the validation print is required when the validation compulsory status has been<br />
programmed on the last operation.<br />
R OFF: Illuminates when the Receipt-OFF mode is declared by the [LOG/RECEIPT] key. In this condition,<br />
no receipts will be issued for a sale to be entered. To extinguish this lamp (i.e., to<br />
change into Receipt-ON mode for issuing receipts), simply depress the [LOG/RECEIPT] key<br />
again.<br />
SIGN ON: Illuminates when a cashier signs ON if the cashier signing method has been selected.<br />
ALM: Illuminates with the alarm buzzer to indicate that the last operation or numeric entry was an<br />
error. To clear the error condition, depress the [C] key.<br />
TL: Illuminates with the total amount displayed when a sale is finalized without any amount<br />
tendered.<br />
ST: Illuminates in the following operations or condition.<br />
• The [ST] key is depressed, indicating that the displayed amount is subtotal.<br />
• The [TXBL TL] key is depressed, indicating that the displayed amount is taxable total.<br />
• The [EX] key is depressed, indicating that the displayed amount is the sale portion<br />
subject to the tax exemption.<br />
• Amount tendered is less than the sale total.<br />
CG: When an amount tendering operation has been performed, this lamp illuminates with the<br />
amount of change due displayed.<br />
6-2<br />
6.4 Message Descriptors (Status Lamps)
7. KEYBOARD EO1-11137<br />
7. KEYBOARD<br />
7-1<br />
7.1 Keyboard Layout<br />
The following is the standard keyboard layout, which was initially set at the factory. This register is designed to be<br />
capable of programming most of the keys at desired locations or adding some optional keys in place of the<br />
current keys. If you are in need of changing the locations or adding keys, refer to Chapter 14. OPTIONAL KEY<br />
SETTING.<br />
7.1 Keyboard Layout<br />
7.1.1 Normal Keyboard Standard Layout<br />
LOG<br />
RECEIPT<br />
#/NS<br />
FS/M<br />
PR<br />
OPEN<br />
LC<br />
OPEN<br />
RTN<br />
MDSE<br />
VOID<br />
ITEM<br />
CORR<br />
@/FOR<br />
AMT<br />
VALI<br />
DATE<br />
C<br />
RF<br />
TX<br />
JF<br />
7 8 9<br />
4 5 6<br />
1 2 3<br />
0 00 •<br />
PLU ST AT/TL<br />
7.1.2 Flat Keyboard Standard Layout<br />
PLU Preset-code Keys<br />
M<br />
1<br />
2<br />
3<br />
4<br />
5<br />
6<br />
7<br />
Department Keys 1 to15<br />
1<br />
2<br />
3<br />
4<br />
5<br />
8<br />
9<br />
10<br />
11<br />
12<br />
13<br />
14<br />
6<br />
7<br />
8<br />
9<br />
10<br />
LOG<br />
RECEIPT<br />
RECEIPT<br />
ISSUE<br />
%-<br />
#<br />
AMT<br />
PLU<br />
Department Keys 1 to 14<br />
11<br />
12<br />
13<br />
14<br />
15<br />
VOID<br />
TX/M<br />
c<br />
PO<br />
R/A<br />
VND<br />
CPN<br />
STR<br />
CPN<br />
FSTL<br />
TEND<br />
ITEM<br />
CORR<br />
EX<br />
7 8<br />
4 5<br />
1 2<br />
0 00<br />
CHECK<br />
TEND<br />
RECEIPT<br />
ISSUE<br />
DOLL<br />
DISC<br />
%-<br />
EX<br />
chg<br />
ALL<br />
VOID<br />
RTN<br />
MDSE<br />
@/<br />
FOR<br />
9<br />
6<br />
3<br />
.<br />
RF<br />
R/A<br />
chg<br />
$5.00<br />
$10.00<br />
ST<br />
JF<br />
PO<br />
NS<br />
AT / TL
7. KEYBOARD EO1-11137<br />
7.2 Functions of Each Key<br />
KEY FUNCTION<br />
LOG<br />
RECEIPT<br />
1<br />
RF<br />
JF<br />
NS<br />
ALL<br />
VOID<br />
PR<br />
OPEN<br />
LC<br />
OPEN<br />
DOLL<br />
DISC<br />
RTN<br />
MDSE<br />
C<br />
#<br />
(or #/CID )<br />
to<br />
%-<br />
@/FOR<br />
R/A<br />
40<br />
Log/Receipt Key: Used for the cashier sign on/off operation<br />
when cashier signing option is selected after entering numbers.<br />
Also, used to select receipt issue or non-issue without entering<br />
numbers.<br />
7-2<br />
7.2 Functions of Each Key<br />
Receipt Feed Key: Used to advance the receipt roll and<br />
operated by holding it down until the paper is advanced to the ----required<br />
position.<br />
Journal Feed Key: Used to advance the journal roll in the same<br />
fashion as the [RF] key is used for receipt roll.<br />
No-sale Key: Used in the no-sale operation.<br />
All Void Key: Used to delete all items in the current sale.<br />
Preset Price Open Key: Used to release the preset-price<br />
department for a <strong>manual</strong> price entry.<br />
Listing Capacity Open Key: Used to enter an amount which<br />
exceeds the listing capacity programmed for department keys in 18-29<br />
advance.<br />
Dollar Discount Key: Used to subtract an amount from a sale.<br />
Returned Merchandise Key: Used for the returned<br />
merchandise operation.<br />
Clear Key: Used to clear a wrong entry or operation error.<br />
Non-add Number Print Key: When depressed with a prior<br />
number entry, this key is used to print the non-add number.<br />
Department Keys 1 to 40: Used to enter department items and<br />
process the amount into appropriate departments.<br />
Percent Discount Key: Used to subtract a percent rate, preset<br />
or <strong>manual</strong>ly entered, from a sale or an individual sale item.<br />
18-38<br />
At/FOR Key: Used to enter a department or a PLU item by<br />
multiplication. Also used to auto-calculate and enter a split 18-14<br />
package price.<br />
Received-on-Account Key: Used to register received-onaccount<br />
amount.<br />
REFERENCE<br />
PAGE<br />
16-1, 18-1<br />
-----<br />
18-48<br />
18-38<br />
18-29<br />
18-32<br />
18-36<br />
18-2<br />
18-3<br />
18-30<br />
18-49
7. KEYBOARD EO1-11137<br />
KEY FUNCTION<br />
PO<br />
PLU<br />
AMT<br />
ITEM<br />
CORR<br />
7 8 9<br />
4 5 6<br />
1 2 3<br />
0 00 .<br />
ST<br />
TXBL<br />
TL<br />
VND<br />
CPN<br />
STR<br />
CPN<br />
MISC<br />
chg<br />
CHECK<br />
TEND<br />
AT/TL<br />
%+<br />
RECEIPT<br />
ISSUE<br />
CPN<br />
VALIDATE<br />
VOID<br />
Paid Out Key: Used to register paid out amount.<br />
PLU (Price-Look-Up) Key: Used to enter a PLU item that is<br />
linked to a department.<br />
Amount Key: Used to enter a <strong>manual</strong> amount of PLU item.<br />
Item Correct Key: Used to delete the last item entered within the<br />
current sale.<br />
Numeric Keys: Used to enter numeric data, such as amount,<br />
quantities, and code numbers. The [00] key functions the same<br />
as depressing the [0] key twice. The [ . ] key is used to designate ----the<br />
decimal point of a percentage rate or a quantity. The [000]<br />
key functions the same as depressing the [0] key three times.<br />
Subtotal Key: Used to obtain a subtotal of the current<br />
transaction.<br />
Taxable Total Key: Used to obtain the taxable total (the sale<br />
total including taxes due) of the current transaction.<br />
Vendor Coupon Key: Used to enter the amount of vendor<br />
coupons received from the customer.<br />
Store Coupon Key: Used to subtract the store coupon amount<br />
redeemed through a department.<br />
Miscellaneous Media Key: Used to finalize a sale as<br />
miscellaneous media.<br />
Charge Key: Used to finalize a sale as charge.<br />
Check Tender Key: Used to finalize a sale as check.<br />
Cash Amount Tender / Total Key: Used to finalize a sale as<br />
cash.<br />
Percent Charge Key: Used to add a percent rate, preset or<br />
<strong>manual</strong>ly entered, to a sale or an individual sale item.<br />
Post-issue Receipt Key: Used to print the receipt of a last sale<br />
completed in registration.<br />
Media-coupon Tender Key: Used to finalize a sale as mediacoupon.<br />
Validation Print Key: Used to print a required item on a<br />
validation slip.<br />
Void Key: Used to delete item(s) already entered in the current<br />
sale.<br />
7-3<br />
7.2 Functions of Each Key<br />
REFERENCE<br />
PAGE<br />
18-49<br />
18-16<br />
18-23<br />
18-35<br />
18-39<br />
18-40<br />
18-32<br />
18-33<br />
18-42<br />
18-42<br />
18-42<br />
18-42<br />
18-30<br />
18-48<br />
18-42<br />
18-54<br />
18-37
7. KEYBOARD EO1-11137<br />
KEY FUNCTION<br />
CLERK 1 to CLERK 8<br />
CUR 1 to CUR 4<br />
TX1/M to TX3/M<br />
EX<br />
TAX<br />
GST/M<br />
FS/M<br />
FSTL<br />
TEND<br />
PB+ , PB-<br />
PRICE<br />
SHIFT 1<br />
#/NS<br />
OPEN<br />
$5.00 , $10.00<br />
CASH3<br />
TRF<br />
to<br />
PLU Presetcode<br />
Key<br />
PRICE<br />
SHIFT 3<br />
Non-add Number Print / No-sale Key: It functions as the [#]<br />
(or [#/CID]) key and the [NS] key.<br />
Preset Price & Listing Capacity Open Key: It functions as the<br />
[PR OPEN] key and the [LC OPEN] key.<br />
Cashier 1 to 8 Keys: Used to identify each cashier who<br />
operates the register.<br />
Cash Payment 1 to 3 Keys: Used for cash-tendering operation<br />
with the respective preset amounts. As initial setting, the amount<br />
$5.00 is preset for the [$5.00] key and $10.00 for the [$10.00] 18-42<br />
key.<br />
Foreign Currency 1 to 4 Keys: Used to finalize a sale with<br />
foreign currency.<br />
Tax Modifier 1 to 3 Keys: Used to reverse the tax status of<br />
required department, PLU, percent discount/charge, dollar 18-34,<br />
discount, vendor coupon or store coupon entry. 18-50<br />
Tax Exempt Key: Used to exempt designated tax (es) from the<br />
sale.<br />
<strong>Ma</strong>nual Tax Key: Used to enter an irregular tax amount to sale<br />
total.<br />
GST Modifier Key (applicable for Canada only): Used to<br />
reverse the GST status of required department, PLU, percent<br />
discount/charge, dollar discount, vendor coupon, or store coupon<br />
entry.<br />
Food Stamp Modifier Key: Used to reverse the food stamp<br />
status of required department, PLU, percent discount/charge, 18-35<br />
dollar discount, vendor coupon, or store coupon entry.<br />
Food Stamp Total/Tender Key: Used to read the food<br />
stampable portion amount of a sale and to tender an amount in 18-40<br />
food stamps.<br />
Previous Balance Keys: Used to enter a previous balance in<br />
charge posting operation.<br />
Transfer Key: Used to transfer an entire balance in charge<br />
posting operation.<br />
Price Shift 1 to 3 Keys: Used in PLU price shift operation.<br />
PLU Preset-code Keys: Each of these keys is programmed with<br />
a PLU code. Therefore, depressing those keys can directly enter 18-24<br />
PLU items corresponding to each PLU code.<br />
7-4<br />
7.2 Functions of Each Key<br />
REFERENCE<br />
PAGE<br />
18-38,<br />
18-48<br />
18-29<br />
16-3<br />
18-51<br />
18-50<br />
18-40<br />
18-34,<br />
18-50<br />
18-46<br />
18-46<br />
18-28
8. INSTALLING AND REPLACING THE RECEIPT/JOURNAL ROLL EO1-11137<br />
8. INSTALLING AND REPLACING THE RECEIPT/<br />
JOURNAL ROLL<br />
8.1 Installing the Receipt Roll<br />
Turn the Control Lock to the REG position using a Control Key to perform the paper roll installation described in<br />
this chapter.<br />
WARNING!<br />
Care must be taken not to injure yourself with the paper cutter.<br />
8-1<br />
8.1 Installing the Receipt Roll<br />
1. To remove the Printer Cover, insert the Printer Cover Key to the Printer Cover Lock, and then turn it 90°<br />
clockwise.<br />
2. Cut the paper end to make it sharp.<br />
3. Place the paper roll in the outer side holder of the two roll holders.<br />
Correct <strong>Inc</strong>orrect
8. INSTALLING AND REPLACING THE RECEIPT/JOURNAL ROLL EO1-11137<br />
8-2<br />
8.2 Replacing the Receipt Roll<br />
4. Insert the paper end into the receipt inlet behind the printer. Then, feed the paper by hand into the inside of<br />
the printer while pressing the [RF] key provided at the central upper side of the keyboard until about 4<br />
inches (about 10cm) of paper comes out of the printer.<br />
5. Cut the excess paper with the attached cutter, and attach the Printer Cover.<br />
After closing the Printer Cover, depress the [NS] key to check print condition.<br />
VALI<br />
DATE<br />
8.2 Replacing the Receipt Roll<br />
TX M<br />
When a red line appears on the edge of the paper roll, follow the steps below to replace the paper roll with a new<br />
one.<br />
1. After removing the Printer Cover, cut the paper as shown in the figure.
8. INSTALLING AND REPLACING THE RECEIPT/JOURNAL ROLL EO1-11137<br />
2. Depress the [RF] key to feed the remaining paper end.<br />
CAUTION: Never try to pull out the remaining paper end by hand. It may cause a paper jam.<br />
3. Load new paper roll as described in the preceding pages.<br />
8.3 Installing the Journal Roll<br />
8-3<br />
VALI<br />
DATE<br />
TX M<br />
8.3 Installing the Journal Roll<br />
1. Follow Steps 1 to 4 for “Installing the Receipt Roll”, except that the paper roll should be placed inner side of<br />
the two holders and the [JF] key should be used for the journal roll to advance about 8 inches (20 cm) of<br />
paper out of the printer.<br />
2. Insert the paper end into the slit on the Take-up Reel and wind it around the reel two or three times.<br />
3. Set the Journal Take-up Reel into the Reel Holder.
8. INSTALLING AND REPLACING THE RECEIPT/JOURNAL ROLL EO1-11137<br />
4. Attach the Printer Cover.<br />
8.4 Replacing the Journal Roll<br />
8-4<br />
8.4 Replacing the Journal Roll<br />
When a red line appears on the edge of the paper roll, follow the steps below to replace the paper roll with a new<br />
one.<br />
1. After removing the Printer Cover, depress the [JF] key to wind up enough of the Journal Paper, then cut the<br />
paper as shown in the figure.<br />
Depress the [JF] key to feed the remaining paper end.<br />
CAUTION: Never try to pull out the remaining paper end by hand. It may cause a paper jam.<br />
2. Remove the wound-up portion of the paper by pulling it sideways.<br />
3. Load new paper roll as described in the preceding pages.<br />
VALI<br />
DATE<br />
TX M
9. INSTALLING THE RIBBON CASSETTE EO1-11137<br />
9. INSTALLING THE RIBBON CASSETTE<br />
9.1 Installing the Ribbon Cassette<br />
Turn the Control Lock to the OFF position using a Control Key to perform the ribbon cassette installation<br />
described in this chapter.<br />
1. To remove the Printer Cover, insert the Printer Cover Key to the Printer Cover Lock, and turn it 90° clockwise.<br />
9-1<br />
9.1 Installing the Ribbon Cassette<br />
2. Install the Ribbon Cassette as shown in the figure. After installing the Ribbon Cassette, turn the knob of the<br />
Ribbon Cassette in the direction of the arrow mark several times to remove the slack on the ribbon.<br />
3. Attach the Printer Cover.
9. INSTALLING THE RIBBON CASSETTE EO1-11137<br />
9.2 Replacing the Ribbon Cassette<br />
9-2<br />
9.2 Replacing the Ribbon Cassette<br />
This Ribbon Cassette is a consumable part and a TOSHIBA <strong>TEC</strong>’s exclusive. Ask your TOSHIBA <strong>TEC</strong><br />
representative about the order of the Ribbon Cassette.<br />
1. After remove the Printer Cover, remove the old Ribbon Cassette by pulling it in the direction of the arrow<br />
mark.<br />
2. Install new ribbon cassette as described in the preceding page.<br />
3. Turn the Control Lock to the REG position using the Control Key, then depress the [NS] key to check the print<br />
condition.
10. SETTING THE TIME AND DATE<br />
10. SETTING THE TIME AND DATE<br />
10.1 Setting the Time<br />
10-1<br />
EO1-11137<br />
10.1 Setting the Time<br />
The register has a clock function. Once the time is set, the time is kept even when the power is turned off. The<br />
24-hour system (the military time) is used for time setting, display, and printing.<br />
Condition for Setting: Any time outside a sale. Must be signed off in the Cashier Signing Method. (In another<br />
method, a Cashier Key may or may not be set to ON.) Refer to Chapter 16.<br />
NOTE on “Condition”: This is necessary for all program changes. (Refer to page 11-1.)<br />
Setting Procedure: Turn the Control Lock to the SET position using the MA key.<br />
5<br />
@/FOR<br />
Declaration of Program<br />
No. 5 for Time Setting<br />
Hour Minute<br />
(00 to 23) (00 to 59)<br />
AT/TL<br />
.....<br />
Issues a receipt.<br />
<strong>TEC</strong> STORE<br />
1343 PEACH DRIVE<br />
PHONE: 87-6437<br />
Open 8:00am to 7:00pm<br />
Closed: every Wednesday<br />
11-28-1997 #0<br />
P05<br />
08:30TM<br />
0037 08:30TM<br />
..... Numeric Key<br />
..... Function Key<br />
Examples) 1:05 a.m.: 0 1 0 5<br />
1:32 p.m.: 1 3 3 2<br />
Date<br />
Program No. for Time Setting<br />
Receipt Print Format<br />
Receipt Consecutive No.<br />
NOTE 1 below<br />
NOTE 2 below<br />
Register No.<br />
Time now set (8:30 a.m. in this example)<br />
Current Time<br />
NOTES: 1. Initially, the store name stamp “Thank you Call again” is printed in this 4-line area. As shown<br />
above, you can print your own store message here. For details, refer to Section 13.2 Store<br />
Message and Commercial Message Programming on page 13-6.<br />
2. 3-line area for Commercial Message; for details, refer to Section 13.2 Store Message and<br />
Commercial Message Programming on page 13-6.
10. SETTING THE TIME AND DATE<br />
10.2 Setting the Date<br />
NOTE: The date set/print order is Month-Day-Year. If you want to change the order into Day-Month-Year or<br />
Year-Month-Day, select appropriate status of Bits 1 and 2 in Address 19 in Chapter 22. SYSTEM<br />
OPTION SETTING on page 22-21.<br />
Examples) To set July 28, 1999:<br />
Receipt Print Format<br />
10-2<br />
Month-Day-Year order<br />
Day-Month-Year order<br />
Year-Month-Day order<br />
EO1-11137<br />
The register has a calendar function. Once the date and time are correctly set, the day automatically advances at<br />
midnight even when the power is turned off. The extra day of a leap year is also computed automatically.<br />
Condition for Setting: Any time outside a sale. Must be signed off in the Cashier Signing Method. (In another<br />
method, a Cashier Key may or may not be set to ON.) Refer to Chapter 16.<br />
Setting Procedure: Turn the Control Lock to the SET position using the MA key.<br />
6<br />
@/FOR<br />
Declaration of Program<br />
No. 6 for Date Setting<br />
Month Day Year<br />
(01 to 12) (01 to 31) (1999, 2000, etc.)<br />
0 7 2 8 1 9 9 9<br />
2 8 0 7 1 9 9 9<br />
1 9 9 9 0 7 2 8<br />
Program No. for Date Setting<br />
Month Day Year<br />
Day Month Year<br />
Year Month Day<br />
<strong>TEC</strong> STORE<br />
1343 PEACH DRIVE<br />
PHONE: 87-6437<br />
Open 8:00am to 7:00pm<br />
Closed: every Wednesday<br />
11-28-1997 #0<br />
P06<br />
07-28-1999<br />
0038 08:31TM<br />
AT/TL<br />
.....<br />
Issues a receipt.<br />
Date (previous setting)<br />
Date now set<br />
(28 July 1999 in this example)<br />
10.2 Setting the Date
10. SETTING THE TIME AND DATE<br />
10.3 Displaying the Time<br />
10-3<br />
EO1-11137<br />
The current time is displayed in the “AMOUNT” area when the Control Lock is turned to REG from any other<br />
position. When the Control Lock position is changed or any entry operation starts, the displayed time disappears.<br />
Time Display Format:<br />
(Example: 1:45 p.m.)<br />
10.4 Printing the Time and Date<br />
10.3 Displaying the Time<br />
The current time is printed on every receipt, as shown in the Receipt Print Format on the page before the<br />
preceding. The time can be programmed to non-print, if necessary, by the System Option selection (refer to<br />
Chapter 22. SYSTEM OPTION SETTING, Address 1 - Bit 1 on page 22-3).<br />
The date is printed on every receipt, as shown in the Receipt Print Format on the page before the preceding.<br />
The quickest way to verify the date print with the Control Lock in REG position is to issue a receipt of any<br />
transaction (for example a No-sale receipt).
11. TAX TABLE SETTING<br />
11. TAX TABLE SETTING<br />
For details about the actual tax table, contact to the location where the register was purchased.<br />
11.1 Setting the U.S. Tax Tables (also applicable to PST in Canada)<br />
There are three ways to set state and local tax tables. Select one that suits the tax table required to be set.<br />
Condition for Setting: After Daily Financial Reset<br />
11-1<br />
EO1-11137<br />
NOTE on “Condition”: Unless the register satisfies this condition, the programming operations will not be<br />
allowed.<br />
“After ... Reset” means that the designated reset report must be taken before entering<br />
the programming (setting) operation. An error will result if the operation is attempted<br />
without taking the report.<br />
However, it does not necessarily mean “immediately after ...” When the designated<br />
reset report has already been taken and then some operations are performed in the “X”,<br />
“Z”, or “SET” mode, the condition “After ... Reset” is still satisfied and the programming<br />
operation is still allowed.<br />
On the contrary , when the designated reset report has been taken but then some sales<br />
data relating to that report’s output data are entered in the “REG” “MGR” or “ - ” mode,<br />
the programming operation will no longer be allowed and the same reset report must be<br />
taken again.<br />
Thus the condition “After ... Reset” indicates that all the sales data relating to the report<br />
data must be zero (except non-resettable memory data). Because of this “Condition”<br />
requirement, the report data will be protected from any inconsistencies of sales data<br />
entered in the period from a resetting of the report to another resetting of the same<br />
report next time. When no condition is specified to a programming (setting) operation, it<br />
means that the operation is allowed any time outside a sale but the cashier must be<br />
signed off if the Cashier Signing Method is selected (See Chapter 16).<br />
Setting Procedure: Turn the Control Lock to the SET position using the MA key.<br />
Go to 1), 2), or 3) on the next page.<br />
Indications of types of keys on the next page:<br />
11.1 Setting the U.S. Tax Tables (also applicable to PST in Canada)<br />
..... Individual Numeric Key<br />
| | ..... Data to be entered through Numeric Keys<br />
..... Function Key
11. TAX TABLE SETTING<br />
1) Tax 1; Full Breaks (Non-cyclic Breaks + Cyclic Breaks)<br />
|max. amount non-taxable| ⎯→<br />
|max. amount for 1¢ tax levied| ⎯→ TX1/M<br />
|max. amount for 2¢ tax levied| ⎯→ TX1/M<br />
Non-cyclic<br />
Tax Breaks<br />
...........<br />
TX1/M<br />
Repeat up to the “A” Break.<br />
|max. amount for N¢ tax levied| ⎯→ TX1/M ..... “A” Break<br />
(to indicate the “A” Break entry)<br />
|max. amount for N + 1¢ tax levied| ⎯→<br />
|max. amount for N + 2¢ tax levied| ⎯→<br />
Repeat up to the “B” Break.<br />
|“B” Break| ⎯→ TX1/M (“B” Break - “A” Break<br />
= a multiple of $1.00)<br />
AT/TL<br />
TX1/M<br />
TX1/M<br />
(to complete this tax table setting)<br />
11-2<br />
Cyclic Tax Breaks<br />
NOTE: Each amount (break) entry may be a maximum of 4-digit value (9999¢).<br />
2) Tax 1; “A” Break and % Rate Combination (Non-cyclic Breaks + % Rate)<br />
EO1-11137<br />
First, set all the non-cyclic breaks up to the “A” Break entry and the [ST] key depression shown in the above case<br />
of “1) Tax 1 Full Breaks”.<br />
↓<br />
|Tax Rate applied when exceeding the “A” Break amount|<br />
(<strong>Ma</strong>x. 6 digits up to 99.9999%. Use the [ . ] key for a decimal value. Examples: To set 5%, enter 5. To set 5.26%,<br />
enter 5 → [ . ] → 2 → 6. The fraction of the amount resulting from this % rate calculation will be rounded off.)<br />
↓<br />
AT/TL<br />
3) Tax 1; % Rate Only<br />
0<br />
ST<br />
...........<br />
(to complete this tax table setting)<br />
⎯→ TX1/M (to indicate that no breaks are entered)<br />
ST<br />
|Tax Rate applied to any amount| ⎯→<br />
AT/TL<br />
(The description for the Tax Rate in the above case 2) is also applied to this case.)<br />
11.1 Setting the U.S. Tax Tables (also applicable to PST in Canada)<br />
NOTES: 1. For Tax 2 or Tax 3 table setting in a multi-tax area, follow the same procedure in 1), 2), or 3)<br />
above, using the [TX2/M] or [TX3/M] key instead of [TX1/M].<br />
To install the [TX2/M] or [TX3/M] key on the keyboard, refer to Chapter 14. OPTIONAL KEY<br />
SETTING.<br />
2. If multiple tax tables are to be set, the Tax 1 table must be set first. The Tax 1 table setting will<br />
automatically reset the Tax 2 and Tax 3 tables that have been programmed.<br />
3. No second depression of the [ST] key is allowed within one tax table setting. A maximum of 64<br />
breaks may be entered for Tax 1 to Tax 3 tables.
11. TAX TABLE SETTING<br />
U.S. Tax Table Program Receipt Format:<br />
Example 1) Tax 1; Full Breaks<br />
Tax Table Key Operation<br />
Control Lock: SET<br />
Amount Range Tax Levied<br />
$0.00 to $0.10 0¢<br />
$0.11 to $0.22 1¢<br />
$0.23 to $0.39 2¢<br />
$0.40 to $0.56 3¢<br />
$0.57 to $0.73 4¢<br />
$0.74 to $0.90 5¢<br />
$0.91 to $1.08 6¢<br />
... “A” Break<br />
$1.09 to $1.24 7¢<br />
$1.25 to $1.41 8¢<br />
$1.42 to $1.58 9¢<br />
$1.59 to $1.74 10¢<br />
$1.75 to $1.91 11¢<br />
$1.92 to $2.08 12¢<br />
... “B” Break<br />
Example 2) Tax 1; “A” Break and % Rate Combination<br />
Tax Table Key Operation<br />
Control Lock: SET<br />
Amount Range Tax Levied<br />
$0.00 to $0.09 0¢<br />
$0.10 to $0.29 1¢<br />
$0.30 to $0.59 2¢<br />
$0.60 to $0.84 3¢<br />
$0.85 to $1.12 4¢<br />
... “A” Break<br />
5% is applied to any amount<br />
exceeding the “A” Break.<br />
1<br />
2<br />
3<br />
5<br />
7<br />
9<br />
1<br />
1<br />
1<br />
1<br />
1<br />
1<br />
2<br />
9<br />
2<br />
5<br />
8<br />
1<br />
5<br />
0<br />
2<br />
9<br />
6<br />
3<br />
0<br />
0<br />
2<br />
4<br />
5<br />
7<br />
9<br />
0<br />
ST<br />
AT/TL<br />
9<br />
9<br />
4<br />
1<br />
ST<br />
2<br />
11-3<br />
EO1-11137<br />
11.1 Setting the U.S. Tax Tables (also applicable to PST in Canada)<br />
TX1/M<br />
TX1/M<br />
TX1/M<br />
TX1/M<br />
TX1/M<br />
TX1/M<br />
8 TX1/M<br />
4 TX1/M<br />
1 TX1/M<br />
8 TX1/M<br />
4 TX1/M<br />
1 TX1/M<br />
8 TX1/M<br />
TX1/M<br />
TX1/M<br />
TX1/M<br />
TX1/M<br />
TX1/M<br />
AT/TL<br />
<strong>TEC</strong> STORE<br />
1343 PEACH DRIVE<br />
PHONE: 87-6437<br />
Open 8:00am to 7:00pm<br />
Closed: every Wednesday<br />
11-28-1997 #112300<br />
P00<br />
TAX1<br />
00 0.10<br />
01 0.22<br />
02 0.39<br />
03 0.56<br />
04 0.73<br />
05 0.90<br />
06 1.08<br />
*<br />
07 1.24<br />
08 1.41<br />
09 1.58<br />
10 1.74<br />
11 1.91<br />
12 2.08<br />
**<br />
0101 12:35TM<br />
<strong>TEC</strong> STORE<br />
1343 PEACH DRIVE<br />
PHONE: 87-6437<br />
Open 8:00am to 7:00pm<br />
Closed: every Wednesday<br />
11-28-1997 #112300<br />
P00<br />
TAX1<br />
00 0.09<br />
01 0.29<br />
02 0.59<br />
03 0.84<br />
04 1.12<br />
*<br />
5%<br />
0102 12:36TM
11. TAX TABLE SETTING<br />
Example 3) Tax 2; % Rate Only<br />
Tax Table Key Operation<br />
Control Lock: SET<br />
10% is applied to any amount.<br />
5<br />
0<br />
11-4<br />
TX2/M<br />
AT/TL<br />
11.2 Setting the GST Rate (applicable to Canada only)<br />
1<br />
0<br />
ST<br />
EO1-11137<br />
11.2 Setting the GST Rate (applicable to Canada only)<br />
<strong>TEC</strong> STORE<br />
1343 PEACH DRIVE<br />
PHONE: 87-6437<br />
Open 8:00am to 7:00pm<br />
Closed: every Wednesday<br />
11-28-1997 #112300<br />
P00<br />
TAX2<br />
00 0.00<br />
*<br />
10%<br />
0103 12:37TM<br />
Please note the following before operating the GST rate setting. The following preparations are required:<br />
1) Select the “GST Active” status in Chapter 22. SYSTEM OPTION SETTING, Address 17 -Bit 8 on page<br />
22-19 (some other options can also be selected relating to GST in the same Address).<br />
2) If the [GST/M] (GST Modifier) key must be changed to any other location on the keyboard, refer to Chapter<br />
14. OPTIONAL KEY SETTING. On the Standard Normal Keyboard (see page 7-1) at shipping from the<br />
factory, the [FS/M] (Food Stamp Modifier) Key is installed. This key will be changed automatically into the<br />
[GST/M] key by the operation described in 1) above.<br />
Condition for Setting: After Daily Financial Reset<br />
(Refer to NOTE on “Condition” on page 11-1.)<br />
Setting Procedure: Turn the Control Lock to the SET position using the MA key.<br />
This portion is required only<br />
when any decimal portion is<br />
contained in the rate.<br />
.<br />
GST Rate 0 to 99.99(%)<br />
Examples)<br />
7%<br />
12%<br />
8.55%<br />
To reset the rate once set:<br />
7<br />
1<br />
8<br />
0<br />
2<br />
.<br />
GST/M<br />
5<br />
GST Rate 7% is set.<br />
<strong>TEC</strong> STORE<br />
1343 PEACH DRIVE<br />
PHONE: 87-6437<br />
Open 8:00am to 7:00pm<br />
Closed: every Wednesday<br />
11-28-1997 #112300<br />
GST<br />
P00<br />
7%<br />
0267 20:59TM
11. TAX TABLE SETTING<br />
11.3 Setting the Non-taxable Limit Amount<br />
(applicable to only certain areas in Canada)<br />
This non-taxable amount limit must be set only in certain areas in Canada.<br />
Example) $20.00<br />
Non-taxable Limit<br />
Amount (max. 4 digits; 1<br />
to 9999¢, or enter 0 to<br />
reset the limit)<br />
11-5<br />
EO1-11137<br />
Please note the following before operating the Non-taxable limit amount setting. The following preparations are<br />
required:<br />
1) Select the “GST Active” status in Chapter 22. SYSTEM OPTION SETTING, Address 17 - Bit 8 on page<br />
22-19. If not selected, tax calculation is not performed.<br />
2) Delete the [FSTL TEND] (Food Stamp Total/Tender) key from the keyboard, if installed, by the operation of<br />
Chapter 14. OPTIONAL KEY SETTING. If installed, an error occurs when the [@/FOR] key is<br />
depressed in the setting procedure below.<br />
Condition for Setting: After Daily Financial Reset<br />
(Refer to NOTE on “Condition” on page 11-1.)<br />
Setting Procedure: Turn the Control Lock to the SET position using the MA key.<br />
1<br />
2<br />
Declaration of Program No.<br />
12 for Non-taxable Limit<br />
Amount Setting<br />
@/FOR AT/TL<br />
2 0 0 0<br />
<strong>TEC</strong> STORE<br />
1343 PEACH DRIVE<br />
PHONE: 87-6437<br />
Open 8:00am to 7:00pm<br />
Closed: every Wednesday<br />
11-28-1997 #112300<br />
P12<br />
20.00<br />
0266 20:58TM<br />
11.3 Setting the Non-taxable Limit Amount<br />
NOTES: 1 . When the Non-taxable Limit Amount is programmed, be certain not to program the negative<br />
status to the Other <strong>Inc</strong>ome Department. For details of the department status, refer to Section<br />
18.3 Department Keys on page 18-3.<br />
2. An error results when the [GST/M] key is depressed in sale entries on the ECR with Non-taxable<br />
Limit Amount programmed.<br />
3. This setting must not be operated when Food Stamps are handled in transactions.
11. TAX TABLE SETTING<br />
11.4 Tax Calculation Test<br />
Tax calculation can be tested by the following procedure. This operation will not affect any sales data.<br />
Operating Procedure: Turn the Control Lock to the X position using the MGR or MA Key.<br />
|Amount| TX/M (or TX1/M ,<br />
TXBL<br />
)<br />
TL<br />
.....<br />
Enter any<br />
amount through<br />
Numeric Keys.<br />
<strong>TEC</strong> STORE<br />
1343 PEACH DRIVE<br />
PHONE: 87-6437<br />
Open 8:00am to 7:00pm<br />
Closed: every Wednesday<br />
11-28-1997 #112300<br />
PX<br />
10.00<br />
TAX1 0.50<br />
TAX2 1.00<br />
TAX3 0.00<br />
11-6<br />
0330 23:26TM<br />
NOTES: 1. Non-taxable Limit Amount is ignored even if programmed.<br />
2. GST Amount cannot be calculated.<br />
Amount entered<br />
EO1-11137<br />
11.4 Tax Calculation Test<br />
Each Tax Amount calculated by<br />
respective Tax Tables or Tax Rates
12. REGISTER NO. SETTING<br />
12. REGISTER NO. SETTING<br />
Register Number<br />
max. 6 digits; 0 to 999999<br />
#/NS<br />
12-1<br />
EO1-11137<br />
12. REGISTER NO. SETTING<br />
When multiple registers are used in one store, or to distinguish this register from others used by other stores in<br />
the same chain, set the Register Number in the following procedure.<br />
Condition for Setting: Any time outside a sale. Must be signed off in the Cashier Signing Method. (In other<br />
methods, a Cashier Key may or may not be set to ON.) Refer to Chapter 16.<br />
Setting Procedure: Turn the Control Lock to the SET position using the MA key.<br />
Example) No. 112300: 1 1 2 3 0 0<br />
Register No. now set<br />
(or # )<br />
<strong>TEC</strong> STORE<br />
1343 PEACH DRIVE<br />
PHONE: 87-6437<br />
Open 8:00am to 7:00pm<br />
Closed: every Wednesday<br />
11-28-1997 #0<br />
P00<br />
#112300<br />
0094 12:22TM<br />
Register No. before this setting<br />
NOTES: 1. The Decimal Point cannot be entered in the Register Number.<br />
2. Preceding zeros, if any, will not be printed. For example, if “001234” is entered, “#1234” will be<br />
printed.
13. PROGRAMMING YOUR OWN MESSAGE AND VARIOUS NAMES<br />
13-1<br />
EO1-11137<br />
13.1 Character Entries for Programming Operations<br />
13. PROGRAMMING YOUR OWN MESSAGE AND<br />
VARIOUS NAMES<br />
This chapter explains how to make your own messages and various names to be printed on the receipts.<br />
13.1 Character Entries for Programming Operations<br />
There are two methods of operations for character settings for names or messages: CHARACTER CODE EN-<br />
TRY Method and DIRECT CHARACTER ENTRY Method.<br />
CHARACTER CODE ENTRY Method:<br />
This method is to set a character by entering a Character Code and depressing the [#/NS] key.<br />
This method is allowed on the ECR keyboard.<br />
DIRECT CHARACTER ENTRY Method:<br />
This method is to set a character by directly depressing the Character Key on the following keyboards.<br />
• ECR Normal Keyboard (Setting operations including character entries can be performed after the key<br />
operation “81 [@/FOR].)<br />
• ECR Flat Keyboard using the “SET Mode Key Layout” sheet<br />
• PK-2 Keyboard (PLU Keyboard; hardware option)<br />
By using those character keys, the characters are directly entered. In this <strong>manual</strong>, sample operations are attached<br />
to all the programming operations. And at name or message programming portions, characters are<br />
entered by the CHARACTER CODE ENTRY method. Instead of this, you may depress the Character Keys.<br />
For example, instead of entering 11[#/NS] (to enter character “A”), you may simply depress Character Key “A”<br />
on any of three keyboards above.<br />
On the following pages, Character Code Tables under the CHARACTER CODE ENTRY Method and the three<br />
different Keyboards under the DIRECT CHARACTER ENTRY Method are shown. These pages are to be referred<br />
to, every time the “Character Entries” sequence is contained in various programming operations in this<br />
<strong>manual</strong>.
13. PROGRAMMING YOUR OWN MESSAGE AND VARIOUS NAMES<br />
13.1.1 Character Code Entry Method<br />
CHARACTER CODE Table:<br />
Row<br />
Code<br />
⎯⎯→<br />
Column Code ⎯⎯→<br />
0<br />
1<br />
2<br />
3<br />
4<br />
5<br />
6<br />
7<br />
8<br />
9<br />
13-2<br />
EO1-11137<br />
13.1 Character Entries for Programming Operations<br />
0 1 2 3 4 5 6 7 8 9 10 11 12 13 14 15 16 17<br />
0 @ J T < No , j t (<br />
1 A K U > . a k u )<br />
2 B L V { ¢<br />
3 C M W |<br />
1<br />
2<br />
1<br />
4<br />
: b l v Γ<br />
c m w Δ<br />
4 D N X } d n x Θ<br />
5 E O Y ~ II ; # e o y Λ<br />
6 F P Z III kg ^ * f p z Ξ<br />
7 G Q $ 1b II g q + % Π<br />
8 H R £ [ ‘ & h r D<br />
9 I S + ] ! i s = ? ∂ Φ<br />
Example) Character code “12” is assigned to character “B”.<br />
Character code “120” is assigned to character “j”.<br />
⎯⎯→<br />
Space<br />
Σ<br />
18<br />
Ψ<br />
III<br />
III
13. PROGRAMMING YOUR OWN MESSAGE AND VARIOUS NAMES<br />
Character Setting Operations<br />
13-3<br />
EO1-11137<br />
13.1 Character Entries for Programming Operations<br />
• To set a regular-sized character, enter the COL (column) code and then the ROW code, followed<br />
by the [#/NS] key.<br />
Example) To set “B”, enter 12 and depress [#/NS].<br />
To set “j”, enter 120 and depress [#/NS].<br />
• To set a blank instead of a character, enter 169 and depress [#/NS].<br />
• Depress the [@/FOR] key once prior to a regular-sized character entry, and it will be a double-sized<br />
character (a blank will also be double-sized).<br />
Example) To set “GROUP”, “G” in double-sized, and “ROUP” in regular-sized:<br />
[@/FOR] 17 [#/NS] 28 [#/NS] 25 [#/NS] 31 [#/NS] 26 [#/NS]<br />
G R O U P<br />
• Depress the [@/FOR] key twice prior to the first character code entry to set the entire message line<br />
or enter name with all double-sized characters.<br />
Example) To set “GROUP” all in double-sized:<br />
[@/FOR] [@/FOR] 17 [#/NS] 28 [#/NS] 25 [#/NS] 31 [#/NS] 26 [#/NS]<br />
G R O U P<br />
......<br />
All Double-sized Declaration<br />
13.1.2 Direct Character Entry Method<br />
Using the ECR Normal Keyboard:<br />
Keyboard layout can be changed as shown below by the key operation “81 [@/FOR]” before you enter the setting<br />
operations which include the character entries.<br />
Character<br />
Keys;<br />
• Space<br />
•/<br />
•–<br />
•,<br />
LOG<br />
RECEIPT<br />
#<br />
,<br />
–<br />
SPACE<br />
PLU<br />
DP#<br />
ITEM<br />
CORR<br />
@/FOR<br />
/<br />
C<br />
RF<br />
7 8<br />
4 5<br />
1 2<br />
0 00<br />
JF<br />
9<br />
6<br />
3<br />
.<br />
A<br />
B<br />
C<br />
D<br />
E<br />
ST<br />
Character Keys; A to Z<br />
F<br />
G L<br />
H<br />
I<br />
J<br />
AT / TL<br />
K P U<br />
Characters shown above can be directly entered by depressing the corresponding Character Keys.<br />
* Keyboard layout above in actual size is attached on the last page as Appendix 2. <strong>Ma</strong>ke a copy and use it<br />
when you perform the programming operations executable by this keyboard layout.<br />
M<br />
N<br />
O<br />
Q<br />
R<br />
S<br />
T<br />
Z<br />
V<br />
W<br />
X<br />
Y
13. PROGRAMMING YOUR OWN MESSAGE AND VARIOUS NAMES<br />
13-4<br />
EO1-11137<br />
13.1 Character Entries for Programming Operations<br />
NOTES: 1. Numeric keys are used to enter PLU Codes or numeric values of program data, etc. but not to<br />
enter the numerics as characters.<br />
2. Characters not shown on the keyboard on the preceding page can be entered by the Character<br />
Code Entry Method.<br />
3. After setting operation on this keyboard is completed, operate “82 [@/FOR]” to regain the<br />
keyboard layout for registrations.<br />
To indicate that the keyboard layout has been changed, the following receipts are issued after the<br />
key operation “81 [@/FOR]” or “82 [@/FOR]”.<br />
Receipt issued by the key operation “81 [@/FOR]” Receipt issued by the key operation “82 [@/FOR]”<br />
<strong>TEC</strong> STORE<br />
1343 PEACH DRIVE<br />
PHONE: 87-6437<br />
Open 8:00am to 7:00pm<br />
Closed: every Wednesday<br />
11-28-1997 #112300<br />
∗ P KB ON ∗<br />
e<br />
0312 21:31TM<br />
t<br />
u<br />
i<br />
<strong>TEC</strong> STORE<br />
1343 PEACH DRIVE<br />
PHONE: 87-6437<br />
Open 8:00am to 7:00pm<br />
Closed: every Wednesday<br />
11-28-1997 #112300<br />
∗ P KB OFF ∗<br />
0313 21:32TM<br />
Using the ECR Flat Keyboard:<br />
Use the “SET Mode Key Layout” sheet when you perform the setting operations which include the character<br />
entries.<br />
! @<br />
q w<br />
a<br />
z<br />
Q<br />
A<br />
Z<br />
r<br />
v<br />
Character Keys<br />
# $ % ¢ & ★<br />
s d f<br />
x<br />
c<br />
W E R<br />
S<br />
D<br />
F<br />
g h j k l ”<br />
@/FOR<br />
b<br />
T<br />
y<br />
n<br />
Y<br />
m<br />
U<br />
G H J K L<br />
(<br />
o<br />
)<br />
p<br />
LOG<br />
RECEIPT<br />
7 8<br />
I O P 4 5<br />
c<br />
1 2<br />
0 00<br />
X C V B N M SPACE . /<br />
AT / TL<br />
#<br />
PLU<br />
DP#<br />
ITEM<br />
CORR<br />
Characters shown above can be directly entered by depressing the corresponding Character Keys.<br />
NOTES: 1. Numeric keys are used to enter PLU Codes or numeric values of program data, etc. but not to<br />
enter the numerics as characters.<br />
2. Characters not shown on the keyboard above can be entered by the Character Code Entry<br />
Method.<br />
’<br />
;<br />
9<br />
6<br />
3<br />
.<br />
RF<br />
ST<br />
JF
13. PROGRAMMING YOUR OWN MESSAGE AND VARIOUS NAMES<br />
13-5<br />
EO1-11137<br />
13.1 Character Entries for Programming Operations<br />
Using the PK-2 (PLU Keyboard; hardware option):<br />
The PK-2 (hardware option PLU Keyboard) is used to enter the required PLU Code by simply depress the PLU<br />
Preset-code Key on the PK-2 keyboard in the “REG”, “MGR”, or “ - ” mode. In addition, the PK-2 can be used to<br />
enter characters directly during the programming operations that require character settings, such as Store<br />
Message and Commercial Message Programming, PLU Table Setting, Changing, or Deletion, etc.<br />
The figure below shows the key indications of the PK-2 keyboard. (A sheet of these character indications is<br />
attached to the PK-2 unit. Insert it between the film layers that cover the PK-2 keyboard for using the keyboard<br />
for this purpose.)<br />
Instead of entering a 2- or 3- digit character code and depressing the [#/NS] key on the ECR keyboard, a simple<br />
depression of the appropriate key on the PK-2 keyboard will be the character entry.<br />
All the function keys, such as [@/FOR], [ST], [#/NS], [AT/TL], etc. must be operated on the ECR side. Any characters<br />
not listed on the template may be entered by the Character Code Entry method on the ECR keyboard (the<br />
characters even listed on the template may be entered as well by that method).<br />
Please note also that the keys “0” to “9” in the figure below function as character keys but do not function for code<br />
entries. Any code entries, for Item Codes, Address Nos, etc. must be entered through the Numeric Keys on the<br />
ECR keyboard.<br />
The One Double-size Declaration (by depressing the [@/FOR] key once prior to the required character) and the<br />
All Double-sized Declaration (by depressing [@/FOR] twice before all the characters) are the same as in the<br />
Character Code Entry method.<br />
7 8 9<br />
1 11 21 31 41 51 61 71 81 91 101 111 121<br />
4 5 6<br />
2 12 22 32 42 52 62 72 82 92 102 112 122<br />
1 2 3<br />
3 13 23 33 43 53 63 73 83 93 103 113 123<br />
! @ # $ %<br />
& * ( )<br />
0<br />
4 14 24 34 44 54 64 74 84 94 104 114 124<br />
q w e r t y u i o p<br />
5 15 25 35 45 55 65 75 85 95 105 115 125<br />
a s d f g h j k l<br />
+<br />
6 16 26 36 46 56 66 76 86 96 106 116 126<br />
z x c v b n m<br />
’ - =<br />
7 17 27 37 47 57 67 77 87 97 107 117 127<br />
Q W E R T Y U I O P [ ]<br />
8 18 28 38 48 58<br />
68 78 88 98 108 118 128<br />
A S D F G H J K L<br />
:<br />
9 19 29 39 49 59 69 79 89 99 109 , 119 129<br />
Z X C V B N M SPACE . / ?<br />
10 20 30 40 50 60 70 80 90 100 110 120 130
13. PROGRAMMING YOUR OWN MESSAGE AND VARIOUS NAMES<br />
13.2 Store Message and Commercial Message Programming<br />
Line No. 1 to 7<br />
NOTE 2<br />
13-6<br />
EO1-11137<br />
13.2 Store Message and Commercial Message Programming<br />
The following preparation is required to print a store message on the receipt:<br />
Select the “Store Name Print by Dot Printer” status in Chapter 22. SYSTEM OPTION SETTING, Address 21 -<br />
Bit 8 on page 22-23. In initial status, the “Store Name Print by Rubber Stamp” status is active.<br />
Condition for Programming: Any time outside a sale. Must be signed off in the Cashier Signing Method. (In other<br />
methods, a Cashier Key may or may not be set to ON.) Refer to Chapter 16.<br />
Programming Procedure: Turn the Control Lock to the SET position using the MA key.<br />
1 @/FOR<br />
Declaration of Program No. 1<br />
for Store Message and Commercial<br />
Message Programming<br />
Character Entries<br />
max. 24 characters/line<br />
(See Character Entries<br />
at the beginning of this<br />
chapter.)<br />
ST<br />
ST AT/TL<br />
. . .<br />
To complete<br />
this line<br />
(For sequentially<br />
programming lines,<br />
the line number<br />
specification can<br />
be skipped.)<br />
Repeat for<br />
another line.<br />
NOTES: 1. For each line, a maximum of 24 regular-sized characters or 12 double-sized characters may be<br />
entered. A combination of both types is also available.<br />
2. The line Nos. available are as follows.<br />
• Store Stamp Feature (Initial status)<br />
Line Nos. for Commercial Message (1 to 3)<br />
• Store Message Print Feature<br />
Line Nos. for Store Message (1 to 4)<br />
Line Nos. for Commercial Message (5 to 7)<br />
3. If any incorrect characters have been programmed, depress the [C] key to clear all the<br />
characters on a line and then re-enter charactrs from the beginning, or end the line with an [ST]<br />
and re-program the entire line. The new data will be active.<br />
4. When all the lines have been programmed, do a check by issuing a receipt. Only the lines with<br />
errors need to be re-programmed; other lines will not be affected.<br />
5. When blanks are programmed for the whole one line, it will cause one line space.<br />
6. As for Commercial Message, if blanks are programmed for all three lines, it will cause line feed.<br />
However, if the message is programmed for one line, remaining two lines will result in two lines<br />
space.<br />
As for the Store Message Print Feature, even if blanks are programmed for all four lines assigned<br />
to Store Message, it will not cause line feed. Those lines will result in four lines space.<br />
Example) To program the following Store Message and Commercial Message<br />
(under the Store Message Print Feature):<br />
T E C S T O R E<br />
T T T T 1 3 4 3 T P E A C H T D R I V E<br />
T T T T T P H O N E : T 8 7 - 6 4 3 7<br />
T T T T T T T T T T T T T T T T T T T T T T T T<br />
O p e n T T 8 : 0 0 a m T t o T 7 : 0 0 p m<br />
C l o s e d : T e v e r y T W e d n e s d a y<br />
T T T T T T T T T T T T T T T T T T T T T T T T<br />
Line No. 1<br />
Line No. 2<br />
Line No. 3<br />
Line No. 4<br />
Line No. 5<br />
Line No. 6<br />
Line No. 7
13. PROGRAMMING YOUR OWN MESSAGE AND VARIOUS NAMES<br />
Store Message and Commercial Message Programming Receipt Format:<br />
Key Operation: Control Lock: SET<br />
1 @/FOR<br />
1<br />
ST<br />
(Line No. 1)<br />
1 6 9 #/NS<br />
1 6 9 #/NS<br />
1 6 9 #/NS<br />
1<br />
6<br />
9<br />
@/FOR<br />
1 6 9 #/NS<br />
ST<br />
#/NS<br />
(space)<br />
(space)<br />
(space)<br />
3<br />
0<br />
#/NS<br />
(T)<br />
@/FOR 1 5 #/NS (E)<br />
@/FOR 1 3 #/NS (C)<br />
@/FOR<br />
(space)<br />
(space)<br />
2 9 #/NS<br />
(S)<br />
@/FOR 3 0 #/NS (T)<br />
@/FOR 2 5 #/NS (O)<br />
@/FOR 2 8 #/NS (R)<br />
@/FOR 1 5 #/NS (E)<br />
(to complete Line 1)<br />
( 2 ST ) (Line No. 2)<br />
1 6 9 #/NS<br />
1 6 9 #/NS<br />
1 6 9 #/NS<br />
0 1 #/NS<br />
0 3 #/NS<br />
0 4<br />
#/NS<br />
1 6 9 #/NS<br />
0 3 #/NS<br />
1 6 9 #/NS<br />
2 6 #/NS<br />
1 5 #/NS<br />
1 1 #/NS<br />
1 3 #/NS<br />
(space)<br />
(space)<br />
(space)<br />
(space)<br />
(1)<br />
(3)<br />
(4)<br />
(3)<br />
(space)<br />
(P)<br />
(E)<br />
(A)<br />
(C)<br />
( 3 ST ) (Line No. 3)<br />
1 6 9 #/NS<br />
1 6 9 #/NS<br />
1 6 9 #/NS<br />
1 6 9 #/NS<br />
1 6 9 #/NS<br />
1<br />
1<br />
1 8 #/NS<br />
1 6 9 #/NS<br />
1 4 #/NS<br />
2 8 #/NS<br />
1 9 #/NS<br />
3 2 #/NS<br />
1 5 #/NS<br />
ST<br />
2 6 #/NS<br />
1 8 #/NS<br />
2 5 #/NS<br />
2 4 #/NS<br />
1 5 #/NS<br />
0 2 #/NS<br />
6<br />
0 7 #/NS<br />
ST<br />
9 #/NS<br />
0 8 #/NS<br />
0 7 #/NS<br />
9 9 #/NS<br />
0 6 #/NS<br />
0 4 #/NS<br />
13-7<br />
EO1-11137<br />
13.2 Store Message and Commercial Message Programming<br />
(H)<br />
(space)<br />
(space)<br />
(space)<br />
(space)<br />
(P)<br />
(H)<br />
(O)<br />
(N)<br />
(space)<br />
(8)<br />
(7)<br />
(-)<br />
(6)<br />
(4)<br />
0 3 #/NS (3)<br />
(space)<br />
(D)<br />
(R)<br />
(I)<br />
(V)<br />
(E)<br />
(to complete Line 2)<br />
(space)<br />
(E)<br />
(:)<br />
(7)<br />
(to complete Line 3)<br />
11-28-1997 #0<br />
P01<br />
1<br />
<strong>TEC</strong> STORE<br />
2<br />
1343 PEACH DRIVE<br />
3<br />
PHONE: 87-6437<br />
5<br />
Open 8:00am to 7:00pm<br />
6<br />
Closed: every Wednesday<br />
0018 11:55TM
13. PROGRAMMING YOUR OWN MESSAGE AND VARIOUS NAMES<br />
5<br />
1<br />
ST<br />
2<br />
2<br />
0 0 #/NS<br />
ST<br />
(Line No. 5)<br />
5 #/NS<br />
1 2 6 #/NS<br />
1 1 5 #/NS<br />
1 2 4 #/NS<br />
1 6 9 #/NS<br />
1<br />
1<br />
1<br />
1<br />
1<br />
1<br />
1<br />
1<br />
1<br />
6 9 #/NS<br />
0 8 #/NS<br />
0 2 #/NS<br />
0 0 #/NS<br />
0 0 #/NS<br />
1 1 #/NS<br />
3 #/NS<br />
6 9 #/NS<br />
3 0 #/NS<br />
2 5 #/NS<br />
6 9 #/NS<br />
0 7 #/NS<br />
(O)<br />
(p)<br />
(e)<br />
(n)<br />
(space)<br />
(8)<br />
(:)<br />
(0)<br />
(m)<br />
(space)<br />
(t)<br />
(o)<br />
(space)<br />
(7)<br />
0 2 #/NS (:)<br />
0 0 #/NS<br />
2 6 #/NS<br />
(space)<br />
(0)<br />
(a)<br />
(0)<br />
(0)<br />
(p)<br />
1 2 3 #/NS (m)<br />
(to complete Line 5)<br />
( 6 ST ) (Line No. 6)<br />
1<br />
1<br />
1 4 #/NS<br />
2<br />
1 5 #/NS<br />
ST<br />
3 #/NS<br />
1 2 2 #/NS<br />
1 2 5 #/NS<br />
1 2 9 #/NS<br />
1 1 5 #/NS<br />
1<br />
1<br />
1<br />
1<br />
1<br />
1<br />
1<br />
1<br />
1<br />
1<br />
1<br />
1<br />
1<br />
1<br />
1<br />
AT/TL<br />
0 2 #/NS<br />
6 9 #/NS<br />
1 5 #/NS<br />
3 2 #/NS<br />
1 5 #/NS<br />
8 #/NS<br />
3 5 #/NS<br />
6 9 #/NS<br />
3 3 #/NS<br />
1 5 #/NS<br />
1 4 #/NS<br />
13-8<br />
EO1-11137<br />
13.2 Store Message and Commercial Message Programming<br />
(C)<br />
(l)<br />
(o)<br />
(s)<br />
(e)<br />
(d)<br />
(:)<br />
(space)<br />
(e)<br />
(v)<br />
(e)<br />
(r)<br />
(y)<br />
(space)<br />
(W)<br />
(e)<br />
(d)<br />
2 4 #/NS (n)<br />
2 9 #/NS<br />
1 4 #/NS<br />
(e)<br />
(s)<br />
(d)<br />
1 1 #/NS (a)<br />
1 3 5 #/NS (y)<br />
(to complete Line 6)
13. PROGRAMMING YOUR OWN MESSAGE AND VARIOUS NAMES<br />
13.3 Financial Total Name Programming<br />
Character Entries<br />
max. 8 characters<br />
(See Character Entries<br />
at the beginning of this<br />
chapter.)<br />
NOTE 2<br />
ST<br />
ST<br />
ST<br />
13-9<br />
NOTE 1<br />
Repeat for<br />
other items.<br />
AT/TL<br />
EO1-11137<br />
13.3 Financial Total Name Programming<br />
This programming programs various financial total names to be printed on the sales receipts and the reports,<br />
according to your requirement.<br />
Condition for Programming: After Daily Financial Reset and Periodic Financial Reset<br />
(Refer to NOTE on “Condition” on page 11-1.)<br />
Programming Procedure: Turn the Control Lock to the SET position using the MA key.<br />
9 @/FOR<br />
Declaration of Program No. 9<br />
for Financial Total Name<br />
Programming<br />
Item Code; 1 to 77<br />
(Refer to the table on the<br />
following pages.)<br />
NOTES: 1. For sequentially programming items, item code designation can be omitted.<br />
2. For each financial total name, a maximum of 8 regular-sized characters or 4 double-sized<br />
characters may be entered. A combination of both types is also available. However, as for the<br />
following names, a maximum of 6 regular-sized characters or 3 double-sized characters may be<br />
entered.<br />
• Received-on-Account (Item Code 26) • Void (Item Code 36)<br />
• Paid Out (Item Code 27) • All Void (Item Code 38)<br />
• Item Correct (Item Code 35) • Returned Merchandise (Item Code 43)<br />
3. When the functions of % I and % II have been changed on Address 22-Bits 2 and 3 of System<br />
Option Setting, be certain to change the corresponding names.<br />
Financial Total Name Program Receipt Format:<br />
To change the name of Item Code 6; Net sales without Tax (Standard Program: NS) into<br />
new one “NS W/O T”.<br />
Key Operation: Control Lock: SET<br />
9 @/FOR<br />
6<br />
ST<br />
2 4 #/NS<br />
2 9 #/NS<br />
1 6 9 #/NS<br />
3 3 #/NS<br />
1 0 4 #/NS<br />
(N)<br />
(S)<br />
(space)<br />
(W)<br />
(/)<br />
1<br />
AT/TL<br />
2 5 #/NS<br />
6 9 #/NS<br />
3 0 #/NS<br />
(O)<br />
(space)<br />
(T)<br />
<strong>TEC</strong> STORE<br />
1343 PEACH DRIVE<br />
PHONE: 87-6437<br />
Open 8:00am to 7:00pm<br />
Closed: every Wednesday<br />
11-28-1997 #0<br />
P09<br />
06 NS W/O T<br />
0042 08:48TM
13. PROGRAMMING YOUR OWN MESSAGE AND VARIOUS NAMES<br />
FINANCIAL TOTAL NAME PRINT (To be Continued)<br />
13-10<br />
EO1-11137<br />
13.3 Financial Total Name Programming<br />
Code Total or Counter Name in Standard Program Your Plan Remarks<br />
1 Grand Total G T<br />
2 NET GT N E T G T<br />
3 GS (Gross Sale) G S<br />
4 % + (% I) % +<br />
5 % + (% II) % +<br />
6 Net Sale without Tax N S<br />
7 GST (Exclusive) G S T *1<br />
8 Tax 1 T A X 1<br />
9 Tax 2 T A X 2<br />
10 Tax 3 T A X 3<br />
11 <strong>Ma</strong>nual Tax T A X 4<br />
12 Exempted GST (<strong>Inc</strong>lusive) E X G S T *1<br />
13 Net Sale with Tax N S<br />
14 Other <strong>Inc</strong>ome Sales H A S H T L<br />
15 %- on Subtotal (% I) % -<br />
16 %- on Subtotal (% II) % -<br />
17 Vendor Coupon V . C P N<br />
18 Dollar Discount D I S C<br />
19 All Media Sales T O T A L<br />
20 Cash Sales C A S H<br />
21 Media 1 Sales (Check) C H E C K<br />
22 Media 2 Sales (Charge) C h g<br />
23 Media 3 Sales (Misc.) M I S C<br />
24 Media 4 Sales (Coupon) C P N<br />
25 Media 5 Sales (FS) F S T L *2<br />
26 Received-on- Account R / A<br />
27 Paid-Out P O<br />
28 Cash-in-drawer C A S H I D<br />
29 Check-in-drawer C H E C K I D<br />
30 Charge-in-drawer C h g I D<br />
31 Misc-in-drawer M I S C I D<br />
32 Coupon-in-drawer C P N I D<br />
33 Food Stamp-in-drawer F S I D *2<br />
34 Food Stamp Change F S C G *2<br />
35 Item Correct C O R R<br />
36 Void V O I D<br />
37 Misc Void M I S C V D<br />
38 All Void (Cancel) A L L V D<br />
39 %- on Lime Item (% I) % -<br />
40 %- on Lime Item (% II) % -<br />
41 Store Coupon S . C P N<br />
42 Negative Depts Total - D P T L<br />
43 Returned Merchandise R T N<br />
44 Negative Tax - T A X
13. PROGRAMMING YOUR OWN MESSAGE AND VARIOUS NAMES<br />
45 Negative Mode Total R E G -<br />
46 Transfer Balance GT T R F T L<br />
FINANCIAL TOTAL NAME PRINT (Continued)<br />
47 Transfer + GT T R F + G T<br />
48 Transfer - GT T R F - G T<br />
49 Transfer + Daily T R F +<br />
50 Transfer - Daily T R F -<br />
51 Previous Balance Sales P B T L<br />
52 PB R/A (PB Paid) P B R / A<br />
53 PB PO (PB Refurned) P B P O<br />
54 GST Non-taxable Total N O N G S T<br />
55 GST Taxable Total G S T T X B L<br />
56 GST (<strong>Inc</strong>lusive) G S T I N C<br />
57 Taxable Total 1 T X B L 1<br />
58 Taxable Total 2 T X B L 2<br />
59 Taxable Total 3 T X B L 3<br />
60 Tax-exempt Customer T A X E X<br />
61 GST Exempt Transaction G S T E X<br />
62 Tax 1 Exempt T A X 1 E X<br />
63 Tax 2 Exempt T A X 2 E X<br />
64 Tax 3 Exempt T A X 3 E X<br />
65 FS Amount Tax 1 Exempt F S E X 1<br />
66 FS Amount Tax 2 Exempt F S E X 2<br />
67 FS Amount Tax 3 Exempt F S E X 3<br />
68 Net Sale without Tax (New Net Sale) N . N S<br />
69 Foreign Currency 1 C U R 1<br />
70 Foreign Currency 2 C U R 2<br />
71 Foreign Currency 3 C U R 3<br />
72 Foreign Currency 4 C U R 4<br />
73 No-sale Counter N O S A L E<br />
74 Validation Counter V A L I C T R<br />
75 Taxes Consolidated T A X<br />
76 Negative Total 1 (Cashier) N E G 1<br />
77 Negative Total 2 (Cashier) N E G 2<br />
13-11<br />
EO1-11137<br />
13.3 Financial Total Name Programming<br />
Code Total or Counter Name in Standard Program Your Plan Remarks<br />
NOTE: Items marked with “*1” in the “Remarks” column are printed only when the GST feature has been<br />
selected. Also, items marked with “*2” in the “Remarks” column are printed only when the Food Stamp<br />
feature has been selected. For details, refer to Chapter 22. SYSTEM OPTION SETTING, Address 17 -<br />
Bit 8 on page 22-19.
13. PROGRAMMING YOUR OWN MESSAGE AND VARIOUS NAMES<br />
13.4 Print Line Item Name Programming<br />
1<br />
1<br />
AT/TL<br />
ST<br />
13-12<br />
EO1-11137<br />
This programming programs various print line item names to be printed on the sales receipts, etc., according to<br />
your requirement.<br />
Condition for Programming: Any time outside a sale. Must be signed off in the Cashier Signing Method. (In other<br />
methods, a Cashier Key may or may not be set to ON.) Refer to Chapter 16.<br />
Programming Procedure: Turn the Control Lock to the SET position using the MA key.<br />
0 @/FOR<br />
Declaration of Program No. 10<br />
for Print Line Item Name<br />
Programming<br />
Item Code; 1 to 25<br />
(Refer to the table on the<br />
following pages.)<br />
Character Entries ST<br />
max. 8 characters<br />
(See Character Entries<br />
at the beginning of this<br />
chapter.)<br />
NOTE 2<br />
ST<br />
NOTE 1<br />
13.4 Print Line Item Name Programming<br />
Repeat for<br />
other items.<br />
AT/TL<br />
NOTES: 1. For sequentially programming items, item code designation can be omitted.<br />
2. The table on the next page shows the maximum number of characters programmable for each<br />
item.<br />
Print Line Item Name Program Receipt Format:<br />
To program the items of Item Code 7 as shown below:<br />
• Unit Price Symbol ..... @<br />
• Amount <strong>Ma</strong>rk ............ $<br />
• Sales Item Count Symbol ..... ITEM<br />
Key Operation: Control Lock: SET<br />
7<br />
0 @/FOR<br />
ST<br />
1 0 #/NS<br />
3 7 #/NS<br />
1<br />
#/NS<br />
3 0 #/NS<br />
1<br />
9<br />
5<br />
#/NS<br />
2 3 #/NS<br />
(@)<br />
($)<br />
(I)<br />
(T)<br />
(E)<br />
(M)<br />
<strong>TEC</strong> STORE<br />
1343 PEACH DRIVE<br />
PHONE: 87-6437<br />
Open 8:00am to 7:00pm<br />
Closed: every Wednesday<br />
11-28-1997 #0<br />
P10<br />
07 @$ITEM<br />
0044 08:50TM
13. PROGRAMMING YOUR OWN MESSAGE AND VARIOUS NAMES<br />
<strong>Ma</strong>ximum Number of Characters<br />
PRINT LINE ITEM NAME TABLE (To be Continued)<br />
13-13<br />
EO1-11137<br />
13.4 Print Line Item Name Programming<br />
Code Print Line Item Name in Standard Program Your Plan Remarks<br />
1 Subtotal 8 S U B T L<br />
2 Cash Tendered 8 C A T E N D<br />
3 Sales Total 8 T O T A L<br />
4 Change due 8 C H A N G E<br />
5 Cash Refunded 8 C A S H for negative sale<br />
6 -- vacant --<br />
7 6 @ I T E M These three must be<br />
Unit Price Symbol 1 set together.<br />
Amount <strong>Ma</strong>rk 1<br />
Sales Item Count Symbol 4<br />
8 6 # C L T M These three must be<br />
Register No. Symbol 2 set together.<br />
Cashier Symbol 2 for Validation<br />
Time Symbol 2<br />
9 Customer Count 2 C U On Reports<br />
10 Previous Balance + 8 P B +<br />
11 Previous Balance - 8 P B -<br />
12 Transferred Amount 8 N E W B A L<br />
13 Taxable Total 8 T X B L T L [TXBL TL] and [EX]<br />
14 Post-issue Receipt Header 8 C O P Y<br />
for Validation<br />
15 PLU Symbol 3 P L U Used when no name<br />
is programmed for<br />
the PLU.<br />
16 Cashier Signing Symbol 4 S I G N<br />
17 8 O N O F F These two must be<br />
“ON” portion of Cashier Signing 4 set together.<br />
“OFF” portion of Cashier Signing 4<br />
18 Food Stampable Total 8 F S / T L<br />
19 Food Stamp 8 F - S T M P<br />
20 Food Stamp Change 8 F S C H G<br />
21 Group Subtotal 8 G R P . S T<br />
22 8 F P F P These three must be<br />
GST Taxable Status 2 set together.<br />
PST Taxable Status 2 On Sales Receipts<br />
Both GST and PST Taxable Status 2<br />
23 Normal Keyboard<br />
Layout Change Symbol<br />
4 P K B<br />
Printed when the layout of the normal<br />
keyboard is changed by the operation<br />
“81 [@/FOR]” or “82 [@/FOR]”
13. PROGRAMMING YOUR OWN MESSAGE AND VARIOUS NAMES<br />
<strong>Ma</strong>ximum Number of Characters<br />
PRINT LINE ITEM NAME TABLE (Continued)<br />
13-14<br />
EO1-11137<br />
13.4 Print Line Item Name Programming<br />
Code Print Line Item Name in Standard Program Your Plan Remarks<br />
24 8 O N O F F These two must be<br />
“ON” portion for Normal<br />
Keyboard Layout Change<br />
4 set together.<br />
“OFF” portion for Normal<br />
Keyboard Layout Change<br />
4<br />
25 Power Failure Symbol 8 P . F A I L<br />
OTHER AUTO-PRESET DATA<br />
(programmable)<br />
The following data are automatically preset in program memory. However, when the corresponding items names<br />
are programmed in each corresponding operation, the programmed name will be active instead of the preset<br />
data.<br />
Item Preset Data Remarks Reference<br />
Group GPXX XX = Group Code 01 to 15 Group Name Programming<br />
on page 18-10<br />
Department DPXX XX = Department Code 01 to 40 Department Status<br />
Programming on page 18-3<br />
Cashier Symbol XCL X = Cashier ID Code 1 to 8 Cashier Name<br />
Programming on page 16-4<br />
OTHER FIXED DATA<br />
(unchangeable)<br />
Item Preset Data Remarks<br />
Program Mode Symbol P Used as header in “SET” mode print<br />
Program Verification Symbol PX Used as header in “X” mode print<br />
Read Mode Symbol X Used as header in “X” reports<br />
Reset Mode Symbol Z Used as header in “Z” reports<br />
GT Read Mode Symbol GTX Used as header in “GTX” reports<br />
GT Reset Mode Symbol GTZ Used as header in “GTZ” reports<br />
System Option Address Symbol #<br />
Percent Rate Symbol %<br />
Non-add No. Symbol #<br />
Taxable Status <strong>Ma</strong>rk T<br />
Food Stampable Status <strong>Ma</strong>rk F<br />
Negative <strong>Ma</strong>rk -<br />
Quantity Extension <strong>Ma</strong>rk X<br />
All Memory Clear RAM-C<br />
Sales Memory Clear DATA-C<br />
Status Clear STATUS-C
14. OPTIONAL KEY SETTING<br />
14. OPTIONAL KEY SETTING<br />
14-1<br />
EO1-11137<br />
14.1 List of Keys<br />
This chapter introduces optional keys (keys not installed on the current Standard Keyboard) that can be<br />
programmed. Please note, however, that adding an optional key means to sacrifice another key already installed.<br />
If you plan to install any of the Optional Keys or change locations of any of the current keys, this operation must<br />
be performed first before any other programming or setting operation (refer to NOTE 9 at the end of this chapter).<br />
14.1 List of Keys<br />
The following is the list of the all the keys that can be programmed on the keyboard. Numeric Keys 0 to 9 are<br />
fixed as to their locations, therefore, not included in the list. The “Key Code” assigned to each key in the list used<br />
in the setting procedure on the next page. For the keys initially installed and a brief information of each key, refer<br />
to Chapter 7. KEYBOARD. For detail functions and operations of each key, refer to Chapters 16 to 21.<br />
*1<br />
*2<br />
Key Code Key Name<br />
0 Code to deactivate the key<br />
1 to 40 Department Keys 1 to 40<br />
61 RF (Receipt Feed)<br />
62 JF (Journal Feed)<br />
63 00 (Double-zero)<br />
64 000 (Triple-zero)<br />
65 • (Decimal Point)<br />
66 VND CPN (Vendor Coupon)<br />
67 STR CPN (Store Coupon)<br />
..........Keys that must be installed as minimum requirement<br />
69 DOLL DISC (Dollar Discount)<br />
70 %+ (Percent Charge)<br />
71 %- (Percent Discount)<br />
72 RTN MDSE (Returned Merchandise)<br />
73 ITEM CORR (Item Correct)<br />
74 VOID (Void)<br />
75 ALL VOID (All Void)<br />
76 AT/TL (Cash Tender/Total)<br />
77 CHECK TEND (Check Tender)<br />
78 chg (Charge Total)<br />
79 MISC (Miscellaneous Media Tender)<br />
80 CPN (Media-coupon Tender)<br />
82 ST (Subtotal)<br />
83 R/A (Received-on-Account)<br />
84 PO (Paid Out)<br />
85 NS (No-sale)<br />
86 PR OPEN (Preset Price Open)<br />
87 LC OPEN (Listing Capacity Open)<br />
88 OPEN (PR & LC Open)<br />
89 VALIDATE (Validation Print)<br />
Key Code Key Name<br />
90 # or #/CID<br />
(Non-add Number/Cash-in-drawer)<br />
91 #/NS (Non-add Number/No-sale)<br />
92 PLU (Price-Look-Up)<br />
93 @/FOR (@/For)<br />
94 RECEIPT ISSUE (Post-receipt)<br />
95 C (Clear)<br />
96 PLU Preset-code<br />
(PLU Preset -code Key)<br />
97 TX1/M (Tax 1 Modifier)<br />
98 TX2/M (Tax 2 Modifier)<br />
99 TXBL TL(Taxable Total)<br />
100 TAX (<strong>Ma</strong>nual Tax)<br />
101 EX (Tax Exempt)<br />
102 PB+ (Previous Balance +)<br />
103 PB- (Previous Balance -)<br />
104 TRF (Balance Transfer)<br />
108 AMT (Amount)<br />
115 FS/M<br />
(Food Stamp Modifier for US) or<br />
GST/M (GST Modifier for Canada)<br />
116 TX3/M (Tax 3 Modifier)<br />
120 FS TL TEND (Food Stamp Total/Tender)<br />
121 CUR1 (Foreign Currency 1)<br />
122 CUR2 (Foreign Currency 2)<br />
123 CUR3 (Foreign Currency 3)<br />
124 CUR4 (Foreign Currency 4)<br />
127 LOG/RECEIPT (Log/Receipt)<br />
128 $5.00 (Cash Payment 1)<br />
129 $10.00 (Cash Payment 2)<br />
*2<br />
*2<br />
*4<br />
*3
14. OPTIONAL KEY SETTING<br />
Key Code Key Name<br />
130 CASH3 (Cash Payment 3)<br />
133 PRICE SHIFT1 (PLU Price Shift 1)<br />
134 PRICE SHIFT2 (PLU Price Shift 2)<br />
135 PRICE SHIFT3 (PLU Price Shift 3)<br />
143 CLK1 (Cashier 1)<br />
144 CLK2 (Cashier 2)<br />
14-2<br />
Key Code Key Name<br />
145 CLK3 (Cashier 3)<br />
146 CLK4 (Cashier 4)<br />
147 CLK5 (Cashier 5)<br />
148 CLK6 (Cashier 6)<br />
149 CLK7 (Cashier 7)<br />
150 CLK8 (Cashier 8)<br />
EO1-11137<br />
14.2 Key Installation Setting<br />
*1. At least one Department Key is required to be installed.<br />
*2. The [#/NS] key has both [#/CID] and [NS] functions. Therefore, when [#/NS] is installed, neither<br />
[#/CID] nor [NS] are necessary. (At least, either [#/NS] or [#/CID] must be installed.)<br />
*3. When the Signing Method is selected for the cashier-identifying operation (refer to Chapter 16),<br />
this key must be installed. If this method is not selected, this key merely functions as Receipt ON/<br />
OFF key.<br />
*4. Function of the key assigned with Key Code 115 is decided by Chapter 22. SYSTEM OPTION<br />
SETTING, Address 17 - Bit 8 selection on page 22-19.<br />
14.2 Key Installation Setting<br />
Condition for Programming: After all Daily and Periodic Resets (Refer to NOTE on “Condition” on page 11-1.)<br />
Setting Procedure: Turn the Control Lock to the BLIND position using the S key.<br />
REG<br />
OFF<br />
X<br />
MGR<br />
Z<br />
SET<br />
(BLIND)<br />
(The BLIND position is the<br />
unmarked step next to “Z”.)<br />
-<br />
7 6 AT/TL<br />
To declare Key Installation<br />
Setting.<br />
Only to read the Key Code currently set on the key.<br />
..........<br />
Key Code (max. 3 digits;<br />
see the List of Keys on<br />
the preceding page.) Displays the<br />
entered Key<br />
Code in the<br />
AMOUNT<br />
portion , as<br />
it is entered.<br />
Depress the key to be set<br />
with the Key Code. Displays<br />
the Key Code set or read ,<br />
in the AMOUNT portion.<br />
Repeat for all the keys<br />
to be newly installed,<br />
for location changes,<br />
or for reading Key<br />
Codes already set.<br />
AT/TL<br />
Depress the [AT/TL]<br />
key to complete the<br />
Key Installation<br />
Setting operation.
14. OPTIONAL KEY SETTING<br />
Blank Keyboard Sketch (for your planning aid)<br />
Fill in:<br />
Key Name<br />
Key Code<br />
(Refer to 14.1 List of<br />
Keys on the preceding<br />
pages.)<br />
▼<br />
▼<br />
For the Standard<br />
Keyboard Layout, refer to<br />
Chapter 7. KEYBOARD.<br />
( ) ( )<br />
( ) ( )<br />
( )<br />
( )<br />
( )<br />
( )<br />
Normal Keyboard<br />
( ) ( ) ( )<br />
7 8 9<br />
5 6<br />
( ) ( ) 0 ( ) ( )<br />
4<br />
1<br />
2 3<br />
14-3<br />
<strong>Ma</strong>x. 66 Keys<br />
EO1-11137<br />
14.2 Key Installation Setting<br />
( ) ( ) ( ) ( ) ( ) ( ) ( ) ( ) ( ) ( ) ( )<br />
Flat Keyboard<br />
<strong>Ma</strong>x. 106 Keys<br />
( ) ( )<br />
( )<br />
( )<br />
( )<br />
( )<br />
( )<br />
( )<br />
( ) ( ) ( ) ( ) ( ) ( )<br />
( ) ( ) ( ) ( ) ( ) ( )<br />
( ) ( ) ( ) ( ) ( ) ( )<br />
( ) ( ) ( ) ( ) ( ) ( )<br />
( )<br />
( )<br />
( ) ( ) ( ) ( )<br />
( ) ( ) ( ) ( ) ( ) ( ) ( )<br />
( ) ( ) ( ) ( ) ( ) ( )<br />
( )<br />
( )<br />
( )<br />
( ) ( ) ( ) ( ) ( ) ( )<br />
( ) 7 8 9 ( )<br />
( ) 4 5 6 ( )<br />
( ) 1 2 3 ( )<br />
( ) 0<br />
( ) ( )<br />
NOTES: 1. If Key Installation Setting is operated for the first time, all the keys are already set as in the<br />
Standard Keyboard Layout. Therefore, set only the keys that are to be changed as to their<br />
locations or newly installed.<br />
2. If a wrong code has been entered and the key has also been depressed (i.e.,a wrong code has<br />
been set on a key), enter the correct code and depress the key. The code entered last will be<br />
effective.<br />
3. If “0” is entered as Key Code, the key will be dead and its memory will also be closed.<br />
4. Each of the keys programmed in this operation will have its memory (if any) opened<br />
automatically.<br />
5. The [C] key, if once set with Key Code 95, may be used to clear an error , but it cannot be used<br />
immediately after a Key Code entry (for the purpose of clearing the wrong Key Code error). If any<br />
Key Code is entered and then the [C] key is depressed, that Key Code will be set on the key that<br />
was once the [C] key.<br />
6. On depressing the final [AT/TL] key, “0.00” is displayed in the AMOUNT portion , indicating that<br />
the setting operation is completed. No printing occurs.<br />
7. Use the Blank Keyboard Layout on this page, if necessary, for your own keyboard plan before<br />
starting the setting procedure.<br />
( )
14. OPTIONAL KEY SETTING<br />
14-4<br />
EO1-11137<br />
14.2 Key Installation Setting<br />
8. To set the [TAX] key (<strong>Ma</strong>nual Tax; Key Code 100) on the keyboard, operate the keys as shown<br />
below.<br />
Depress [1], [0], [0], then [TAX].<br />
In this case, the [00] key cannot be used.<br />
9. If any of the following keys are newly installed or location is changed, its relevant programming<br />
operations are further required (even if once programmed, re-programming is necessary because<br />
the program data has been cleared):<br />
Each Department Key ............ Department Status, LC (if required), Preset Price (if required)<br />
of the Department<br />
Each Media Key (including ...... Respective Listing Capacities for Tendering Operation<br />
the [FS TL TEND] key) (if required)<br />
[TX1/M] to [TX3/M], [GST/M] ... Respective Tax Tables or Rates (Tax 1, Tax 2, Tax 3, GST)<br />
[PLU] ........................................ PLU Table<br />
[%+], [%-] ................................. Respective Preset % Rates (if required)<br />
[$5.00], [$10.00], [CASH3] ...... Respective Cash Tendering Amounts<br />
[CUR1] to [CUR4] .................... Respective Foreign Currency Exchange Rates
15. DAILY OPERATION FLOW<br />
15. DAILY OPERATION FLOW<br />
The following shows a typical daily operation flow on the register.<br />
Before Opening the Store ...<br />
During <strong>Business</strong> Hours ...<br />
After Closing the Store ...<br />
• Ensure that the register is firmly<br />
plugged in the wall outlet.<br />
• Check if enough portion of paper roll is<br />
left.<br />
• Check the time, date, and print condition.<br />
Check the time, date, and<br />
print by issuing a No-sale<br />
Receipt. ...<br />
Setting the time or date ...<br />
Opening the store<br />
• Transaction entries on the register<br />
• Taking Read (X) Reports periodically.<br />
Closing the store<br />
• Taking Daily Reset (Z) Reports<br />
• Tear off the print portion of Journal Paper<br />
(optional).<br />
• Leave the drawer open, and turn the<br />
Control Lock to “OFF”. However, even<br />
in this position, the power is being supplied.<br />
• Take all the cash and other contents<br />
from the drawer to the office with the<br />
torn Journal and printed Reset<br />
Reports.<br />
15-1<br />
EO1-11137<br />
15. DAILY OPERATION FLOW<br />
Reference<br />
Chapter<br />
3<br />
8<br />
18<br />
10<br />
18<br />
21<br />
21<br />
8<br />
24<br />
24
16. CASHIER IDENTIFYING OPERATION<br />
16. CASHIER IDENTIFYING OPERATION<br />
16-1<br />
EO1-11137<br />
16.1 Signing Method Cashier Sign ON & Sign OFF<br />
The register requires the cashier identifying operation for starting sales entries in initial status. However, the program<br />
option allows you to operate the register without the cashier identifying operation. For details, refer to<br />
Chapter 22. SYSTEM OPTION SETTING, Address 23 - Bit 2 on page 22-26.<br />
The MA-<strong>1350</strong>-1 adopts one of the following cashier-identifying methods.<br />
1) Signing Method, using the [LOG/RECEIPT] key<br />
2) Cashier Key Method, using the Push LED Key<br />
3) Cashier Key Method, using the Barrel Lock<br />
4) Cashier Key Method, using the [CLK] key installed on the keyboard<br />
Method 1) is the standard feature. To change the cashier-identifying method from 1) to 2) or 3), appropriate program<br />
option selection is necessary as well as hardware option. (Refer to Chapter 22. SYSTEM OPTION<br />
SETTING, Address 23 - Bits 7 and 8 on page 22-26.)<br />
16.1 Signing Method Cashier Sign ON & Sign OFF<br />
A cashier needs to “sign ON” for starting transaction entries on the register and identifying the operator. The<br />
signed-ON condition is held until a “sign OFF” is operated. A cashier can sign ON only when the register is in the<br />
signed-OFF condition. A maximum of 8 cashiers can be controlled in the signing method.<br />
Sign ON (operable in signed-OFF condition)<br />
Use the REG Key to turn the Control Lock to the REG position. (or to MGR or - using the MGR or MA key)<br />
REG<br />
OFF<br />
SET<br />
X<br />
MGR<br />
-<br />
Z<br />
(BLIND)<br />
The code being entered<br />
is not displayed.<br />
Sign OFF (operable in signed-ON condition)<br />
Same Control Lock position as the Sign<br />
ON (Changing the position in a<br />
signed-ON condition will cause an error.)<br />
LOG<br />
RECEIPT<br />
The “SIGN ON” lamp illuminates, and a sign<br />
ON receipt is issued. (See the next page.)<br />
.....<br />
.....<br />
Transaction entries are now possible.<br />
Cashier Code assigned to each cashier by the store<br />
(1 digit; 1 to 8)<br />
Secret Code generated by the cashier<br />
(2 digits; any number from 01 to 99)<br />
See NOTE 1 on the next page.<br />
0<br />
LOG<br />
RECEIPT<br />
..... No operation in REG, MGR or -<br />
mode will be allowed until a sign<br />
ON is operated by a cashier.<br />
..........<br />
The “SIGN ON” lamp is extinguished,<br />
and a sign OFF receipt is issued.
16. CASHIER IDENTIFYING OPERATION<br />
Name of a cashier<br />
who has just<br />
signed ON is<br />
printed if the name<br />
has been programmed.<br />
If not, a<br />
cashier symbol<br />
such as “3CL” is<br />
printed here. Refer<br />
to Section 16.6<br />
Cashier Name<br />
Programming on<br />
page 16-4.<br />
16-2<br />
EO1-11137<br />
16.2 Cashier Key Method (Push LED Key)<br />
Sign ON Receipt Format Sign OFF Receipt Format<br />
<strong>TEC</strong> STORE<br />
1343 PEACH DRIVE<br />
PHONE: 87-6437<br />
Open 8:00am to 7:00pm<br />
Closed: every Wednesday<br />
11-28-1997 #112300<br />
∗ SIGN ON ∗<br />
JONES 0117 08:46TM<br />
<strong>TEC</strong> STORE<br />
1343 PEACH DRIVE<br />
PHONE: 87-6437<br />
Open 8:00am to 7:00pm<br />
Closed: every Wednesday<br />
11-28-1997 #112300<br />
∗ SIGN OFF ∗<br />
JONES 0118 08:46TM<br />
NOTES: 1. The two-digit Secret Code portion, once entered for a cashier’s Sign ON, is set in the memory of<br />
the register. The Secret Code of the same cashier is checked every time his/her Sign ON is<br />
operated until the Daily Cashier Reset Report is taken at the end of the day. Then the Secret<br />
Code is reset and a new Secret Code entry will be allowed. When the Secret Code is within the<br />
range of 01 to 09, it will be omissible to enter the preceding zero.<br />
2. The multi-drawer feature can be adopted on this cashier-identifying method. In this case, Drawer<br />
1 is assigned to cashiers 1 and 2, and Drawer 2 to cashiers 3 to 8. To select the multi-drawer<br />
feature, refer to Chapter 22. SYSTEM OPTION SETTING, Address 21 - Bit 3 on page 22-23.<br />
16.2 Cashier Key Method (Push LED Key)<br />
1 2 3 4<br />
Each Cashier key (1 to 4) is assigned to each cashier.<br />
Push the assigned cashier key, and the built-in light becomes<br />
lit, indicating that the key is ON to identify the<br />
cashier. The ON status of the key will be held until another<br />
cashier key is pushed.<br />
Sales entries will be possible only when one of these<br />
key is in the ON status (in “REG”, “MGR”, or “ - ”<br />
mode).<br />
The Key’s ON status will not be cleared even when the Mode Lock is turned to other positions.<br />
NOTES: 1. No receipts are issued on turning ON or OFF a Cashier Key. However, the cashier code (1 to 4)<br />
or cashier name is printed near the bottom of every receipt to be issued.<br />
2. The multi-drawer feature can be adopted on this cashier-identifying method. In this case, Drawer<br />
1 is assigned to cashiers 1 and 2, and Drawer 2 to cashiers 3 and 4. To select the multi-drawer<br />
feature, refer to Chapter 22. SYSTEM OPTION SETTING, Address 21 - Bit 3 on page 22-23.
16. CASHIER IDENTIFYING OPERATION<br />
16.3 Cashier Key Method (Barrel Lock)<br />
1 • 2 3 • 4<br />
1<br />
Cashier Keys 1 to 4<br />
16-3<br />
EO1-11137<br />
16.3 Cashier Key Method (Barrel Lock)<br />
This method is applied when two barrel locks are installed as cashier locks.<br />
A maximum of 4 cashiers can be identified in this method.<br />
Each key (1 to 4) is assigned to each cashier. The register will not operate<br />
in the REG, MGR, or - mode unless one of these keys is inserted and<br />
turned to the position (1 to 4) corresponding to the Cashier Key No.<br />
Each of the keys may be inserted and pulled out in the neutral position<br />
marked with a dot. When the operating cashier changes to another, the first<br />
Cashier Key must be pulled out before inserting another Cashier Key.<br />
NOTES: 1. No receipts are issued on turning ON or OFF a Cashier Key. However, the Cashier Code (1 to 4)<br />
is printed near the bottom of every receipt to be issued.<br />
2. The multi-drawer feature can be adopted on this cashier-identifying method. In this case, Drawer<br />
1 is assigned to cashiers 1 and 2, and Drawer 2 to cashiers 3 and 4. To select the multi-drawer<br />
feature, refer to Chapter 22. SYSTEM OPTION SETTING, Address 21 - Bit 3 on page 22-23.<br />
16.4 Cashier Key Method ([CLK] Key)<br />
A maximum of 8 cashier keys ([CLK 1] to [CLK 8]) can be installed on the keyboard.<br />
Sale entries will be possible only when one of the [CLK] keys is depressed (in “REG”, “MGR”, or “ - ” mode).<br />
When the same [CLK] key is again depressed, the cashier will go in Cashier OFF status.<br />
NOTES: 1. No receipts are issued on turning ON or OFF a Cashier Key. However, the cashier code (1 to 8)<br />
or cashier name is printed near the bottom of every receipt to be issued.<br />
2. When adopting this cashier-identifying method, it is recommended to select the program option to<br />
display cashier code instead of department code. (Refer to Chapter 22. SYSTEM OPTION<br />
SETTING, Address 23 - Bit 5 on page 22-26.)<br />
3. The multi-drawer feature can be adopted on this cashier-identifying method. In this case, Drawer<br />
1 is assigned to cashiers 1 and 2, and Drawer 2 to cashiers 3 to 8. To select the multi-drawer<br />
feature, refer to Chapter 22. SYSTEM OPTION SETTING, Address 21 - Bit 3 on page 22-23.<br />
16.5 Cashier Reports<br />
By adopting the Cashier Identifying option, Daily Cashier Read and Reset Reports (for individual cashiers) and<br />
Periodical Cashier Read and Reset Reports (for all the cashiers together in one report) are available. For the report<br />
taking operations and print format, refer to Chapter 21. READ AND RESET REPORTS.
16. CASHIER IDENTIFYING OPERATION<br />
16.6 Cashier Name Programming<br />
AT/TL<br />
16-4<br />
EO1-11137<br />
Condition for Programming: Any time outside a sale. Must be signed off in the Cashier Signing Method. (In<br />
other methods, a Cashier Key may or may not be set to ON.) Refer to this<br />
chapter.<br />
Programming Procedure: Turn the Control Lock to the SET position using the MA key.<br />
2 @/FOR<br />
Declaration of Program<br />
No. 2 for Cashier Name<br />
Programming<br />
Character Entries<br />
max. 8 characters<br />
(See Character Entries<br />
at the beginning of<br />
Chapter 13.)<br />
Cashier No. 1 to 8<br />
NOTE 3<br />
ST<br />
ST AT/TL<br />
. . .<br />
To complete<br />
this name<br />
16.6 Cashier Name Programming<br />
Repeat for<br />
another cashier.<br />
(<strong>Ma</strong>x. 8 cashiers)<br />
NOTES: 1. For each cashier name, a maximum of 8 regular-sized characters or 4 double-sized characters<br />
may be entered. A combination of both types is also available.<br />
2. This programming is available only when the cashier identifying operation option has been<br />
selected.<br />
3. Number of the controllable cashiers differs as follows.<br />
• <strong>Ma</strong>x. 4 cashiers for the Push LED Cashier Key and the Barrel Lock<br />
• <strong>Ma</strong>x. 8 cashiers for the Cashier Signing and the [CLK] Key<br />
Cashier Name Programming Receipt Format:<br />
Key Operation: Control Lock: SET<br />
2 @/FOR<br />
Cashier Code Name<br />
1<br />
2<br />
ST<br />
ST<br />
2 0 #/NS (J)<br />
2 5 #/NS<br />
1 9 #/NS<br />
3 0 #/NS<br />
(O)<br />
2 4 #/NS (N)<br />
1 5 #/NS<br />
2 9 #/NS<br />
2 9 #/NS<br />
2 3 #/NS<br />
(E)<br />
(S)<br />
(S)<br />
(M)<br />
(I)<br />
(T)<br />
1 8 #/NS (H)<br />
ST<br />
ST<br />
<strong>TEC</strong> STORE<br />
1343 PEACH DRIVE<br />
PHONE: 87-6437<br />
Open 8:00am to 7:00pm<br />
Closed: every Wednesday<br />
11-28-1997 #0<br />
P02<br />
1CL JONES<br />
2CL SMITH<br />
Cashier Code<br />
0019 12:01TM<br />
Cashier<br />
Name
17. TRAINING<br />
17. TRAINING<br />
17-1<br />
EO1-11137<br />
17.1 Operation for Training Mode Start<br />
This chapter describes a training provided for new employed cashiers. After entering the training mode, a cashier<br />
may operate the same transaction entries as those in the REG mode. The data in the training mode is not processed,<br />
therefore not affect any actual sales data in business.<br />
Training Procedure: Turn the Control Lock to the SET position using the MA key.<br />
17.1 Operation for Training Mode Start<br />
9 9<br />
ST<br />
17.2 Entries in Training Mode<br />
..................... A training start receipt is issued.<br />
When the cashier identifying option is selected, a sign ON or cashier Key ON is required before starting operations.<br />
Refer to Chapter 16. CASHIER IDENTIFYING OPERATION.<br />
A trainee can operate all transaction entries described in the next chapter.<br />
except: 1) The drawer will not open.<br />
2) The consecutive No. will not be incremented.<br />
3) Entried contents will not be printed on a validation slip.<br />
When the cashier identifying option is selected, a sign OFF or cashier key OFF is required after completing operations.<br />
Refer to Chapter 16. CASHIER IDENTIFYING OPERATION.<br />
17.3 Operation for Training Mode End<br />
9 9<br />
ST<br />
..................... A training end receipt is issued.<br />
Training Start Receipt ⎯⎯⎯⎯⎯⎯⎯⎯⎯⎯⎯⎯⎯⎯⎯⎯⎯⎯⎯⎯⎯→ Training End Receipt<br />
<strong>TEC</strong> STORE<br />
1343 PEACH DRIVE<br />
PHONE: 87-6437<br />
Open 8:00am to 7:00pm<br />
Closed: every Wednesday<br />
11-28-1997 #112300<br />
∗ TRAINING ∗<br />
ON<br />
0118 09:20TM<br />
Training Mode Symbol<br />
Receipt issued in Training Mode<br />
<strong>TEC</strong> STORE<br />
1343 PEACH DRIVE<br />
PHONE: 87-6437<br />
Open 8:00am to 7:00pm<br />
Closed: every Wednesday<br />
11-28-1997 #112300<br />
∗ TRAINING ∗<br />
R/A 10.00<br />
R/A 2.50<br />
CASH 12.50<br />
∗ TRAINING ∗<br />
JONES 0118 09:21TM<br />
Entry Contents<br />
<strong>TEC</strong> STORE<br />
1343 PEACH DRIVE<br />
PHONE: 87-6437<br />
Open 8:00am to 7:00pm<br />
Closed: every Wednesday<br />
11-28-1997 #112300<br />
∗ TRAINING ∗<br />
OFF<br />
0118 09:21TM
18. SETTING PREPARATION OF EACH KEY, AND TRANSACTION ENTRIES<br />
18. SETTING PREPARATION OF EACH KEY, AND<br />
TRANSACTION ENTRIES<br />
18-1<br />
EO1-11137<br />
18.1 Receipt-issue/Non-issue Selection<br />
This chapter describes individual key operations on transaction entries, and setting requirements for the key if<br />
necessary.<br />
WARNING!<br />
When opening the cash drawer, be careful not to let the drawer hit any person.<br />
LOG<br />
18.1 Receipt-issue/Non-issue Selection (LOG/RECEIPT Key)<br />
Receipts are issued or not issued according to the “R OFF” lamp illuminated/extinguished status on the<br />
Operator’s Display panel.<br />
“R OFF” (Receipts OFF) Lamp Status Change Operations<br />
Control Lock may be in any position except OFF.<br />
LOG<br />
RECEIPT<br />
RECEIPT<br />
⎯⎯⎯⎯⎯⎯⎯⎯→<br />
←⎯⎯⎯⎯⎯⎯⎯⎯<br />
LOG<br />
Extinguished RECEIPT<br />
Illuminated<br />
.......<br />
Receipt ON Status Receipt OFF Status<br />
NOTES: 1. The Control Lock may be in any position (except OFF position) for changing the Receipt ON/OFF<br />
status.<br />
2. The “R OFF” lamp status at the starting of a transaction entry decides whether a receipt will be<br />
issued for the transaction or not. Switching the Receipt ON/OFF status during a transaction will<br />
not be effective.<br />
3. If a transaction entered with the “R OFF” lamp illuminated and finalized but a receipt is required,<br />
the [RECEIPT ISSUE] (Post-issue Receipt) key can be operated to issue a receipt (see “Postissue<br />
Receipt” on page 18-48).<br />
4. Simply depress the [LOG/RECEIPT] key without a numeric entry. If the key is depressed with a<br />
prior numeric entry in “REG”, “MGR”, or “ - ” mode, it may turn out to be a Sign ON or Sign OFF<br />
operation when the Singing Method is selected for cashier identification (refer to Chapter 16).<br />
However, if any Declaration Key (such as [RTN MDSE]) is already pressed and then the [LOG/<br />
RECEIPT] key is pressed, the Declaration Key entry is not canceled by the Receipt ON/OFF<br />
status change.<br />
.......
18. SETTING PREPARATION OF EACH KEY, AND TRANSACTION ENTRIES<br />
18-2<br />
EO1-11137<br />
18.2 Clearing Errors, or Clearing Wrong Declaration Key or Wrong Numeric Entries<br />
18.2 Clearing Errors, or Clearing Wrong Declaration<br />
Key or Wrong Numeric Entries<br />
(Clear Key)<br />
When in sale entries an error has occurred with an alarm buzzer, a wrong Declaration Key (such as [RTN<br />
MDSE], [TX/M], [GST/M], etc.) has been depressed, or a wrong numeric data has been entered; depress the [C]<br />
key.<br />
1) Error has occurred (the alarm<br />
buzzer is generated and the<br />
“ALM” lamp illuminates), and the<br />
keyboard is locked.<br />
2) Declaration Key has been depressed.<br />
Example)<br />
3) Numeric Keys are entered.<br />
Example)<br />
4) Declaration Key + Numeric Keys<br />
Example)<br />
5) Numeric Keys + Non-motorized<br />
Key (key that does not trigger<br />
printing)<br />
Example)<br />
RTN<br />
MDSE<br />
5 0<br />
RTN<br />
MDSE<br />
6) Combination of 2) to 5)<br />
7) Combination of 6) + 1)<br />
1<br />
2<br />
0<br />
7<br />
0<br />
@/FOR<br />
⎯⎯→ C ⎯⎯→<br />
⎯⎯→ C ⎯⎯→<br />
⎯⎯→ C ⎯⎯→<br />
C<br />
The error condition is cleared (the<br />
buzzer tone stops and the “ALM”<br />
lamp is extinguished). Find the cause<br />
of the error, and do the operation<br />
again. Refer to “Possible Cause of<br />
Error” attached where an error may<br />
occur in each operation sequence on<br />
the following pages.<br />
The entered data are all cleared at<br />
once.<br />
The entered data are all cleared at<br />
once, and the error condition is<br />
cleared also. Refer to 1) for finding<br />
the cause of error.<br />
NOTE: When data is already entered and printed (through a Department Key, etc.), it cannot be cleared by the<br />
[C] Key any longer. In need of deleting such data, see the following:<br />
Item Correction (Last Line Voiding)<br />
ITEM<br />
CORR page 18-35<br />
Void (Designated Line Voiding) VOID page 18-37<br />
ALL<br />
All Void (Transaction Cancel) VOID<br />
page 18-38<br />
Operations in “ - ” Mode Chapter 20
18. SETTING PREPARATION OF EACH KEY, AND TRANSACTION ENTRIES<br />
18.3 Department Keys<br />
1 to 40 (Department Key)<br />
These are department keys through which sales items are registered.<br />
18.3.1 Programmings regarding Department Keys<br />
■ Programming Department Status<br />
To use Department Keys, first program how each Department Key is to be used, in accordance with<br />
merchandise categories, taxation, operativity of the key, etc.<br />
18-3<br />
EO1-11137<br />
18.3 Department Keys<br />
Condition for Programming: After Daily Financial Reset and Periodic Financial Reset (and All PLU Reset if<br />
the positive/negative status is to be set)<br />
When the program option “Department Report separately issued from the<br />
Financial Report” has been selected (Refer to Chapter 22. SYSTEM OPTION<br />
SETTING, Address 21 - Bit 4 on page 22-23): To add to the above conditions,<br />
After Daily Department Reset and Periodic Department Reset<br />
(refer to NOTE on “Condition” on page 11-1)
18. SETTING PREPARATION OF EACH KEY, AND TRANSACTION ENTRIES<br />
Programming Procedure: Turn the Control Lock to the SET position using the MA key.<br />
3 @/FOR<br />
Declaration of Program<br />
No. 3 for Department<br />
Status Programming<br />
Address No.<br />
NOTE 1<br />
#/NS<br />
Repeat for programming other departments (max. 40 departments).<br />
For Normal Keyboard<br />
Dept.<br />
For Flat Keyboard or Normal Keyboard of<br />
which layout is changed by 81 [@/FOR]<br />
Department No.<br />
max. 2 digits; 1 to 40<br />
Address 1:<br />
Department Name<br />
1<br />
2<br />
ST<br />
Address 2:<br />
Preset Price<br />
ST<br />
Address 3:<br />
Department Status<br />
3<br />
ST<br />
Address 4:<br />
Tax/PST Status<br />
4<br />
ST<br />
DP#<br />
Character Entries ST<br />
max. 8 characters (See Character<br />
Entries at the beginning of Chapter 13.)<br />
. . .<br />
Preset Price <strong>Ma</strong>x. 6 digits;<br />
0 to 999999<br />
To set Open-price Department<br />
. . .<br />
Department Status Code<br />
NOTE 3<br />
. . .<br />
Tax/PST Status Code<br />
NOTE 4<br />
18-4<br />
#/NS<br />
#/NS<br />
#/NS<br />
EO1-11137<br />
18.3 Department Keys<br />
AT/TL
18. SETTING PREPARATION OF EACH KEY, AND TRANSACTION ENTRIES<br />
Status Code Contents Not select Select<br />
1 Single-item Itemized Single-item<br />
2 Negative Status Positive Status Negative Status<br />
3 Other <strong>Inc</strong>ome Dept. Ordinary Dept. Other <strong>Inc</strong>ome Dept.<br />
4 Food Stamp/GST Status Without With<br />
18-5<br />
EO1-11137<br />
18.3 Department Keys<br />
NOTES: 1. “Address No.” designation located after the key operation “3 [@/FOR]” can be omitted if<br />
unnecessary. When an address No. is designated, the programming of the designated address<br />
will be automatically repeated for multiple departments.<br />
2. For each department name, a maximum of 8 regular-sized characters or 4 double-sized<br />
characters may be entered. A combination of both types is also available.<br />
3. Department status available is as follows.<br />
Department Key Status Description<br />
Itemized Key: When a sale item amount is entered through this key, the sale is<br />
not finalized until a media key (such as [AT/TL]) is operated.<br />
Other items can be entered within one sale receipt sequence.<br />
Single-item Key: A sale item entry through this key will automatically finalize the<br />
sale as cash outside a sale (i.e. when no other items have been<br />
entered within one receipt sequence). However, it will function<br />
just as an Itemized Key if operated inside a sale.<br />
Negative Department Key: Amount entered through this key is subtracted from the sale total.<br />
It may be used for item entries of returned bottles, etc.<br />
Other <strong>Inc</strong>ome Key: It is used to enter items which do not directly become sales for<br />
the store, such as lottery, postage, gift wrapping fee, size<br />
adjustment fee, utility (payment of electricity and gas) and<br />
donation.<br />
• When you select the status codes 1 and 2, enter 12, then depress the [#/NS] key.<br />
• When you select none of the status shown above, enter 0, then depress the [#/NS] key.<br />
4. As for Tax/PST code, more than one code can be entered for combining Tax/PST 1 to 3.<br />
• When you select Tax/PST 1 and 3 as “Taxable”, enter 13, then depress the [#/NS] key.
18. SETTING PREPARATION OF EACH KEY, AND TRANSACTION ENTRIES<br />
Department Status Program Receipt Format:<br />
Key Operation: Control Lock: SET<br />
3 @/FOR<br />
1<br />
1<br />
Dept.1<br />
ST<br />
2 3 #/NS<br />
1 5 #/NS<br />
1 1 #/NS<br />
3 0 #/NS<br />
ST<br />
( 2 ST )<br />
5 0 0 #/NS<br />
( 3 ST )<br />
( 4 ST )<br />
Dept.2<br />
ST<br />
1 6 #/NS<br />
1 9 #/NS<br />
2 9 #/NS<br />
1 8 #/NS<br />
( 2 ST )<br />
( 3 ST )<br />
( 4 ST )<br />
4 #/NS<br />
1 #/NS<br />
#/NS<br />
4 #/NS<br />
2 #/NS<br />
.....<br />
(M)<br />
(E)<br />
(A)<br />
(T)<br />
(F)<br />
(I)<br />
(S)<br />
(H)<br />
3<br />
3<br />
AT/TL<br />
Dept.5<br />
ST<br />
1 2 #/NS<br />
Dept.6<br />
ST<br />
3 #/NS<br />
Department No.<br />
Program Address No.<br />
18-6<br />
<strong>TEC</strong> STORE<br />
1343 PEACH DRIVE<br />
PHONE: 87-6437<br />
Open 8:00am to 7:00pm<br />
Closed: every Wednesday<br />
11-28-1997 #0<br />
P03<br />
01 DP01<br />
#01 MEAT<br />
#02 5.00@<br />
#03 00 F<br />
#04 01<br />
02 DP02<br />
#01 FISH<br />
#03 00 F<br />
#04 02<br />
03 DP03<br />
#01 DRINK<br />
#04 03<br />
04 DP04<br />
#01 BAKERY<br />
#04 01<br />
05 DP05<br />
#03 10-<br />
06 DP06<br />
#03 40<br />
0028 13:03TM<br />
Department<br />
Status<br />
0: Itemized<br />
1: Single-item<br />
4: Other <strong>Inc</strong>ome<br />
5: Other <strong>Inc</strong>ome<br />
(Single-item)<br />
EO1-11137<br />
18.3 Department Keys<br />
Department Name<br />
Preset Price<br />
Food Stamp Status<br />
or GST Status<br />
F: Food<br />
Stampable<br />
T: GST Taxable<br />
Positive/Negative<br />
Status<br />
-: Negative<br />
Blank: Positive<br />
Tax/PST Status<br />
1: Tax/PST 1 taxable<br />
2: Tax/PST 2 taxable<br />
3: Tax/PST 1 & Tax/PST 2 taxable<br />
4: Tax/PST 3 taxable<br />
5: Tax/PST 1 & Tax/PST 3 taxable<br />
6: Tax/PST 2 & Tax/PST 3 taxable<br />
7: Tax/PST 1 & Tax/PST 2 & Tax/PST 3 taxable<br />
0: Non-taxable
18. SETTING PREPARATION OF EACH KEY, AND TRANSACTION ENTRIES<br />
Declaration of Program<br />
No. 8 for Department LC<br />
programming<br />
Dept.<br />
18-7<br />
<strong>TEC</strong> STORE<br />
1343 PEACH DRIVE<br />
PHONE: 87-6437<br />
Open 8:00am to 7:00pm<br />
Closed: every Wednesday<br />
11-28-1997 #0<br />
P08<br />
01 MEAT 73<br />
02 FISH 94<br />
03 DRINK 57<br />
86<br />
0041 08:40TM<br />
AT/TL<br />
EO1-11137<br />
18.3 Department Keys<br />
■ Programming Department LCs (Listing Capacities)<br />
The LC setting is used to check an amount limit error. By setting the LC an amount entry (due perhaps to a<br />
mistake by the operator) will be prevented at the earliest stage (i.e. an error will result on entering an excessive<br />
amount through the department key).<br />
Condition for Programming: After Daily Financial Reset<br />
(Refer to NOTE on “Condition” on page 11-1.)<br />
Programming Procedure: Turn the Control Lock to the SET position using the MA key.<br />
8 @/FOR<br />
Repeat for setting LCs of other departments.<br />
2-digit LC code for<br />
each department<br />
NOTES 1, 2<br />
Common 2-digit LC code<br />
for all departments<br />
NOTES 1, 2<br />
Example) 3 4 ............... indicates $ 39.99 ................ Allows to enter equal to or smaller than $39.99 in<br />
sale entries.<br />
4 digits<br />
Value of the top digit<br />
NOTES: 1. If the individual LC of a department is set, it prevails over the common LC for all departments.<br />
2. To reset a LC once set, enter “0” in place of the 2-digit LC code. Then a maximum of 7-digit<br />
amount can be entered in sale entries.<br />
Department LC Program Receipt Format:<br />
Key Operation: Control Lock: SET<br />
8 @/FOR<br />
7 3 Dept.1<br />
9 4 Dept.2<br />
5<br />
7<br />
Dept.3<br />
8 6<br />
AT/TL<br />
Listing Capacity Code<br />
Top digit value<br />
Number of maximum digits<br />
for each department<br />
Common LC for all<br />
departments
18. SETTING PREPARATION OF EACH KEY, AND TRANSACTION ENTRIES<br />
AT/TL<br />
18-8<br />
EO1-11137<br />
18.3 Department Keys<br />
■ Setting Department Gross Profit Rate<br />
Department Gross Profit Rate Setting helps you obtain the data of each department gross profit amount by<br />
issuing the Department Gross Profit Read Report.<br />
Condition for Setting: Any time outside a sale. Must be signed off in the Cashier Signing Method. (In other<br />
methods, a Cashier Key may or may not be set to ON.) Refer to Chapter 16.<br />
Setting Procedure: Turn the Control Lock to the SET position using the MA key.<br />
1 3 @/FOR<br />
.<br />
Declaration of Program No. 13<br />
for Department Gross Profit Rate<br />
Setting<br />
AT/TL<br />
NOTES : 1 . The fraction resulted from the rate calculation is rounded off.<br />
2. To reset the gross profit rate once set, enter 0 as department gross profit rate.<br />
3. Department of which gross profit rate is 0 is not printed on the Department Gross Profit Read<br />
Report.<br />
Department Gross Profit Rate Program Receipt Format:<br />
Key Operation: Control Lock: SET<br />
1 3 @/FOR<br />
1 0 Dept.1<br />
1 5 Dept.2<br />
2<br />
0<br />
Dept.3<br />
2 5 Dept.4<br />
Repeat for another department.<br />
Gross Profit Rate 0 to 99.99 (%)<br />
Department No.<br />
Dept.<br />
<strong>TEC</strong> STORE<br />
1343 PEACH DRIVE<br />
PHONE: 87-6437<br />
Open 8:00am to 7:00pm<br />
Closed: every Wednesday<br />
11-28-1997 #0<br />
P13<br />
01 10%<br />
02 15%<br />
03 20%<br />
04 25%<br />
0048 09:02TM<br />
Gross Profit Rate
18. SETTING PREPARATION OF EACH KEY, AND TRANSACTION ENTRIES<br />
3<br />
Dept.3<br />
ST<br />
Dept.5<br />
Dept.4<br />
Dept.6<br />
18-9<br />
EO1-11137<br />
■ Setting Department Group<br />
Department Group Setting allows you to classify each department into the maximum 15 groups, and helps you<br />
analyze the department sales data.<br />
Condition for Setting: After Daily Financial Reset and Periodic Financial Reset<br />
(After Daily Department Reset and Periodic Department Reset when the system<br />
option “Department Report separately issued from Financial Report” has been<br />
selected)<br />
Setting Procedure: Turn the Control Lock to the SET position using the MA key.<br />
1 4 @/FOR<br />
ST<br />
Declaration of Program No. 14<br />
for Department Group Setting<br />
Group Code<br />
1 to 15<br />
Repeat for another group<br />
Dept.<br />
Repeat for other departments which<br />
belong to the same group.<br />
AT/TL<br />
NOTES: 1 . All the departments including Other <strong>Inc</strong>ome Department and Negative Status Department can be<br />
classified into groups.<br />
2. When 0 is entered as a group code, the group corresponding to the department will be reset.<br />
Department Group Program Receipt Format:<br />
To program the department groups as shown below:<br />
• Dept. 1 (MEAT) and Dept. 2 (FISH) belong to Group 1<br />
• Dept. 3 (DRINK) and Dept. 4 (BAKERY) belong to Group 2<br />
• Dept. 5 and Dept. 6 belong to Group 3<br />
Key Operation: Control Lock: SET<br />
1 4 @/FOR<br />
1<br />
2<br />
AT/TL<br />
ST<br />
Dept.1<br />
ST<br />
Dept.2<br />
<strong>TEC</strong> STORE<br />
1343 PEACH DRIVE<br />
PHONE: 87-6437<br />
Open 8:00am to 7:00pm<br />
Closed: every Wednesday<br />
11-28-1997 #0<br />
P14<br />
GP01 01 MEAT<br />
GP01 02 FISH<br />
GP02 03 DRINK<br />
GP02 04 BAKERY<br />
GP03 05 DP05<br />
GP03 06 DP06<br />
0049 09:04TM<br />
18.3 Department Keys
18. SETTING PREPARATION OF EACH KEY, AND TRANSACTION ENTRIES<br />
@/FOR<br />
Declaration of Program No. 15<br />
for Department Group Name<br />
Programming<br />
Character Entries ST<br />
max. 8 characters<br />
(See Character Entries<br />
at the beginning of<br />
Chapter 13.)<br />
ST<br />
18-10<br />
NOTE 1<br />
EO1-11137<br />
18.3 Department Keys<br />
■ Programming Department Group Name<br />
Department Group Name Programming programs the names of each group which has been programmed in the<br />
preceding page.<br />
Condition for Programming: Any time outside a sale. Must be signed off in the Cashier Signing Method. (In other<br />
methods, a Cashier Key may or may not be set to ON.) Refer to Chapter 16.<br />
Programming Procedure: Turn the Control Lock to the SET position using the MA key.<br />
1 5<br />
Group Code<br />
1 to 15<br />
Repeat for<br />
another group.<br />
AT/TL<br />
NOTES: 1 . For sequentially programming groups, group code designation can be omitted.<br />
2. For each department group name, a maximum of 8 regular-sized characters or 4 double-sized<br />
characters may be entered. A combination of both types is also available.
18. SETTING PREPARATION OF EACH KEY, AND TRANSACTION ENTRIES<br />
Department Group Name Program Receipt Format:<br />
To program the department groups as shown below:<br />
• FRESH F for Group 1<br />
• DR & BA for Group 2<br />
• OTHERS for Group 3<br />
Key Operation: Control Lock: SET<br />
1<br />
1 5<br />
2 8 #/NS<br />
1<br />
1<br />
( 3 ST )<br />
2 5 #/NS<br />
3 0 #/NS<br />
1<br />
1<br />
2<br />
2<br />
1 ST<br />
1 6 #/NS<br />
2 8 #/NS<br />
1<br />
2<br />
1<br />
8<br />
5<br />
8<br />
9<br />
#/NS<br />
2 9 #/NS<br />
1<br />
6<br />
5<br />
8<br />
9<br />
#/NS<br />
#/NS<br />
6 9 #/NS<br />
( 2 ST )<br />
1<br />
1<br />
1<br />
@/FOR<br />
ST<br />
1 4 #/NS<br />
6<br />
0<br />
6<br />
9<br />
8<br />
9<br />
#/NS<br />
#/NS<br />
#/NS<br />
#/NS<br />
#/NS<br />
ST<br />
#/NS<br />
#/NS<br />
#/NS<br />
#/NS<br />
ST<br />
AT/TL<br />
(F)<br />
(R)<br />
(E)<br />
(S)<br />
(H)<br />
(space)<br />
(F)<br />
(D)<br />
(R)<br />
(space)<br />
(&)<br />
(space)<br />
(B)<br />
(A)<br />
(O)<br />
(T)<br />
(H)<br />
(E)<br />
(R)<br />
(S)<br />
18-11<br />
<strong>TEC</strong> STORE<br />
1343 PEACH DRIVE<br />
PHONE: 87-6437<br />
Open 8:00am to 7:00pm<br />
Closed: every Wednesday<br />
11-28-1997 #0<br />
01 FRESH F<br />
02 DR & BA<br />
03 OTHERS<br />
P15<br />
0050 09:11TM<br />
EO1-11137<br />
18.3 Department Keys
18. SETTING PREPARATION OF EACH KEY, AND TRANSACTION ENTRIES<br />
■ Setting Department Preset Prices<br />
If a fixed price is always entered through a Department Key in sales entries, a preset price can be set on the<br />
Department Key. Please note that once set with a preset price, the Department Key will not accept any other<br />
price (open price) unless the [PR OPEN] or [OPEN] key is operated or until the Department Key is again<br />
programmed to be an open department.<br />
Condition for Setting: Any time outside a sale. Must be signed off in Cashier Signing Method. (In other<br />
methods, a Cashier Key may or may not be set to ON.) Refer to Chapter 16.<br />
Setting Procedure: Turn the Control Lock to the SET position using the MA key.<br />
To set Open Department (to allow <strong>manual</strong> amount entries) NOTES 1,2,3<br />
Preset Price<br />
(max. 6 digits; 0 to 999999;<br />
resulting in $0.00 to $9999.99)<br />
Repeat for other Department Keys, if necessary.<br />
NOTES: 1. All the Department Keys are open departments (with no preset prices) as initial status.<br />
2. If a Department Key is pressed with no Preset Price entry, the key is set as an open-price<br />
Department Key.<br />
3. If “0” in entered as Preset Price, the Department Key is set with Preset Price of $0.00.<br />
Department Preset Price Setting Receipt Format:<br />
Key Operation: Control Lock: SET<br />
7 0 0 Dept.1<br />
AT/TL<br />
Dept.<br />
18-12<br />
AT/TL<br />
<strong>TEC</strong> STORE<br />
1343 PEACH DRIVE<br />
PHONE: 87-6437<br />
Open 8:00am to 7:00pm<br />
Closed: every Wednesday<br />
11-28-1997 #0<br />
P00<br />
01 MEAT 7.00<br />
18.3.2 Sale Item Entries Using Department Keys<br />
Various types of department entries are shown on the following pages.<br />
Use the REG Key to turn to the Control Lock to “REG” position.<br />
REG<br />
OFF<br />
SET<br />
X<br />
Z<br />
(BLIND)<br />
0095 12:24TM<br />
EO1-11137<br />
18.3 Department Keys<br />
Preset Price $7.00 for Dept. 1<br />
(MEAT)<br />
MGR Cashier Sign ON is necessary or a Cashier Key must be set to ON.<br />
-<br />
(Refer to Chapter 16.)
18. SETTING PREPARATION OF EACH KEY, AND TRANSACTION ENTRIES<br />
■ Entry of One Item<br />
Open-price Department<br />
. . .<br />
Price of the item<br />
(max. 7 digits: or<br />
limited by the<br />
Department LC)<br />
Preset-price Department<br />
Dept.<br />
Depress the appropriate Department<br />
Key for preset price<br />
. . .<br />
Dept.<br />
Depress the appropriate<br />
Department Key for open price<br />
If an error occurs here:<br />
Possible cause of error:<br />
• The price entered exceeds the LC.<br />
→ See the Listing Capacity Open Entry.<br />
• The Department Key is a preset-price key.<br />
→ Use an open-price Department Key, or see the “Preset-price<br />
Department” entry procedure below.<br />
• Entries through that Department requires <strong>Ma</strong>nager Intervention.<br />
→ Ask the manager to turn the Control Lock to MGR position.<br />
(Refer to Chapter 19.)<br />
18-13<br />
EO1-11137<br />
If an error occurs here:<br />
Possible cause of error:<br />
• The Department Key is an open-price key.<br />
→ Use a preset-price Department Key, or see the ”Open-price Department”<br />
entry above.<br />
• Entries through that Department requires <strong>Ma</strong>nager Intervention.<br />
→ Ask the manager to turn the Control Lock to MGR position. (Refer to<br />
Chapter 19.)<br />
Department Name MEAT 7.00 TF Status Symbol<br />
Dept.<br />
Entered Price<br />
(or Preset Price)<br />
Dept.<br />
Price Depress the same<br />
Department Key<br />
18.3 Department Keys<br />
For the United States<br />
T: Taxable<br />
F: Food Stampable<br />
TF: Taxable and Food Stampable<br />
Blank: Not applicable to any of the<br />
above status<br />
For Canada<br />
F: GST Taxable<br />
P: PST Taxable<br />
FP: GST and PST Taxable<br />
Blank: Not applicable to any of the<br />
above status<br />
■ Department Repeat Entry<br />
Depress again the Department Key used for the department item entry just entered. The item entry is repeated<br />
as many times as the Department Key is depressed. (A negative Department entry cannot be repeated.)<br />
Open-price Department Repeat<br />
MEAT 7.00 TF<br />
MEAT 7.00 TF
18. SETTING PREPARATION OF EACH KEY, AND TRANSACTION ENTRIES<br />
Preset-price Department Repeat<br />
Dept.<br />
Examples)<br />
123:<br />
23.4:<br />
If an error occurs here:<br />
Possible cause of error:<br />
• Exceeding the digit limit<br />
. . .<br />
Quantity;<br />
max. 6 digits<br />
0.001 to 999.999<br />
0.234: ( 0 )<br />
Dept.<br />
Depress the same<br />
Department Key<br />
@/FOR<br />
. . .<br />
Unit Price;<br />
max. 6 digits<br />
Preset-price Department<br />
Dept.<br />
18-14<br />
Dept.<br />
Product must not<br />
( exceed 7 digits. )<br />
If an error occurs here:<br />
Possible cause of error:<br />
• Exceeding the LC of the Department.<br />
→ Check the Unit Price.<br />
→ See Listing Capacity Open.<br />
• Product exceeding 7 digits.<br />
→ Check the Quantity and Unit Price.<br />
• Department requiring <strong>Ma</strong>nager Intervention.<br />
→ Ask the manager to turn the Control Lock to<br />
MGR.<br />
Product must not<br />
( exceed 7 digits. )<br />
EO1-11137<br />
18.3 Department Keys<br />
■ Other <strong>Inc</strong>ome Department<br />
Other <strong>Inc</strong>ome Department Key is used to enter items which do not directly become sales for the store, such as<br />
lottery, postage, gift wrapping fee, size adjustment fee, utility (payment of electricity and gas), and donation. Only<br />
the difference from ordinary Department Keys is that the amounts entered through this key are processed<br />
separately from the ordinary sales total (refer to Chapter 21. READ AND RESET REPORTS).<br />
The operation procedure is the same as ordinary (itemized) Department Keys.<br />
■ Department Quantity Extension (Multiplication)<br />
When more than three or four items are to be entered with the same Department and price, the Quantity<br />
Extension (multiplication) is quicker than the Repeat Entry.<br />
3 digits for integer<br />
(max.)<br />
1<br />
2<br />
.<br />
3 digits for<br />
decimal (max.)<br />
Required only for any<br />
decimal portion entry.<br />
2<br />
3<br />
.<br />
3<br />
.<br />
2<br />
4<br />
3<br />
4<br />
Open-price Department<br />
If an error occurs here:<br />
Possible cause of error:<br />
• Product exceeding 7 digits.<br />
→ Check the Quantity.<br />
• Department requiring <strong>Ma</strong>nager Intervention.<br />
→ Ask the manager to turn the Control Lock to<br />
MGR.<br />
Quantity<br />
Department Name<br />
12X 0.50 @<br />
FISH 6.00 TF<br />
Unit Price<br />
Product
18. SETTING PREPARATION OF EACH KEY, AND TRANSACTION ENTRIES<br />
18-15<br />
EO1-11137<br />
18.3 Department Keys<br />
NOTES: 1. When the Quantity is a 1-digit integer (1 to 9) and a Preset-price Department Key is to follow, the<br />
[@/FOR] key is omissible.<br />
2. The product obtained by Quantity Extension cannot be repeated.<br />
3. The decimal portion of the Quantity entry is processed down to the 2 digits below the decimal<br />
point. The fraction rounding at this time is fixed to ROUND OFF.<br />
4. You can select the rounding process of the fractions of the product (result of multiplication) --<br />
ROUND OFF (initial setting), ROUND UP, or ROUND DOWN. (Refer to Chapter 22. SYSTEM<br />
OPTION SETTING, Address 2 - Bits 1 and 2 on page 22-4.)<br />
■ Department SPP (Split-Package-Pricing):<br />
This operation is used when a customer purchases only part but not all of the items in a package (example: only<br />
two tomatoes in a priced package of three tomatoes).<br />
Purchased Qty<br />
max. 3 digits<br />
(integer only)<br />
Purchased Qty<br />
@/FOR @/FOR<br />
3X 7.00/ 2<br />
MEAT 10.50 TF<br />
Whole Package<br />
Qty max. 3 digits<br />
(integer only)<br />
Department Name Whole Package Price<br />
If an error occurs here:<br />
Possible cause of error:<br />
• Qty Error<br />
→ Decimal Point is not<br />
allowed in either Qty.<br />
→ Check the Qty digits.<br />
Whole Package Qty<br />
Product<br />
Open-price Department<br />
Dept.<br />
. . .<br />
Whole Package<br />
Price max. 6<br />
digits<br />
Preset-price Department<br />
The preset price is regarded<br />
as the Whole<br />
Package Price<br />
Dept.<br />
If an error occurs here:<br />
Possible cause of error:<br />
• Exceeding the LC of the Department<br />
→ Check the Whole Package Price.<br />
→ See Listing Capacity Open.<br />
• Product exceeding 7 digits.<br />
→ Check the Quantities and Whole<br />
Package Price.<br />
If an error occurs here:<br />
Possible cause of error:<br />
• Product exceeding 7 digits.<br />
→ Check the Quantities.<br />
NOTES: 1. The product (final result amount) obtained by SPP (Split-Package-Pricing) cannot be repeated.<br />
2. The product must not exceed 7 digits.<br />
3. The rounding process of the fractions of the product is ROUND UP PRODUCT as initial status. It<br />
can be changed to ROUND UP ITEM PRICE (refer to Chapter 22. SYSTEM OPTION SETTING,<br />
Address 2 - Bit 3 on page 22-4.)
18. SETTING PREPARATION OF EACH KEY, AND TRANSACTION ENTRIES<br />
18-16<br />
EO1-11137<br />
18.4 PLU (Price-Look-Up)<br />
■ Single-item Department Entry<br />
If a Department Key is programmed with Single-item status, an entry through the key immediately finalizes the<br />
sale as cash and issues a receipt without operating a media key.<br />
Such keys are operated in the same way as ordinary (itemized) Department Keys already described, except that<br />
Repeat Entry is not possible using Single-item Department Keys.<br />
NOTES: 1. A sale item entry through this key will automatically finalize the sale as cash outside a sale (i.e.<br />
when no other items have been entered within one receipt sequence). However, it will function<br />
just as an Itemized Key if operated inside a sale.<br />
2. Quantity Extension and SPP are also possible using Single-item Department Keys.<br />
18.4 PLU (Price-Look-Up)<br />
<strong>TEC</strong> STORE<br />
1343 PEACH DRIVE<br />
PHONE: 87-6437<br />
Open 8:00am to 7:00pm<br />
Closed: every Wednesday<br />
11-28-1997 #112300<br />
DP05 2.00-<br />
CASH 2.00-<br />
JONES 0138 10:07TM<br />
A “PLU” is an individual merchandise item programmed with its own item code (PLU Code), its link department<br />
(and mostly with a Preset Price). By programming PLUs, you can enter an individual item by entering its PLU<br />
Code (which should be written on the price tag of the item), instead of entering the price through a Department<br />
Key. By taking PLUs Reports, you can analyze the sales data of each individual item.<br />
18.4.1 Programmings regarding PLU Keys<br />
■ Programming PLU Table<br />
PLU<br />
PLU Preset-<br />
(PLU Key) Code Key<br />
(PLU Preset-code Key)<br />
Condition for Programming: To change settings of a PLU: When the required PLU sales total memory is zero<br />
(i.e. when no sales are made or after a PLU Reset Report is taken to reset the<br />
sales data of the PLU into zero) Refer to NOTE on “Condition” on page 11-1.<br />
To add new PLUs or to change PLU name only:<br />
Any time outside a sale. Must be signed off in Cashier Signing Method. (In other<br />
methods, a Cashier Key may or may not be set to ON.) Refer to Chapter 16.
18. SETTING PREPARATION OF EACH KEY, AND TRANSACTION ENTRIES<br />
Programming Procedure: Turn the Control Lock to the SET position using the MA key.<br />
4 @/FOR<br />
Declaration of Program<br />
No. 4 for PLU Table<br />
programming<br />
Address 1:<br />
Link Department<br />
1<br />
2<br />
4<br />
Address 2:<br />
PLU Name<br />
Address No.<br />
NOTE 1<br />
#/NS<br />
Repeat for programming other PLUs. (NOTE 2)<br />
ST<br />
ST<br />
Address 4:<br />
Preset Price<br />
ST<br />
Address 5:<br />
Whole Package Quantity<br />
NOTE 3<br />
PLU<br />
Department Code;<br />
1 to 40<br />
18-17<br />
#/NS<br />
Character Entries ST<br />
max. 12 characters (See Character<br />
Entries at the beginning of Chapter 13.)<br />
. . .<br />
Preset Price <strong>Ma</strong>x. 6 digits;<br />
0 to 999999<br />
To set Open-price PLU<br />
#/NS<br />
EO1-11137<br />
18.4 PLU (Price-Look-Up)<br />
5 ST<br />
#/NS<br />
AT/TL<br />
Whole Package Quantity;<br />
1 to 99<br />
NOTES: 1. “Address No.” designation located after the key operation “4 [@/FOR]” can be omitted if unnecessary.<br />
When an address No. (1, 2, 4 or 5) is designated, the programming of the designated<br />
address will be automatically repeated for multiple PLUs.<br />
2. <strong>Ma</strong>x. 500 PLUs are available when the RAM capacity is 32 KB. (Model Name: MA-<strong>1350</strong>-1-S-XX)<br />
<strong>Ma</strong>x. 1000 PLUs are available when the following two conditions have been satisfied.<br />
• RAM capacity is 128KB. (Model Name: MA-<strong>1350</strong>-1E-S-XX)<br />
• The program option “Expansion of the number of the PLUs” is selected.<br />
(Refer to Chapter 22. SYSTEM OPTION SETTING, Address 23 - Bit 1 on page 22-26.)
18. SETTING PREPARATION OF EACH KEY, AND TRANSACTION ENTRIES<br />
( 2 ST )<br />
( 1 ST )<br />
( 2 ST )<br />
6 #/NS<br />
4 #/NS<br />
( 5 ST )<br />
AT/TL<br />
3 #/NS<br />
18-18<br />
P04<br />
0100<br />
PLU100<br />
#01 1<br />
#02 Pork<br />
#04 2.00@<br />
0101<br />
PLU101<br />
#01 1<br />
#02 Beef<br />
#04 3.00@<br />
0200<br />
PLU200<br />
#01 2<br />
#02 Salmon<br />
#04 4.00@<br />
0201<br />
PLU201<br />
#01 2<br />
#02 Shrimp<br />
#04 2.00@<br />
0300<br />
PLU300<br />
#01 3<br />
#02 Coke-A<br />
#04 0.80@<br />
0301<br />
PLU301<br />
#01 3<br />
#02 Coke-B<br />
#04 1.00@<br />
0400<br />
PLU400<br />
#01 4<br />
#02 Bun-A<br />
#04 1.00@<br />
#05 2<br />
0401<br />
PLU401<br />
#01 4<br />
#02 Bun-B<br />
#04 1.50@<br />
#05 3<br />
0500<br />
PLU500<br />
#01 5<br />
#04 0.50@<br />
009<br />
0029 13:12TM<br />
EO1-11137<br />
3. When sequentially programming the PLUs, the code specification can be omitted. When it is<br />
omitted at the very first PLU, PLU Code “1” is automatically assigned.<br />
4. The statuses (Positive/Negative Status, Tax Status, GST or Food Stamp Status and Itemized/<br />
Single-item Status) of each PLU is decided by the statuses of the Department to which the PLU<br />
is linked.<br />
5. If a PLU is linked to an Other <strong>Inc</strong>ome Department, entering the PLU in sales entry will cause an<br />
error.<br />
PLU Table Program Receipt Format:<br />
Key Operation: Control Lock: SET<br />
4 @/FOR<br />
1 0 0<br />
( 1 ST )<br />
4<br />
2<br />
PLU 1 2 #/NS (B)<br />
1 #/NS<br />
1 2 5 #/NS<br />
1 2 8 #/NS<br />
1<br />
2<br />
2 1 #/NS<br />
ST<br />
ST<br />
0<br />
0<br />
#/NS<br />
.....<br />
4 0 1 PLU<br />
(P)<br />
(o)<br />
(r)<br />
(k)<br />
4<br />
4<br />
1 3 1 #/NS<br />
1<br />
2 4 #/NS<br />
9 9 #/NS<br />
1 2 #/NS<br />
ST<br />
ST<br />
1 5 0 #/NS<br />
5 0 0<br />
( 1 ST )<br />
ST<br />
5<br />
PLU<br />
5 #/NS<br />
0 #/NS<br />
(u)<br />
(n)<br />
(-)<br />
(B)<br />
Total number of PLUs<br />
set in the memory<br />
18.4 PLU (Price-Look-Up)<br />
PLU Code<br />
Link Department No.<br />
PLU Name<br />
Preset Price<br />
Whole Package<br />
Quantity
18. SETTING PREPARATION OF EACH KEY, AND TRANSACTION ENTRIES<br />
■ Deleting Individual PLUs<br />
When any of the PLUs once programmed are not handled any more in the store, they can be deleted.<br />
4<br />
3<br />
PLU Code of PLU<br />
to be deleted<br />
18-19<br />
AT/TL<br />
PLU<br />
EO1-11137<br />
Condition for Deleting: When the required PLU sales total memory is zero (i.e. when no sales are made<br />
or after a PLU Reset Report is taken to reset the sales data of the PLU into zero)<br />
(refer to NOTE on “Condition” on page 11-1)<br />
Deleting Procedure: Turn the Control Lock to the SET position using the MA key.<br />
4 @/FOR<br />
Declaration same as PLU<br />
Programming on the<br />
preceding pages.<br />
ITEM<br />
CORR<br />
Repeat for other PLUs to be deleted, if any.<br />
PLU Code of the PLU<br />
to be deleted<br />
18.4 PLU (Price-Look-Up)<br />
AT/TL<br />
NOTES: 1. Deletions are possible PLU by PLU.<br />
2. If all the PLUs must be deleted (i.e., the PLU system itself is not necessary), close the [PLU]<br />
Key. (Refer to Chapter 14.)<br />
PLU Deletion Receipt Format:<br />
Key Operation Control Lock: SET<br />
@/FOR<br />
ITEM<br />
CORR<br />
0 0<br />
PLU<br />
<strong>TEC</strong> STORE<br />
1343 PEACH DRIVE<br />
PHONE: 87-6437<br />
Open 8:00am to 7:00pm<br />
Closed: every Wednesday<br />
11-28-1997 #112300<br />
P04<br />
PLU300<br />
--------CORR--------<br />
008<br />
0030 13:29TM<br />
PLU Code deleted<br />
Deletion Symbol Line<br />
Total number of PLUs remaining set in<br />
memory
18. SETTING PREPARATION OF EACH KEY, AND TRANSACTION ENTRIES<br />
AT/TL<br />
18-20<br />
EO1-11137<br />
■ Setting PLU Preset-code Key<br />
When there are any keys programmed as PLU Preset-code Keys (Key Code 96; refer to Chapter 14. OPTIONAL<br />
KEY SETTING) on the ECR Keyboard, and/or when the PLU Keyboard PK-2 (hardware option) is connected to<br />
the ECR, a PLU code may be preset to each of those keys in this operation. Refer to Chapter 14. OPTIONAL<br />
KEY SETTING on how to program the PLU Preset-code Key on the keyboard.<br />
Condition for Setting: Any time outside a sale. Must be signed off in the Cashier Signing Method. (In other<br />
methods, a Cashier Key may or may not be set to ON.) Refer to Chapter 16.<br />
Setting Procedure: Turn the Control Lock to the SET position using the MA key.<br />
2 7 @/FOR<br />
KEY<br />
AT/TL<br />
Declaration of Program<br />
No. 27 for PLU Presetcode<br />
Key Setting<br />
Repeatable for other keys.<br />
PLU Code<br />
Enter through Numeric<br />
Keys on the ECR Keyboard<br />
(Enter 0 to close the key)<br />
(Key Code 96)<br />
18.4 PLU (Price-Look-Up)<br />
NOTES: 1. If the PLU Code entry is skipped and a [KEY] is simply depressed in the above sequence, the<br />
preprogrammed PLU Code of the KEY will be displayed.<br />
2. If “0” is entered as PLU Code in the above sequence, the KEY will be closed. Pressing the closed<br />
KEY in sale entry will cause an error.<br />
PLU Preset-code Key Program Receipt Format:<br />
Key Operation: Control Lock: SET<br />
5<br />
2 7<br />
0<br />
0<br />
@/FOR<br />
Required<br />
Key<br />
Location Code (left side); refer to REMARKS<br />
1 and 2 on the next page.<br />
PLU Code assigned to the key (right side)<br />
<strong>TEC</strong> STORE<br />
1343 PEACH DRIVE<br />
PHONE: 87-6437<br />
Open 8:00am to 7:00pm<br />
Closed: every Wednesday<br />
11-28-1997 #0<br />
P27<br />
#116 0500<br />
0089 12:11TM
18. SETTING PREPARATION OF EACH KEY, AND TRANSACTION ENTRIES<br />
PK-2 KEYBOARD<br />
1 11 21 31 41 51 61 71 81 91 101 111 121<br />
2 12 22 32 42 52 62 72 82 92 102 112 122<br />
3 13 23 33 43 53 63 73 83 93 103 113 123<br />
4 14 24 34 44 54 64 74 84 94 104 114 124<br />
5 15 25 35 45 55 65 75 85 95 105 115 125<br />
6 16 26 36 46 56 66 76 86 96 106 116 126<br />
7 17 27 37 47 57 67 77 87 97 107 117 127<br />
8 18 28 38<br />
48 58 68 78 88 98 108 118 128<br />
9 19 29 39 49 59 69 79 89 99 109 119 129<br />
10 20 30 40 50 60 70 80 90 100 110 120 130<br />
18-21<br />
EO1-11137<br />
18.4 PLU (Price-Look-Up)<br />
REMARKS: 1. The Nos. 1 through 130 marked on the PK-2 Keyboard are the KEY Nos. to be printed on the left<br />
side of the program receipt issued in the operation on the preceding page. If each KEY is not set<br />
with a PLU Code, the auto-preset PLU Code identical to the initial KEY No. in the above figure<br />
will be active as its preset PLU Code<br />
ex.) KEY No. 1 ... PLU Code 1<br />
KEY No. 130 ... PLU Code 130<br />
2. When a PLU code is assigned to a PLU Preset-code Key on the ECR Keyboard in the operation<br />
on the preceding page, the Hardware Key Code which indicates the absolute location of the key<br />
will be printed to the left of the assigned PLU Code. Since it is hard to explain which location<br />
code corresponds to each key (due to an irregular numbering), it is suggested to verify the<br />
positioning by simply depressing the KEY and reading the code in the display (described in<br />
NOTE 1 on the preceding page). This reading operation is applied to the PK-2 Keyboard as well.
18. SETTING PREPARATION OF EACH KEY, AND TRANSACTION ENTRIES<br />
PLU Code max. 4 digits;<br />
1 to 9999<br />
NOTE 1<br />
PLU<br />
ST . . . #/NS<br />
AT/TL<br />
18-22<br />
EO1-11137<br />
■ Changing PLU Preset Prices or Whole Package Quantity<br />
When only changing preset prices and/or whole package quantities of PLUs as part of daily requirements, this<br />
operation is quicker than operating “Programming PLU Table”.<br />
Condition for Programming: Any time outside a sale. Must be signed off in the Cashier Signing Method. (In other<br />
methods, a Cashier Key may or may not be set to ON.) Refer to Chapter 16.<br />
Programming Procedure: Turn the Control Lock to the SET position using the MA key.<br />
Repeat for other PLUs if necessary.<br />
NOTE 3<br />
For non-SPP PLUs or for no change of Whole Package Quantity<br />
New Whole Package<br />
Quantity max. 2 digits;<br />
0 to 99<br />
NOTE 4<br />
New Preset Price<br />
max. 6 digits;<br />
0 to 999999¢<br />
NOTE 2<br />
For non-SPP PLUs or for no change of Whole Package Quantity<br />
New Whole Package<br />
Quantity max. 2 digits;<br />
0 to 99<br />
ST . . . PLU Preset-<br />
Code Key<br />
AT/TL<br />
New Preset Price<br />
max. 6 digits;<br />
0 to 999999¢<br />
18.4 PLU (Price-Look-Up)<br />
NOTES: 1. The PLU Codes must exist in the PLU table file already programmed.<br />
2. If “0” is entered as the New Preset Price, price of $0.00 is set. Neither price setting nor Whole<br />
Package Quantity changing are possible for Open-price PLUs in this operation.<br />
3. For sequentially accessing PLU Codes, the code specification can be omitted.<br />
4. The entry of “New Whole Package Quantity” is possible only for SPP-type PLUs (those already<br />
set with Whole Package Quantity). When the Whole Package Quantity is changed here, the New<br />
Preset Price (i.e., New Whole Package Price) must also be set here.<br />
PLU Preset Price Change using the PLU Preset-code Key:
18. SETTING PREPARATION OF EACH KEY, AND TRANSACTION ENTRIES<br />
PLU Price Change Setting Receipt Format:<br />
Key Operation: Control Lock: SET<br />
2 0 0<br />
PLU Code New Preset Price<br />
PLU<br />
18.4.2 Sale Item Entries of PLUs<br />
0 0 #/NS<br />
Various types of PLU entries are shown below.<br />
Use the REG Key to turn the Control Lock to “REG”.<br />
REG<br />
OFF<br />
SET<br />
X<br />
MGR<br />
■ Entry of One PLU Item<br />
1) Using the [PLU] key<br />
Open-price PLU<br />
PLU Code<br />
max. 4 digits;<br />
1 to 9999<br />
Preset-price PLU<br />
PLU Code<br />
max. 4 digits;<br />
1 to 9999<br />
-<br />
Z<br />
PLU<br />
5<br />
Cashier Sign ON is necessary or a Cashier Key must be set to ON.<br />
(Refer to Chapter 16.)<br />
If an error occurs here:<br />
Possible cause of error:<br />
• Undefined PLU Code has<br />
been entered.<br />
→ Check if the PLU Code is<br />
correct.<br />
PLU<br />
AT/TL<br />
. . . AMT<br />
Price max.<br />
7 digits<br />
18-23<br />
<strong>TEC</strong> STORE<br />
1343 PEACH DRIVE<br />
PHONE: 87-6437<br />
Open 8:00am to 7:00pm<br />
Closed: every Wednesday<br />
11-28-1997 #0<br />
P00<br />
PLU200 02 5.00<br />
Salmon<br />
PLU Code<br />
0096 12:25TM<br />
EO1-11137<br />
18.4 PLU (Price-Look-Up)<br />
Link Department No.<br />
New Preset Price<br />
PLU Name<br />
If an error occurs here:<br />
Possible cause of error:<br />
• Exceeding the price digit limit.<br />
→ Check the price.<br />
• The PLU Code entered is a Preset-price PLU.<br />
→ In that case the PLU item is already entered and<br />
printed on the [PLU] key depression. Check if<br />
the PLU Code and the price are correct.
18. SETTING PREPARATION OF EACH KEY, AND TRANSACTION ENTRIES<br />
2) Using [PLU Preset-code Key]<br />
Open-price PLU<br />
. . .<br />
Unit Price;<br />
<strong>Ma</strong>x. 7 digits<br />
Preset-price PLU<br />
PLU Preset-<br />
Code Key<br />
PLU Code<br />
Preset-price PLU<br />
PLU<br />
PLU<br />
PLU Name<br />
PLU<br />
. . . AMT<br />
Price<br />
PLU Code to repeat<br />
Pork 2.00 TF<br />
Status Symbol<br />
For the United States<br />
T: Taxable<br />
F: Food Stampable<br />
TF: Taxable and Food Stampable<br />
Blank: Not applicable to any of<br />
the above status<br />
For Canada<br />
F: GST Taxable<br />
P: PST Taxable<br />
FP: GST and PST Taxable<br />
Blank: Not applicable to any of<br />
the above status<br />
18-24<br />
Entered Price (or preset price)<br />
AMT<br />
to repeat<br />
Pork 2.00 TF<br />
Pork 2.00 TF<br />
EO1-11137<br />
18.4 PLU (Price-Look-Up)<br />
NOTE: [PLU Preset-code Key] can be provided on the ECR keyboard and/or the PK-2 keyboard (hardware<br />
option; PLU Keyboard). On how to install [PLU Preset-code Keys] on the keyboard, refer to Setting<br />
PLU Preset-code Key on page 18-20.<br />
■ PLU Repeat Entry<br />
Depress again the last key of the sequence for “Entry of One PLU Item” on the preceding page. The item entry<br />
is repeated as many times as the last key is depressed. (A negative PLU entry cannot be repeated.)<br />
1) Using the [PLU] key<br />
Open-price PLU<br />
PLU Preset-<br />
Code Key
18. SETTING PREPARATION OF EACH KEY, AND TRANSACTION ENTRIES<br />
2) Using [PLU Preset-code Key]<br />
Open-price PLU<br />
. . .<br />
Unit Price<br />
Preset-price PLU<br />
PLU Preset-<br />
Code Key<br />
Preset-price PLU<br />
PLU Preset-<br />
Code Key<br />
PLU Preset-<br />
Code Key<br />
To repeat<br />
PLU Preset-<br />
Code Key<br />
To repeat<br />
■ PLU Quantity Extension (Multiplication)<br />
When more than three or four items are to be entered with the same PLU item, the Quantity Extension<br />
(multiplication) is quicker than the Repeat Entry.<br />
1) Using the [PLU] key<br />
Open-price PLU<br />
PLU Code<br />
max. 4 digits;<br />
1 to 9999<br />
3 digits for integer<br />
(max.)<br />
Examples)<br />
123:<br />
23.4:<br />
1<br />
2<br />
0.234: ( 0 )<br />
2<br />
.<br />
3<br />
.<br />
PLU<br />
3 digits for<br />
decimal (max.)<br />
Required only for any<br />
decimal portion entry.<br />
3<br />
. . . @/FOR<br />
Quantity;<br />
max. 6 digits<br />
0.001 to 999.999<br />
.<br />
2<br />
4<br />
3<br />
4<br />
. . . @/FOR<br />
Quantity;<br />
max. 6 digits<br />
0.001 to 999.999<br />
PLU Code<br />
max. 4 digits;<br />
1 to 9999<br />
18-25<br />
If an error occurs here:<br />
Possible cause of error:<br />
• Product exceeding 7 digits.<br />
→ Check the Quantity.<br />
. . . AMT<br />
Unit Price<br />
max. 6 digits<br />
If an error occurs here:<br />
Possible cause of error:<br />
• Exceeding the digit limit<br />
PLU<br />
EO1-11137<br />
18.4 PLU (Price-Look-Up)<br />
If an error occurs here:<br />
Possible cause of error:<br />
• Exceeding the LC of the link<br />
Department<br />
→ Check the Unit Price.<br />
→ See Listing Capacity Open.<br />
• Product exceeding 7 digits.<br />
→ Check the Quantity and Unit<br />
Price.
18. SETTING PREPARATION OF EACH KEY, AND TRANSACTION ENTRIES<br />
2) Using [PLU Preset-code Key]<br />
Open-price PLU<br />
. . . @/FOR<br />
Quantity<br />
Preset-price PLU<br />
. . . @/FOR<br />
Quantity<br />
. . .<br />
Unit Price<br />
PLU Preset-<br />
Code Key<br />
18-26<br />
PLU Preset-<br />
Code Key<br />
EO1-11137<br />
NOTES: 1. The product obtained by Quantity Extension cannot be repeated.<br />
2. The decimal portion of the Quantity entry is processed down to the 2 digits below the decimal<br />
point. The fraction rounding at this time is fixed to ROUND OFF.<br />
3. You can select the rounding process of the fractions of the product (result of multiplication) --<br />
ROUND OFF (initial setting), ROUND UP, or ROUND DOWN. (Refer to Chapter 22. SYSTEM<br />
OPTION SETTING, Address 2 - Bits 1 and 2 on page 22-4.)<br />
Quantity<br />
4X 0.80 @<br />
Coke-A 3.20 T<br />
PLU Name<br />
Unit Price<br />
Product<br />
18.4 PLU (Price-Look-Up)
18. SETTING PREPARATION OF EACH KEY, AND TRANSACTION ENTRIES<br />
18-27<br />
EO1-11137<br />
■ PLU SPP (Split-Package-Pricing)<br />
This operation is used when a customer purchases only part but not all of the items in a PLU package (example;<br />
only two tomatoes in a priced package of three tomatoes). (Also, refer to “Department SPP” on page 18-15<br />
already described.)<br />
1) Using the [PLU] key<br />
Purchased Qty<br />
max. 3 digits<br />
(integer only)<br />
@/FOR<br />
2) Using [PLU Preset-code Key]<br />
Purchased Qty<br />
@/FOR<br />
Purchased Qty<br />
Open-price PLU of SPP Type<br />
PLU Code<br />
max. 4 digits; 1 to 9999<br />
Preset-price PLU of SPP Type<br />
PLU Code max. 4 digits;<br />
1 to 9999<br />
Open-price PLU of SPP Type<br />
. . .<br />
Whole<br />
Package Price<br />
PLU Preset-<br />
Code Key<br />
Preset-price PLU of SPP Type<br />
PLU Preset-<br />
Code Key<br />
5X 1.50/ 3<br />
Bun-B 2.50 T<br />
PLU . . . AMT<br />
PLU<br />
PLU Name Whole Package Price<br />
Whole<br />
Package Price<br />
max. 6 digits<br />
If an error occurs here:<br />
Possible cause of error:<br />
• Product exceeding 7 digits.<br />
→ Check the Purchased Qty.<br />
• The Purchased Qty contains<br />
decimal portion.<br />
→ Check the Purchased Qty.<br />
• The PLU is not a SPP-type PLU.<br />
→ Check the PLU Code.<br />
(The preset price is<br />
regarded as the Whole<br />
Package Price.)<br />
Whole Package Qty<br />
Product<br />
18.4 PLU (Price-Look-Up)
18. SETTING PREPARATION OF EACH KEY, AND TRANSACTION ENTRIES<br />
18-28<br />
EO1-11137<br />
18.5 PLU Price Shift Entry<br />
NOTES: 1. The product (final result amount) obtained by SPP cannot be repeated.<br />
2. The product must not exceed 7 digits.<br />
3. The rounding process of the fractions of the product is ROUND UP PRODUCT as initial status. It<br />
can be changed to ROUND UP ITEM PRICE (refer to Chapter 22. SYSTEM OPTION SETTING,<br />
Address 2 - Bit 3 on page 22-4.)<br />
4. PLU SPP is possible only using the PLUs of SPP Type (i.e. programmed with Whole Package<br />
Quantity).<br />
■ Single-item PLU Entry<br />
If a Department Key is programmed with Single-item status, an entry through a PLU which links to the<br />
Department immediately finalizes the sale as cash and issues a receipt without operating a media key (just as the<br />
operation using a Single-item Department Key).<br />
Such PLUs are operated in the same way as ordinary (itemized) PLUs already described, except that Repeat<br />
Entry is not possible using Single-item PLUs.<br />
NOTES: 1. An item entry through such a PLU will automatically finalize the sale as cash outside a sale (i.e.<br />
when no other items have been entered within one receipt sequence). However, it will function<br />
just as an Itemized PLU if operated inside a sale.<br />
2. Quantity Extension and SPP are also possible using Single-item PLUs.<br />
18.5 PLU Price Shift Entry<br />
<strong>TEC</strong> STORE<br />
1343 PEACH DRIVE<br />
PHONE: 87-6437<br />
Open 8:00am to 7:00pm<br />
Closed: every Wednesday<br />
11-28-1997 #112300<br />
PLU500 0.50-<br />
CASH 0.50-<br />
JONES 0142 10:45TM<br />
Depressing the [PRICE SHIFT] key designates a PLU item, adding the printed number (1 to 3) to an entered PLU<br />
code.<br />
PRICE<br />
SHIFT 1<br />
PRICE<br />
SHIFT 2<br />
PRICE<br />
SHIFT 3<br />
PRICE<br />
SHIFT 1<br />
to (PLU Price Shift 1 to 3 Keys)<br />
PRICE<br />
SHIFT 3<br />
PLU Entry (To enter a PLU item of the entered code plus 1)<br />
PLU Entry (To enter a PLU item of the entered code plus 2)<br />
PLU Entry (To enter a PLU item of the entered code plus 3)<br />
Example) When the PLU Code 200 is designated after the [PRICE SHIFT 2] is depressed, this sales transaction<br />
will result in the sales item entry of the PLU Code 202.<br />
NOTES: 1. Depressing the [C] key immediately after the [PRICE SHIFT] key results in the cancellation of the<br />
PLU Price Shift Entry.<br />
2. The [PRICE SHIFT] key can be depressed any number of times before the PLU Entry. The last<br />
depressed [PRICE SHIFT] key becomes effective.<br />
3. The current PLU Shift No. declared by each [PRICE SHIFT] key can be displayed instead of<br />
Department Code by the system option. For details, refer to Chapter 22. SYSTEM OPTION<br />
SETTING, Address 23 - Bit 6 on page 22-26.
18. SETTING PREPARATION OF EACH KEY, AND TRANSACTION ENTRIES<br />
18.6 Preset Price Open<br />
18-29<br />
EO1-11137<br />
When an open price must be entered through a Preset-price Department, use the [PR OPEN] (or [OPEN]) key to<br />
release the preset-price status temporarily. Then a price different from the preset-price can be entered for that<br />
entry only, in the way as operating an Open-price Department.<br />
Depress<br />
PR<br />
OPEN or OPEN prior to or any time during the entry sequence of the following operations for<br />
Open-price Departments (actually operating a Preset-price Department<br />
instead) already described:<br />
Entry of One Department Item<br />
Other <strong>Inc</strong>ome Department<br />
Department Quantity Extension<br />
Department SPP<br />
Single-item Department Entry<br />
NOTES: 1. The [PR OPEN] (or [OPEN]) key must be pressed, at the latest, before the final key of the<br />
required Department entry sequence.<br />
2. A price entry by Preset Price Open cannot be repeated. Even if the Preset-price Department Key<br />
that has just been used in a Preset Price Open entry sequence is again depressed, the preset<br />
price of the key will be entered but not the open price.<br />
3. The [OPEN] key is a dual-function key. By depressing it once, it functions as both [LC OPEN]<br />
and [PR OPEN]. For the LC Open function, see below.<br />
4. The Preset Price Open entry is not possible for any PLUs.<br />
18.7 Listing Capacity Open<br />
PR<br />
OPEN<br />
(Preset Open Key) OPEN (Open Key)<br />
LC<br />
OPEN<br />
18.6 Preset Price Open<br />
(Listing Capacity Open Key) OPEN (Open Key)<br />
As for setting LCs, see “Programming Department LCs” in the “Department Keys” section on page 18-7.<br />
When an item entry price exceeds the LC in sale entries, an error will result. To enter a price larger than the limit<br />
defined by the LC, use the [LC OPEN] or [OPEN] key.<br />
Depress<br />
LC<br />
OPEN<br />
prior to or any time during the entry sequence of the following operations for Open-price<br />
Departments and PLUs already described:<br />
Entry of One Department Item<br />
Department Repeat Entry<br />
Other <strong>Inc</strong>ome Department<br />
Department Quantity Extension<br />
Department SPP<br />
Single-item Department Entry<br />
Entry of One PLU Item<br />
PLU Repeat Entry<br />
PLU Quantity Extension<br />
Single-item PLU Entry<br />
NOTE: When [OPEN] key is used instead of [LC OPEN], Repeat Entry is not possible (because the [PR<br />
OPEN] key function also becomes effective).<br />
Please note that the [LC OPEN] or [OPEN] key must be pressed, at the latest, before the final key of the<br />
required Department or PLU entry sequence. The LC for the Department or PLU will be extended with two higher<br />
digits for that entry only. (If a price of further high digits must be entered, call for <strong>Ma</strong>nager Intervention. Refer to<br />
Chapter 19.)
18. SETTING PREPARATION OF EACH KEY, AND TRANSACTION ENTRIES<br />
18.8 Percent Charge, Percent Discount<br />
for % + rate<br />
Examples)<br />
7%:<br />
12%:<br />
8.55%:<br />
12.345%:<br />
18-30<br />
EO1-11137<br />
These keys are used to add or subtract a percent rate to or from an individual sale entry item or the entire sale.<br />
Each of the keys can function with a rate <strong>manual</strong>ly entered or a preset rate. To activate the preset rate entry, rate<br />
setting is necessary.<br />
18.8.1 Setting Preset Rate for % Keys<br />
Condition for Programming: Any time outside a sale. Must be signed off in the Cashier Signing Method. (In other<br />
methods, a Cashier Key may or may not be set to ON.) Refer to Chapter 16.<br />
Programming Procedure: Turn the Control Lock to the SET position using the MA key.<br />
for % - rate<br />
7<br />
1<br />
8<br />
2<br />
.<br />
This portion is required only when any<br />
decimal portion is contained in the rate.<br />
5<br />
5<br />
.<br />
.<br />
% rate 0 to 99.999<br />
1 2 . 3 4 5<br />
%+<br />
%+<br />
%-<br />
18.8 Percent Charge, Percent Discount<br />
(% + Key) %- (% - Key)<br />
To reset the rate once set: 0 When “0” is set, the % key will always require a <strong>manual</strong> rate entry to be<br />
operated in sale entries.<br />
<strong>TEC</strong> STORE<br />
1343 PEACH DRIVE<br />
PHONE: 87-6437<br />
Open 8:00am to 7:00pm<br />
Closed: every Wednesday<br />
11-28-1997 #0<br />
P00<br />
%+ 10%<br />
0099 12:28TM<br />
<strong>TEC</strong> STORE<br />
1343 PEACH DRIVE<br />
PHONE: 87-6437<br />
Open 8:00am to 7:00pm<br />
Closed: every Wednesday<br />
11-28-1997 #0<br />
%+ 10% is set.<br />
P00<br />
%- 5% %- 5% is set.<br />
0099 12:28TM
18. SETTING PREPARATION OF EACH KEY, AND TRANSACTION ENTRIES<br />
18.8.2 % Key Operations in Sale Entries<br />
Percent Operation on a Department, PLU Item or Previous Balance:<br />
Department or<br />
PLU Item Entry<br />
%+ (or %- ) (for the Preset Rate)<br />
18-31<br />
EO1-11137<br />
Positive Previous ( .<br />
) %+ (or %- ) (for the <strong>Ma</strong>nual<br />
Balance Entry Rate)<br />
(debit balance on<br />
customer)<br />
max. 2 dig.<br />
max. 3 dig.<br />
* See page 18-45.<br />
<strong>Ma</strong>nual Rate<br />
Percent Operation on Sale Total:<br />
Sale Item Entries ST %+ (or %-<br />
) (for the Preset Rate)<br />
max. 2 dig.<br />
( .<br />
)<br />
<strong>Ma</strong>nual Rate<br />
max. 3 dig.<br />
18.8 Percent Charge, Percent Discount<br />
%+<br />
(for the <strong>Ma</strong>nual<br />
Rate)<br />
NOTES: 1. When a rate is <strong>manual</strong>ly entered through a % key preset with a rate, the <strong>manual</strong> rate prevails.<br />
2. A % entry will cause an error if operated after an Other <strong>Inc</strong>ome Department or Negative<br />
Department entry.<br />
3. A % entry after obtaining a Subtotal is usually allowed only once. However. it can be<br />
programmed to allow multiple times. (Refer to Chapter 22. SYSTEM OPTION SETTING,<br />
Address 19 - Bit 6 on page 22-21.)<br />
4. You can select the rounding process of the fractions of the product (result of multiplication) --<br />
ROUND OFF (initial setting), ROUND UP, or ROUND DOWN. (Refer to Chapter 22. SYSTEM<br />
OPTION SETTING, Address 2 - Bits 1 and 2 on page 22-4.)<br />
5. The Percent Discount operation can be programmed to require the MGR position of the Control<br />
Lock. (Refer to 22. SYSTEM OPTION SETTING, Address 4 - Bit 4 on page 22-6.)<br />
6. Each of the % keys has its own Tax (PST) Status, GST Status, and Food Stamp Status<br />
programmed. Refer to “Tax Status Modification” (page 18-34) and “Food Stamp<br />
Modification” (page 18-35) for reversing the status.<br />
DRINK 6.00 T<br />
%-<br />
5% 0.30-<br />
Dept. 3 (DRINK) $6.00<br />
5% on $6.00 = $0.30 is<br />
discounted.<br />
(or %- )<br />
SUBTL 15.00<br />
%+<br />
10% 1.50<br />
Subtotal $15.00<br />
obtained<br />
10% on $15.00<br />
= $1.50 is<br />
added.
18. SETTING PREPARATION OF EACH KEY, AND TRANSACTION ENTRIES<br />
18.9 Dollar Discount<br />
DOLL<br />
DISC<br />
Dollar Discount is used to subtract an amount from the sale total.<br />
Sale Item Entries ( ST )<br />
(Dollar Discount Key)<br />
. . .<br />
Amount to be discounted<br />
(max. 7 digits)<br />
18-32<br />
DOLL<br />
DISC<br />
EO1-11137<br />
18.9 Dollar Discount<br />
NOTES: 1. For entering a Dollar Discount that will cause the sale total into negative (credit balance), refer to<br />
Chapter 22. SYSTEM OPTION SETTING, Address 2 - Bit 5 on page 22-4:<br />
If status “Credit Balance Prohibited” (initial status) is selected:<br />
Over-subtraction of the sale total by Dollar Discount causes an error.<br />
If status “Credit Balance Allowed” is selected:<br />
Over-subtraction of the sale total by Dollar Discount is possible.<br />
2. The Dollar Discount operation can be programmed to require the MGR position of the Control<br />
Lock. (Refer to Chapter 22. SYSTEM OPTION SETTING, Address 4 - Bit 3 on page 22-6.)<br />
3. The [DOLL DISC] key has its own Tax (PST) Status, GST Status, and Food Stamp Status<br />
programmed. Refer to “Tax Status Modification” (page 18-34) and “Food Stamp<br />
Modification” (page 18-35) for reversing the status.<br />
18.10 Vendor Coupon<br />
VND<br />
CPN<br />
DISC 0.40- An amount of $0.40 is entered<br />
as Dollar Discount<br />
(Vendor Coupon Key)<br />
This is a motorized key to enter the amount of vendor coupons received from the customer. The amount entered<br />
through this key will be negative and subtract from the sale total.<br />
18.10.1 Setting Vendor Coupon Limit Amount<br />
Condition for Programming: After Financial Daily Reset. (Refer to NOTE on “Condition” on page 11-1)<br />
Programming Procedure: Turn the Control Lock to the SET position using the MA key.<br />
Limit Amount <strong>Ma</strong>x. 4<br />
digits; 0 to 9999<br />
VND<br />
CPN<br />
NOTES: 1. To reset the vendor coupon limit amount, enter 0 before the [VND CPN] key depression in the<br />
above operation.<br />
2. The vendor coupon limit amount is cleared in MGR mode. It cannot be cleared by the [LC OPEN]<br />
(or [OPEN]) key.
18. SETTING PREPARATION OF EACH KEY, AND TRANSACTION ENTRIES<br />
Example) To set the limit amount ($20.00) for the [VND CPN] key:<br />
Key Operation: Control Lock: SET<br />
2<br />
0 0<br />
0<br />
VND<br />
CPN<br />
18.10.2 Vendor Coupon Operation in Sale Entries<br />
Sale Item Entries ( ST )<br />
. . .<br />
Vendor Coupon Amount<br />
18-33<br />
<strong>TEC</strong> STORE<br />
1343 PEACH DRIVE<br />
PHONE: 87-6437<br />
Open 8:00am to 7:00pm<br />
Closed: every Wednesday<br />
11-28-1997 #112300<br />
P00<br />
V.CPN 20.00<br />
VND<br />
CPN<br />
0106 12:39TM<br />
EO1-11137<br />
18.11 Store Coupon<br />
NOTES: 1. For entering a Vendor Coupon amount that will cause the sale total into negative (Credit<br />
Balance), refer to Chapter 22. SYSTEM OPTION SETTING, Address 2 - Bit 5 on page 22-4:<br />
If status “Credit Balance Prohibited” (initial status) is selected:<br />
Over-subtraction of the sale total by Vendor Coupon causes an error.<br />
If status “Credit Balance Allowed” is selected:<br />
Over-subtraction of the sale total by Vendor Coupon is possible.<br />
2. The Vendor Coupon operation can be programmed to require the MGR position of the Control<br />
Lock. (Refer to Chapter 22. SYSTEM OPTION SETTING, Address 12 - Bit 5 on page 22-13.)<br />
3. The [VND CPN] key has its own Tax (PST) Status, GST Status, and Food Stamp Status<br />
programmed. Refer to “Tax Status Modification” (page 18-34) and “Food Stamp<br />
Modification” (page 18-35) for reversing the status.<br />
4. When a limit amount has been programmed for the [VND CPN] key, an amount exceeding the<br />
limit amount cannot be entered in the REG position. However, in the MGR or - position, the limit<br />
amount programmed is ignored and max. 7-digit amount can be entered through the [VND CPN]<br />
key.<br />
An amount of $1.00 is entered<br />
as Vendor Coupon.<br />
18.11 Store Coupon<br />
STR<br />
CPN<br />
V.CPN 1.00-<br />
(Store Coupon Key)<br />
This is a declaration key to subtract a store coupon amount redeemed through a department. Store coupon<br />
operations will net the department through which they are redeemed. To operate, depress the [STR CPN] key<br />
before the coupon amount then operate the appropriate department (but not any PLU).<br />
Depress<br />
STR<br />
CPN<br />
prior to or any time during the entry sequence of the following operations for Open-price or<br />
Preset-price Departments already described:<br />
Entry of One Department Item<br />
Department Quantity Extension<br />
Single-item Department Entry
18. SETTING PREPARATION OF EACH KEY, AND TRANSACTION ENTRIES<br />
18-34<br />
EO1-11137<br />
18.12 Tax Status Modification<br />
NOTES: 1. The [STR CPN] key must be pressed, at the latest, before the final key of the required<br />
Department entry sequence.<br />
2. The store coupon amount must be entered inside a sale and must not exceed the sale total<br />
unless the “Credit Balance Allowed” option is selected. (Refer to Chapter 22. SYSTEM OPTION<br />
SETTING, Address 2 - Bit 5 on page 22-4.)<br />
3. Quantity extension (multiplication) is permitted with this key, but no decimal quantity will be<br />
accepted.<br />
4. None of PLUs, Negative Departments, Other <strong>Inc</strong>ome Departments, Void, Returned Merchandise<br />
entries are possible along with the [STR CPN] key within one item.<br />
5. The Store Coupon amount will subtract the Department Amount but will not affect the Department<br />
Item Count in the report memory.<br />
6. The Store Coupon operation can be programmed to require the MGR position of the Control<br />
Lock. (Refer to Chapter 22. SYSTEM OPTION SETTING, Address 12 - Bit 7 on page 22-13.)<br />
7. The [STR CPN] key has its own Tax (PST) Status, GST Status, and Food Stamp Status<br />
programmed. Refer to “Tax Status Modification” (below) and “Food Stamp Modification”<br />
(page 18-35) for reversing the status.<br />
S.CPN<br />
FISH 1.00-<br />
18.12 Tax Status Modification TX1/M Tax (PST) 1 Modifier Key<br />
TX2/M<br />
TX3/M<br />
GST/M<br />
Tax (PST) 2 Modifier Key<br />
Tax (PST) 3 Modifier Key<br />
GST Modifier Key<br />
Store Coupon $1.00 is entered<br />
through the Dept. 2 (FISH).<br />
Each of these keys is used to reverse the tax status of a required Department or PLU item to be entered in a<br />
sale. It is also used to reverse the tax status of [%+], [%-], [DOLL DISC], [VND CPN], and [STR CPN] keys. The<br />
Modifier Keys are effective only for one entry.<br />
• Depress the required Modifier Key(s) prior to or any time during (before the final key at the latest) the entry<br />
sequence of the following operations for Departments and PLUs already described. More than one Modifier<br />
Keys can be depressed for the same item entry:<br />
Entry of One Department Item<br />
Department Repeat Entry The tax status of the<br />
Other <strong>Inc</strong>ome Department Department (refer to “Pro-<br />
Department Quantity Extension gramming Department<br />
Department SPP Keys” on page 18-3) is<br />
Single-item Department Entry reversed:<br />
Entry of One PLU Item • Taxable →<br />
PLU Repeat Entry Non-taxable<br />
PLU Quantity Extension • Non-taxable →<br />
PLU SPP Taxable<br />
Single-item PLU Entry
18. SETTING PREPARATION OF EACH KEY, AND TRANSACTION ENTRIES<br />
18-35<br />
EO1-11137<br />
• Depress the required Modifier Key(s) prior to or any time during (before the final key at the latest) the entry<br />
sequence of the following operations for Departments and PLUs already described. More than one Modifier<br />
Keys can be depressed for the same item entry:<br />
Percent Charge The tax status of each key (refer to Chapter<br />
Percent Discount 22. SYSTEM OPTION SETTING,<br />
Dollar Discount Addresses 3 & 14 and supplementary<br />
Vendor Coupon descriptions on pages 22-5 and 22-16) is<br />
Store Coupon reversed:<br />
• Taxable → Non-taxable<br />
• Non-taxable → Taxable<br />
18.13 Food Stamp Modification<br />
This key is used to reverse the Food Stamp status (Food-stampable or Non-stampable) of a required Department<br />
or PLU item to be entered in a sale. It is also used to reverse the Food Stamp status of [%+], [%-], [DOLL DISC],<br />
[VND CPN], and [STR CPN] keys.<br />
The [FS/M] key operates the same as Tax Modifier Keys on the preceding page.<br />
NOTES: 1. As for the Food Stamp status of each Department, refer to “Programming Department Status”<br />
on page 18-3. The Food Stamp status of each PLU is determined by the status of the link<br />
Department.<br />
2. As for the Food Stamp status of each of [% +], [% -], [DOLL DISC], [VND CPN], and [STR CPN]<br />
keys, refer to Chapter 22. SYSTEM OPTION SETTING, Addresses 3 & 14 and supplementary<br />
descriptions on pages 22-5 and 22-16.<br />
18.14 Item Correction (Last Line Voiding)<br />
FS/M (Food Stamp Modifier Key)<br />
ITEM<br />
CORR<br />
The last line item (any of the following items that has just been entered within the current transaction) can be<br />
deleted by the [ITEM CORR] key.<br />
Entry of One Department Item<br />
Department Repeat Entry<br />
Other <strong>Inc</strong>ome Department<br />
Department Quantity Extension<br />
Department SPP<br />
Entry of One PLU Item<br />
PLU Repeat Entry<br />
PLU Quantity Extensio<br />
PLU SPP<br />
Percent Charge, Percent Discount<br />
Dollar Discount<br />
Vendor Coupon<br />
Store Coupon<br />
Received-on-Account (Item only)<br />
Paid Out (Item only)<br />
<strong>Ma</strong>nual Tax<br />
Previous Balance<br />
(Item Correct Key)<br />
18.13 Food Stamp Modification<br />
ITEM<br />
CORR<br />
NOTES: 1. When the [ITEM CORR] key is depressed after repeated items, only the last item of the repeated<br />
is deleted, decrementing the “RPT” count in the display.<br />
2. When the [ITEM CORR] key is depressed after a Quantity Extension or SPP, the entire product<br />
(result of the calculation) is deleted.<br />
3. Void, Returned Merchandise items cannot be deleted by the [ITEM CORR] key. Neither can any<br />
media amount be item-corrected even if it is short-tendered.
18. SETTING PREPARATION OF EACH KEY, AND TRANSACTION ENTRIES<br />
18.15 Returned Merchandise<br />
BAKERY 6.00 T<br />
--------CORR--------<br />
RTN<br />
MDSE<br />
18-36<br />
(Returned Merchandise Key)<br />
Dept. 4 (BAKERY) $6.00 is<br />
entered but item-corrected.<br />
EO1-11137<br />
18.15 Returned Merchandise<br />
A Department or PLU item once purchased (i.e. the sale is already finalized) then returned by a customer can be<br />
entered as a Returned Merchandise item. If the [VOID] key is not installed on your register, this function may also<br />
used as Void entry (refer to Void entries on the next page).<br />
• Depress the [RTN MDSE] key prior to or any time (before the final key at the latest) during a required<br />
Department or PLU item entry sequence. (The only difference is a depression of the [RTN MDSE] key):<br />
Entry of One Department Item<br />
Other <strong>Inc</strong>ome Department<br />
Department Quantity Extension<br />
Department SPP<br />
Single-item Department Entry<br />
Entry of One PLU Item<br />
PLU Quantity Extension<br />
PLU SPP<br />
Single-item PLU Entry<br />
(Repeat entry is not possible using the [RTN MDSE] key.)<br />
RTN<br />
MEAT 7.00-TF Dept. 1 (MEAT) $7.00 is<br />
entered but returned.<br />
• When an item once purchased with a Percent Charge or Percent Discount is returned, the item can be<br />
returned with the Percent Charge/Discount by attaching the [RTN MDSE] key to the same entry procedure as<br />
purchase:<br />
At purchase At return<br />
MEAT 7.00 TF<br />
%-<br />
5% 0.35-<br />
RTN<br />
MEAT 7.00-TF<br />
%-<br />
5% 0.35<br />
The process of the amount resulted from % calculation is reversed at Return.<br />
NOTES: 1. The Returned Merchandise entries are possible outside as well as inside a sale.<br />
2. Over-subtraction of the sale is allowed for Returned Merchandise entries.<br />
3. Neither Negative Department nor Negative PLU items can be entered as Returned Merchandise.<br />
4. A Returned Merchandise cannot be item-corrected.<br />
5. The Returned Merchandise operation requires the MGR position of the Control Lock if so programmed<br />
by System Option. (Refer to Chapter 22. SYSTEM OPTION SETTING, Address 4 - Bit<br />
1 on page 22-6.)
18. SETTING PREPARATION OF EACH KEY, AND TRANSACTION ENTRIES<br />
18.16 Void (Designated Line Voiding)<br />
18-37<br />
(Void Key)<br />
EO1-11137<br />
18.16 Void (Designated Line Voiding)<br />
A Department or PLU item entered before the last item but canceled in the current sale (which can no longer be<br />
deleted by [ITEM CORR]) is entered as a Void item using the [VOID] key. If this key is not installed on your<br />
register, the [RTN MDSE] key may be used for voiding purposes (refer to the preceding page ). If both [VOID]<br />
and [RTN MDSE] are installed, [VOID] should be used to cancel (delete) an item already entered within the<br />
current transaction while [RTN MDSE] should be used to record an item that was purchased in a past sale and is<br />
now returned.<br />
• Depress the [VOID] key prior to or any time (before the final key at the latest) during a required Department or<br />
PLU item entry sequence. (The only difference is a depression of the [VOID] key):<br />
Entry of One Department Item<br />
Other <strong>Inc</strong>ome Department<br />
Department Quantity Extension<br />
Department SPP<br />
Single-item Department Entry<br />
Entry of One PLU Item<br />
PLU Quantity Extension<br />
PLU SPP<br />
Single-item PLU Entry<br />
(Repeat entry is not possible using the [VOID] key.)<br />
VOID<br />
VOID<br />
MEAT 7.00-TF Dept. 1 (MEAT) $7.00 is<br />
entered but voided.<br />
• When an item previously entered with a Percent Charge or Percent Discount is canceled, the item can be<br />
voided with the Percent Charge/Discount by attaching the [VOID] key to the same entry procedure as the<br />
previous entry:<br />
At Entry At Void<br />
MEAT 7.00 TF<br />
%-<br />
5% 0.35-<br />
VOID<br />
MEAT 7.00-TF<br />
%-<br />
5% 0.35<br />
The process of the amount resulted from % calculation is reversed at Return.<br />
NOTES: 1. The Void entries are usually possible only inside a sale. However, when the option “Credit<br />
Balance Allowed” is selected, they are allowed outside a sale as well and over-subtraction of the<br />
sale is also allowed. (Refer to Chapter 22. SYSTEM OPTION SETTING, Address 2 - Bit 5 on<br />
page 22-4.)<br />
2. Neither Negative Department nor Negative PLU items can be entered as Void items.<br />
3. A Void entry cannot be item-corrected.
18. SETTING PREPARATION OF EACH KEY, AND TRANSACTION ENTRIES<br />
18.17 All Void (Transaction Cancel)<br />
(or # )<br />
18-38<br />
ALL<br />
VOID<br />
(All Void Key)<br />
EO1-11137<br />
18.17 All Void (Transaction Cancel)<br />
When some items have already been entered in the current sale and the customer cancels the entire contents of<br />
the sale, the [ALL VOID] key is used.<br />
Sale Item Entries<br />
ALL<br />
VOID<br />
Declares a<br />
Transaction<br />
Cancel.<br />
ITEM<br />
CORR (Executes the Transaction Cancel, clears the displayed<br />
data, and an All Void receipt is issued.)<br />
<strong>TEC</strong> STORE<br />
1343 PEACH DRIVE<br />
PHONE: 87-6437<br />
C<br />
Open 8:00am to 7:00pm<br />
(Clears the Transaction Cancel<br />
declaration to continue the sale.)<br />
Closed: every Wednesday<br />
11-28-1997 #112300<br />
FISH 4.50 TF<br />
14X 0.80 @<br />
Coke-A 11.20 T<br />
Beef 3.00 TF<br />
SUBTL 18.70<br />
∗ ALL VD ∗<br />
JONES 0154 15:19TM<br />
Items already entered<br />
in this sale.<br />
Prints the subtotal<br />
when Transaction<br />
Cancel is<br />
executed.<br />
All Void (Transaction<br />
Cancel) Symbol Line<br />
NOTES: 1. The sale is canceled, therefore, no payment should occur. However, subtotal amount printed on<br />
the All Void receipt is processed into the “All Void” total of the report memory.<br />
2. The All Void operation is no longer acceptable when any media key (such as [AT/TL]) is entered<br />
including short-tendering.<br />
3. If Tax Exempt (using the [EX] key) is entered, the sale can no longer be all-voided.<br />
4. The All Void function is not effective for Received-on-Account or Paid Out transactions.<br />
5. When more than 20 items have been entered in the current sale, the All Void function is no<br />
longer effective.<br />
6. The All Void operation can be programmed to require the MGR position of the Control Lock.<br />
(Refer to Chapter 22. SYSTEM OPTION SETTING, Address 4 - Bit 8 on page 22-6.)<br />
18.18 Non-add Number Print #/NS (Non-add Number Print/No-sale Key)<br />
#<br />
(Non-add Number Print Key)<br />
When any code number is to be recorded for future reference, such as a Check No., Customer No., Credit Card<br />
No., House Charge Account No., etc., a Non-add Number Print function is used.<br />
Code Number; max. 8 digits<br />
(Decimal Point is not allowed.)<br />
Example) 1 2 3 0 0 0<br />
#/NS<br />
#123000
18. SETTING PREPARATION OF EACH KEY, AND TRANSACTION ENTRIES<br />
18-39<br />
EO1-11137<br />
18.19 Subtotal Read & Print<br />
NOTES: 1. A Non-add Number can be entered at the starting of a sale or any time during a sale if it is not<br />
finalized. Usually, Non-add number entry is allowed multiple times in one sale. However, it can be<br />
programmed to be allowed only once (refer to Chapter 22. SYSTEM OPTION SETTING,<br />
Address 14 - Bit 7 on page 22-16).<br />
2. The entered number will not affect any sales data. It is merely a print for reference.<br />
3. The preceding zeros, if any, will not be printed. For example, if “012300” is entered, “12300” is<br />
printed.<br />
4. Usually, Non-add Number entries are prohibited at the starting of a No-sale transaction (i.e, Nonadd<br />
Numbers cannot be printed on a No-sale receipt). However, a No-sale entry can be<br />
programmed to be allowed after a Non-add Number entry (refer to Chapter 22. SYSTEM<br />
OPTION SETTING, Address 18 - Bit 1 on page 22-20.)<br />
5. The [#] key is operated only for the Non-add Number Print function in REG, MGR, or - mode.<br />
The [#/NS] key operates and functions the same as [#] in this case. When this key is simply<br />
depressed without a prior numeric entry in REG or MGR mode, it functions as the [NS] (No-sale)<br />
key. (Refer to the section of No-sale on page 18-48.)<br />
18.19 Subtotal Read & Print<br />
ST (Subtotal Key)<br />
When the sale total of the current sale is to be read by the customer’s request or the operator’s requirement, the<br />
[ST] key is used.<br />
Sale Item Entries ST ............................. The sale total of the items so far entered is displayed in<br />
the AMOUNT portion with the “ST” lamp illuminated. At<br />
the same time, the sale total is printed. The sale is not<br />
finalized yet.<br />
SUBTL 22.91 Subtotal Amount<br />
NOTES: 1. When the [ST] key is depressed, the sale total is displayed and printed. However, you can select<br />
not to print (display only) by a system option. (Refer to Chapter 22. SYSTEM OPTION SETTING,<br />
Address 1 - Bit 3 on page 22-3.) Even if this non-print option is selected, the subtotal amount is<br />
automatically printed when a Percent Charge/Discount or Dollar Discount entry follows a subtotal<br />
entry.<br />
2. Usually, both displayed subtotal and printed subtotal include no taxes due (Tax (PST)/GST<br />
exclusive). However, the subtotal amount including taxes due can be displayed by the system<br />
option. (Refer to Chapter 22. SYSTEM OPTION SETTING, Address 18 - Bit 4 on page 22-20.)<br />
3. If the system option “Taxable Total Compulsory” is selected with the function of subtotal display<br />
including taxes due (refer to NOTE 2 above), the [ST] key must always be depressed before<br />
operating the media keys for finalizing a sale. (Refer to Chapter 22. SYSTEM OPTION SETTING,<br />
Address 2 - Bit 6 on page 22-4.)<br />
4. When the [ST] key is depressed more than once consecutively, the subtotal amount is only<br />
displayed but no print occurs from the second time on. If the [C] key depressed to clear a<br />
numeric entry or error, etc. after a subtotal is once obtained, the subtotal amount will be again<br />
displayed.<br />
5. When the [ST] key is depressed during the Previous Balance Entry, the subtotal excluding the<br />
previous balance amount will be displayed.
18. SETTING PREPARATION OF EACH KEY, AND TRANSACTION ENTRIES<br />
18.20 Taxable Total Read<br />
18.22 Food Stamp Tender<br />
18-40<br />
EO1-11137<br />
Sale Item Entries<br />
TXBL<br />
TL ............................. The sale total of the items so far entered is displayed in<br />
the AMOUNT portion with the “ST” lamp illuminated.<br />
The sale total amount displayed includes taxes due<br />
(Tax (PST)/GST). No print occurs. The sale is not<br />
finalized yet.<br />
NOTES: 1. Displayed sale total amount includes taxes due (Tax(PST)/GST). No print occurs.<br />
2. If the system option “Taxable Total Compulsory” is selected, the [TXBL TL] key must always be<br />
depressed before operating the media keys for finalizing a sale. (Refer to Chapter 22. SYSTEM<br />
OPTION SETTING, Address 2 - Bit 6 on page 22-4.)<br />
3. If the [C] key is depressed to clear a numeric entry or error, etc. after a taxable total is once<br />
obtained, the taxable total amount will be again displayed.<br />
4. When the [TXBL TL] key is depressed during the Previous Balance Entry, the taxable total<br />
excluding the previous balance amount will be displayed.<br />
18.21 <strong>Ma</strong>nual Tax Entry<br />
TXBL<br />
TL<br />
(Taxable Total Key)<br />
TAX (<strong>Ma</strong>nual Tax Key)<br />
18.20 Taxable Total Read<br />
Sale Item Entries . . . TAX ..................... The entered tax amount is printed and<br />
Tax Amount required<br />
(max. 7 digits)<br />
added to the sale.<br />
NOTES: 1. The [TAX] key should be used in the single tax area. It should not be used in the dual tax area<br />
nor the triple tax area.<br />
2. A <strong>Ma</strong>nual Tax amount entered can be item-corrected, but cannot be deleted [VOID] or [RTN<br />
MDSE].<br />
TAX4 0.12 A <strong>Ma</strong>nual Tax of $0.12 is entered. The<br />
“TAX 4” symbol indicates <strong>Ma</strong>nual Tax.<br />
FSTL<br />
TEND<br />
(Food Stampable Total Read/Tender Key)<br />
When a customer wants to pay for his/her sale in food stamps, this key is used to read the food-stampable total<br />
and to tender an amount in food stamps. If the sale is to be paid for in combination of food stamps and other<br />
media (cash, check, etc.), Food Stamp Tender must be operated first then operate other media total/tender<br />
operations referring to the following pages.
18. SETTING PREPARATION OF EACH KEY, AND TRANSACTION ENTRIES<br />
All the items are<br />
entered for the<br />
customer.<br />
. . .<br />
Amount of Food<br />
Stamps actually tendered<br />
(max. 8 digits)<br />
NOTE 2<br />
FSTL<br />
TEND<br />
. . .<br />
Displays (and prints) the Food-stampable<br />
Total amount, with the “TL” lamp illuminated.<br />
NOTES 1, 5<br />
FSTL<br />
TEND<br />
When the sale is not finalized<br />
(i.e., short-tendered):<br />
When the sale is finalized<br />
(i.e., equal-or over-tendered):<br />
18-41<br />
EO1-11137<br />
18.22 Food Stamp Tender<br />
The balance due (shortage amount) is<br />
displayed. Operate other media total/<br />
tender operations.<br />
NOTE 3<br />
The sale is finalized, a receipt is<br />
issued, and the change amount is<br />
displayed.<br />
NOTE 4<br />
NOTES: 1. The displayed Food-stampable Total is the limit amount to be paid in food stamps. Accurately,<br />
however, the actual limit may become this displayed total + 99¢ due to the combination of<br />
changes due refunded in cash.<br />
2. The Amount of Food Stamps actually tendered may exceed the Food-stampable Total previously<br />
displayed. In that case, the exceeding amount (besides refunded as change in cash of max. 99¢)<br />
will be refunded in food stamps. Also refer to NOTE 4.<br />
3. Refer to Media Keys on the next page.<br />
4. The “CG” lamp is illuminated. The change portion by the unit of $1.00 will be returned in food<br />
stamps (1 to 99, indicating dollars, displayed in the “DPT” portion. The change portion less than<br />
$1.00 will be returned in cash (displayed in the “AMOUNT” portion).<br />
5. The “Food-stampable Total” is the total of Department and PLU items that are programmed to be<br />
“Food-stampable” and are entered in the current sale. As for programming of Food Stamp status,<br />
refer to Programming Department Status on page 18-3. As for reversing the Food Stamp<br />
status of individual items at the moment of their entries, refer to Food Stamp Modification on<br />
page 18-35.<br />
6. There are three types of food stamp handlings (GENERAL, ILLINOIS, and NEW JERSEY types)<br />
regarding the tax payment for the food-stampable items, and the right type should be selected for<br />
your area. (Refer to Chapter 22. SYSTEM OPTION SETTING, Address 22 - Bits 7 & 8” on page<br />
22-25.)<br />
7. When the HALC (High Amount Limit Capacity) is programmed to the tendering amount of the<br />
[FSTL TEND] key, tendering amount through its key cannot exceed the programmed one in the<br />
REG position. On how to program the HALC for the [FSTL TEND] key, refer to “Listing<br />
Capacity Setting for Tender Media” on page 18-45.<br />
GENERAL Type ILLINOIS Type<br />
FISH 6.00 TF<br />
TAX 0.60<br />
TOTAL 6.60<br />
FS/TL 6.60<br />
F-STMP 10.00<br />
CHANGE 0.40<br />
FS CHG 3.00<br />
JONES 0164 16:31TM<br />
The customer may pay<br />
up to the food-stampable<br />
amount plus its taxes due<br />
in food stamps.<br />
Food-stampable Item<br />
Food-stampable Total<br />
(including tax on Foodstampable<br />
Total)<br />
Food Stamp Tendered<br />
Change in Cash<br />
Change in Food Stamps<br />
FISH 6.00 TF<br />
FS/TL 6.00<br />
F-STMP 5.00<br />
TAX 0.10<br />
CASH 1.10<br />
SMITH 0169 16:43TM<br />
The customer may pay up<br />
to the food-stampable<br />
amount in food stamps, and<br />
the amount actually paid in<br />
food stamps is taxexempted.<br />
Food-stampable Item<br />
Food-stampable Total<br />
(excluding tax on Foodstampable<br />
Total)<br />
Food Stamp Tendered<br />
Cash Total
18. SETTING PREPARATION OF EACH KEY, AND TRANSACTION ENTRIES<br />
18.23 Media Keys<br />
■ Media Total<br />
TXBL<br />
Sale Item ( ST or TL )<br />
Entries<br />
TAX 0.36<br />
CASH 3.96<br />
JONES 0159 15:40TM<br />
Tax Amount<br />
Cash Total<br />
■ Media Tender<br />
TXBL<br />
Sale Item ( ST or TL )<br />
Entries<br />
TAX 0.36<br />
TOTAL 3.96<br />
CATEND 4.00<br />
CHANGE 0.04<br />
JONES 0160 15:42TM<br />
NEW JERSEY Type<br />
FISH 6.00 TF<br />
DRINK 2.00 T<br />
FS/TL 6.00<br />
F-STMP 6.00<br />
TAX 0.30<br />
CASH 2.30<br />
JONES 0174 16:46TM<br />
AT/TL (Cash Tender/Total Key)<br />
CHECK<br />
TEND<br />
chg<br />
CPN<br />
MISC<br />
CASH<br />
Tax Amount<br />
Sales Total<br />
Cash Amount<br />
tendered<br />
Change due<br />
(Check Tender Key)<br />
(Charge Total Key)<br />
(Coupon Tender Key)<br />
(Misc. Tender Key)<br />
(Cash Payment Key)<br />
18.23.1 Finalizing a Sale using the Media Keys<br />
18-42<br />
AT/TL<br />
. . . AT/TL<br />
EO1-11137<br />
18.23 Media Keys<br />
The customer may pay up to the foodstampable<br />
amount in food stamps, and the<br />
food-stampable amount is tax-exempted<br />
regardIess of the actual amount paid in<br />
food stamps.<br />
Food-stampable Item<br />
Non-stampable Item<br />
Food-stampable Total<br />
(including tax on Food-stampable Total)<br />
Food Stamp Tendered<br />
Cash Total<br />
When sale items have all been entered and a customer pays, operation of the media keys finalizes the sale and<br />
issues a receipt.<br />
CHECK<br />
(or , chg , CPN , MISC<br />
TEND<br />
)<br />
Tendered Amount<br />
CHECK<br />
(or , chg , CPN , MISC<br />
TEND<br />
)<br />
$5.00<br />
, $10.00 , CASH 3 (Cash Payment 1 to<br />
3 Keys)
18. SETTING PREPARATION OF EACH KEY, AND TRANSACTION ENTRIES<br />
■ Multi-Tender (short-tender repeated by the same media)<br />
Example)<br />
TXBL<br />
Sale Item ( ST or TL )<br />
Entries<br />
TAX 0.52<br />
TOTAL 10.82<br />
CATEND 10.00<br />
CATEND 1.00<br />
CHANGE 0.18<br />
JONES 0161 15:45TM<br />
■ Split-Tender (short-tender repeated by the different media)<br />
Example)<br />
TXBL<br />
Sale Item ( ST or<br />
TL<br />
)<br />
Entries<br />
TAX 0.52<br />
TOTAL 10.82<br />
CHECK 7.00<br />
CASH 3.82<br />
JONES 0162 15:47TM<br />
Tax Amount<br />
Sales Total<br />
1st Cash Tendered (Short)<br />
2nd Cash Tendered (Over)<br />
Change due<br />
Tax Amount<br />
Sales Total<br />
1st Media (Check) Tendered (Short)<br />
2nd Media (Cash) Total<br />
. . . CHECK<br />
TEND<br />
Short-tendered Amount<br />
18-43<br />
. . . AT/TL<br />
Short-tendered Amount<br />
EO1-11137<br />
18.23 Media Keys<br />
( . . . ) AT/TL<br />
Equal or overtendered<br />
Amount<br />
( . . . ) AT/TL<br />
Equal or overtendered<br />
Amount<br />
NOTES: 1. Functions of each media key are initially programmed as follows.<br />
[AT/TL] ... Tender/Total, [CHECK TEND] ... Tender only, [chg] ... Total only,<br />
[MISC] ... Tender only, [CPN] ... Tender only<br />
(Refer to Chapter 22. SYSTEM OPTION SETTING, Addresses 5 to 9 on pages 22-7 to 11.)<br />
2. When the system option “Taxable Total Compulsory” (Refer to Chapter 22. SYSTEM OPTION<br />
SETTING, Address 2 - Bit 6 on page 22-4.) is selected, the sale is finalized after reading the<br />
sale total by the [ST] (or [TXBL TL]) key.<br />
3. When the system option “Shot-tendering Prohibited” (Refer to Chapter 22. SYSTEM OPTION<br />
SETTING, Address 11 - Bit 1 on page 22-12.) is selected, short-tendering using the media keys<br />
including the Cash Payment key is impossible.<br />
4. When a certain amount is not programmed to the Cash Payment key, use of its key for cash<br />
tendering operation will cause an error. Tendering amount $ 5.00 is initially programmed for the<br />
[$5.00] key, and $10.00 for the [$10.00] key. On how to program an amount for each [CASH]<br />
key, refer to “Cash Tender Key Preset Amount Setting” on the next page.<br />
5. The system option “Over-tendering Prohibited” can be selected individually for the media keys<br />
except the [AT/TL] key. Over-tendering operaiton using a media key to select this option<br />
becomes impossible. (Refer to Chapter 22. SYSTEM OPTION SETTING, Addresses 6 to 9 on<br />
pages 22-8 to 11.)<br />
6. When the HALC (High Amount Listing Capacity) is programmed to the respective tendering<br />
amounts of the media keys, tendering amount through the media key cannot exceed the<br />
programmed one in the REG position. On how to program the HALC for each media key, refer to<br />
“Listing Capacity Setting for Tender Media” page 18-45.
18. SETTING PREPARATION OF EACH KEY, AND TRANSACTION ENTRIES<br />
18.23.2 Programmings regarding the Media Keys<br />
■ Cash Tender Key Preset Amount Setting<br />
18-44<br />
EO1-11137<br />
Condition for Programming: Any time outside a sale. Must be signed off in the Cashier Signing Method. (In other<br />
methods, a Cashier Key may or may not be set to ON.) Refer to Chapter 16.<br />
Programming Procedure: Turn the Control Lock to the SET position using the MA key.<br />
3 4 @/FOR<br />
ST<br />
Declaration of Program No. 34<br />
for Cash Payment Key Preset<br />
Amount Setting<br />
. . .<br />
Tendering Amount (max. 6<br />
digits; 1 to 999999; resulting<br />
in $0.01 to $9999.99)<br />
NOTE 2, 3<br />
AT/TL<br />
Key Code<br />
1: CASH 1 ([$5.00])<br />
2: CASH 2 ([$10.00])<br />
3: CASH 3<br />
#/NS<br />
Repeat for another key.<br />
NOTE 1<br />
18.23 Media Keys<br />
AT/TL<br />
NOTES: 1. For sequentially accessing Key Codes, the code specification can be omitted.<br />
2. To reset the tendering amount once set, enter “0” as the tendering amount. The use of Cash<br />
Tender key with tendering amount reset in sales entries results in an error.<br />
3. As initial setting, the amount $ 5.00 is preset for the [$5.00] (CASH 1) key and $ 10.00 for the<br />
[$10.00] (CASH 2) key<br />
Cash Tender Key Preset Amount Setting Receipt Format:<br />
Key Operation: Control Lock: SET<br />
1 0<br />
2 0<br />
3 4<br />
1<br />
@/FOR<br />
ST<br />
0 0 #/NS<br />
0<br />
0<br />
#/NS<br />
<strong>TEC</strong> STORE<br />
1343 PEACH DRIVE<br />
PHONE: 87-6437<br />
Open 8:00am to 7:00pm<br />
Closed: every Wednesday<br />
11-28-1997 #0<br />
P34<br />
01 CASH 10.00<br />
02 CASH 20.00<br />
0091 12:16TM<br />
Tendering Amount of $ 10.00<br />
is set for [$ 5.00] (CASH 1).<br />
Tendering Amount of $ 20.00<br />
is set for [$ 10.00] (CASH 2).
18. SETTING PREPARATION OF EACH KEY, AND TRANSACTION ENTRIES<br />
■ Listing Capacity Setting for Tender Media<br />
18-45<br />
EO1-11137<br />
18.23 Media Keys<br />
Condition for Programming: After Financial Daily Reset (Refer to NOTE on “Condition” on page 11-1)<br />
Programming Procedure: Turn the Control Lock to the SET position using the MA key.<br />
* HALC of<br />
Tender Media<br />
AT/TL<br />
CHECK<br />
TEND<br />
chg<br />
MISC<br />
CPN<br />
FSTL<br />
TEND<br />
* HALC ..... High Amount Listing Capacity (to be set in a 2-digit code)<br />
Example) 3 4 ............... indicates $ 39.99 ................ equal to or smaller than $39.99<br />
4 digits<br />
Value of the top digit<br />
NOTES: 1. To reset an individual media listing capacity, enter 0 before media key depression in the above<br />
operation.<br />
2. The HALC of each tender media is effective only when the media key is used for tendering but<br />
not when it is used as Total key.<br />
3. The listing capacity is cleared in MGR mode. It cannot be cleared by the [LC OPEN] (or [OPEN])<br />
key.<br />
Example) To set the HALC ($39.99) for the [AT/TL] key:<br />
Key Operation: Control Lock: SET<br />
3 4 AT/TL<br />
<strong>TEC</strong> STORE<br />
1343 PEACH DRIVE<br />
PHONE: 87-6437<br />
Open 8:00am to 7:00pm<br />
Closed: every Wednesday<br />
11-28-1997 #112300<br />
P00<br />
CATEND 34<br />
0100 12:30TM
18. SETTING PREPARATION OF EACH KEY, AND TRANSACTION ENTRIES<br />
18-46<br />
EO1-11137<br />
18.24 Previous Balance, Charge Posting<br />
18.24 Previous Balance, Charge Posting PB+ (Previous Balance + Key)<br />
(1) To initiate charge posting for a new customer<br />
TXBL<br />
( TL )<br />
. . .<br />
Display the sale<br />
total excluding the<br />
previous balance.<br />
PB-<br />
(Previous Balance - Key)<br />
0 PB+ (or PB- ) Follow the line marked with “*” in operation (2) below.<br />
(2) Charge posting with a previous balance first entered (pre-select) with or without PAYMENT<br />
. . .<br />
Previous Balance<br />
* Sale item<br />
entries, if any.<br />
PB+<br />
PB-<br />
TRF ...................................................... to transfer all the balance as a new balance.<br />
(i.e. no payment for this occasion.)<br />
. . . R/A<br />
Media key operation.<br />
Amount Paid for<br />
this occasion<br />
Repeatable if necessary.<br />
PO<br />
...................................................... when the balance is negative (credit balance for<br />
customer) and must be paid back to the customer in<br />
cash now.<br />
(3) Charge posting with a previous balance entered during a sale (post-select)<br />
A previous balance may be entered not only before sale items but also after or between them if the [chg] key has<br />
not been depressed. Multiple previous balance entries are possible within a sale (for the purpose to sum up multiple<br />
accounts into one, etc.)<br />
(4) Percent charge/discount on a previous balance<br />
. . . PB+<br />
Previous Balance<br />
(for debit balance for customer)<br />
(for credit balance for customer)<br />
( . . . ) %+<br />
Rate<br />
chg<br />
. . .<br />
Finalizes the current sale, displays<br />
the entire sale total including<br />
the previous balance.<br />
NOTES: 1. The [%-] key operates the same for percent discouting.<br />
2. The previous balance entered through [PB-] (credit balance for customer) will not allow %+ or %operation.
18. SETTING PREPARATION OF EACH KEY, AND TRANSACTION ENTRIES<br />
<strong>TEC</strong> STORE<br />
1343 PEACH DRIVE<br />
PHONE: 87-6437<br />
Open 8:00am to 7:00pm<br />
Closed: every Wednesday<br />
11-28-1997 #112300<br />
PB+ 0.00<br />
MEAT 7.00 TF<br />
3X 1.00 @<br />
Coke-B 3.00 T<br />
SUBTL 10.00<br />
TAX 0.80<br />
Chg 10.80<br />
R/A 5.00<br />
CASH 5.00<br />
NEW BAL 5.80<br />
JONES 0179 17:05TM<br />
A customer who has no<br />
previous balance comes<br />
to the store. He purchases<br />
sales items;<br />
Dept.1 (MEAT) and three<br />
items of PLU No. 301<br />
(Coke-B). He pays $5.00<br />
in this time, and the remainder<br />
of the balance is<br />
carried forward to the<br />
next time.<br />
18-47<br />
<strong>TEC</strong> STORE<br />
1343 PEACH DRIVE<br />
PHONE: 87-6437<br />
Open 8:00am to 7:00pm<br />
Closed: every Wednesday<br />
11-28-1997 #112300<br />
PB+ 5.80<br />
Chg 5.80<br />
R/A 5.80<br />
CASH 5.80<br />
NEW BAL 0.00<br />
JONES 0180 17:08TM<br />
18.25 Check Cashing (Cashing Non-cash Media)<br />
<br />
. . .<br />
Amount to be cashed<br />
<strong>Ma</strong>x. 8 digits (NOTE 2)<br />
CHECK<br />
TEND<br />
EO1-11137<br />
18.25 Check Cashing (Cashing Non-cash Media)<br />
Non-cash<br />
Media<br />
The customer comes<br />
again to pay all the previous<br />
balance. He pays the<br />
exact amount in cash.<br />
The balance of the customer<br />
becomes zero.<br />
(Non-cash Media Key)<br />
(or chg , MISC , CPN ) .......... The drawer opens to enable<br />
exchanging the non-cash<br />
media into cash.<br />
NOTES: 1. The [CHECK TEND] key is programmed to allow cashing as initial status. It can be programmed<br />
to prohibit cashing.<br />
Similarly, the [chg] , [MISC] and [CPN] keys are programmed to prohibit cashing as initial status.<br />
They can be programmed to allow cashing. (Refer to Chapter 22. SYSTEM OPTION SETTING,<br />
Addresses 6 to 9 on pages 22-8 to 11.)<br />
2. When the HALC (High Amount Listing Capacity) is programmed to the respective tendering<br />
amounts of the media keys, tendering amount through the media key cannot exceed the<br />
programmed one in the REG position. (Refer to “Listing Capacity Setting for Tender Media”<br />
on page 18-45.)<br />
3. When the system option “Validation Print Compulsory” is programmed to the respective media<br />
keys, the drawer will open after performing the validation print. (Regarding the system option,<br />
refer to Chapter 22. SYSTEM OPTION SETTING, Addresses 5 to 9 on pages 22-7 to 11. Also<br />
refer to “Validation Print” on page 18-54 for the actual operation procedure.)<br />
<strong>TEC</strong> STORE<br />
1343 PEACH DRIVE<br />
PHONE: 87-6437<br />
Open 8:00am to 7:00pm<br />
Closed: every Wednesday<br />
11-28-1997 #112300<br />
CHECK 10.00<br />
JONES 0188 17:19TM
18. SETTING PREPARATION OF EACH KEY, AND TRANSACTION ENTRIES<br />
18.26 Post-issue Receipt<br />
RECEIPT<br />
A sale is finalized with the ISSUE ................ The receipt for the last sale is issued.<br />
“R OFF” lamp illuminated.<br />
NOTES: 1. When a sale has contents of 30 print<br />
lines or less, the post-issue receipt will<br />
be an itemized receipt, just as the<br />
ordinary receipt. When it has more<br />
than 30 print lines, the post-issue<br />
receipt will be a total-only receipt.<br />
However, the system option allows the<br />
register to always issue a total-only<br />
receipt regardless of the number of the<br />
print lines. (Refer to Chapter 22.<br />
SYSTEM OPTION SETTING,<br />
Address 22 - Bit 5 on page 22-25.)<br />
2. The Post-issue receipt function is not<br />
effective for Received-on-Account,<br />
Paid Out, Previous Balance, nor All<br />
Void transaction.<br />
3. If a Non-add Number print is entered<br />
at the top of a sale, the number will not<br />
be printed on the Post-issue Receipt.<br />
4. Usually, the Post-issue Receipt<br />
function is available only when a sale<br />
has been entered with the “R OFF”<br />
lamp illuminated. However, the system<br />
option allows the register to issue a<br />
Post-issue receipt regardless of the “R<br />
OFF” status (illuminated or extinguished).<br />
(Refer to Chapter 22.<br />
SYSTEM OPTION SETTING,<br />
Address 18 - Bit 1 on page 22-20.)<br />
18.27 No-sale (Exchange)<br />
<br />
RECEIPT<br />
ISSUE<br />
(Post-issue Receipt Key)<br />
#/NS (or NS ) ................................................ The drawer opens.<br />
18-48<br />
<strong>TEC</strong> STORE<br />
1343 PEACH DRIVE<br />
PHONE: 87-6437<br />
Open 8:00am to 7:00pm<br />
Closed: every Wednesday<br />
11-28-1997 #112300<br />
MEAT 7.00 TF<br />
MEAT 7.00 TF<br />
SUBTL <strong>TEC</strong> 14.00STORE<br />
%-<br />
1343 PEACH DRIVE<br />
10% PHONE: 1.40- 87-6437<br />
TAX 0.70<br />
CASH Open 13.30<br />
8:00am to 7:00pm<br />
Closed: every Wednesday<br />
JONES 0203 18:21TM<br />
11-28-1997 #112300<br />
TOTAL 13.30<br />
JONES 0209 18:23TM<br />
The Consecutive No. printed on the<br />
Post-issue Receipt is the same as that of<br />
the normal receipt if it has been issued.<br />
#/NS (Non-add Number Print/No-sale Key)<br />
NS<br />
NOTE: Usually, Non-add Number entries are<br />
prohibited at the starting of a No-sale<br />
transaction (i.e. Non-add Numbers cannot be<br />
printed on a No-sale receipt). However, a Nosale<br />
entry can be programmed to be allowable<br />
after a Non-add Number entry (Refer to<br />
Chapter 22. SYSTEM OPTION SETTING,<br />
Address 18 - Bit 1 on page 22-20).<br />
(No-sale Key)<br />
<strong>TEC</strong> STORE<br />
1343 PEACH DRIVE<br />
PHONE: 87-6437<br />
EO1-11137<br />
18.26 Post-issue Receipt<br />
Itemized Type<br />
Open 8:00am to 7:00pm<br />
Closed: every Wednesday<br />
11-28-1997 #112300<br />
∗ NO SALE ∗<br />
JONES 0123 08:45TM<br />
Total Type<br />
No-sale Symbol
18. SETTING PREPARATION OF EACH KEY, AND TRANSACTION ENTRIES<br />
18.28 Received-on-Account Payment<br />
<br />
Repeat if multiple amounts are received.<br />
. . .<br />
R/A<br />
Payment Amount Received<br />
(max. 7 digits)<br />
NOTE: As initial setting, all the media keys shown<br />
above except the [chg] key can be used in the<br />
Received-on-Account transaction. (Refer to<br />
Chapter 22. SYSTEM OPTION SETTING,<br />
Addresses 5 to 9 on pages 22-7 to 11.)<br />
18.29 Paid Out<br />
<br />
Repeat if multiple amounts are paid out.<br />
. . .<br />
PO (Paid Out Key)<br />
PO<br />
AT/TL<br />
( . . . ) AT/TL<br />
Total Amount tendered in cash<br />
( . . . )<br />
Total Amount tendered in check<br />
( . . . ) CPN<br />
Total Amount tendered in media-coupon<br />
( . . . ) MISC<br />
Total Amount tendered in miscellaneous media<br />
( . . . ) chg<br />
Total Amount tendered in charge<br />
18-49<br />
R/A (Received-on-Account Key)<br />
CHECK<br />
TEND<br />
EO1-11137<br />
18.28 Received-on-Account Payment<br />
<strong>TEC</strong> STORE<br />
1343 PEACH DRIVE<br />
PHONE: 87-6437<br />
Open 8:00am to 7:00pm<br />
Closed: every Wednesday<br />
11-28-1997 #112300<br />
R/A 10.00<br />
R/A 2.50<br />
CASH 12.50<br />
JONES 0127 09:12TM<br />
<strong>TEC</strong> STORE<br />
1343 PEACH DRIVE<br />
PHONE: 87-6437<br />
Open 8:00am to 7:00pm<br />
Closed: every Wednesday<br />
11-28-1997 #112300<br />
PO 3.00<br />
PO 2.00<br />
PO 1.50<br />
TOTAL 6.50<br />
JONES 0128 09:22TM<br />
Individual<br />
Amount (cash)<br />
Total Amount<br />
received in<br />
cash<br />
Individual Paidout<br />
Amount<br />
Total Amount<br />
Paid-out
18. SETTING PREPARATION OF EACH KEY, AND TRANSACTION ENTRIES<br />
To exempt the sale from designated taxes:<br />
To exempt the sale from all taxes:<br />
or<br />
TX2/M<br />
TX3/M<br />
EX<br />
TX3/M<br />
(Exemption from Tax/PST 1 only)<br />
(Exemption from Tax/PST 2 only)<br />
(Exemption from Tax/PST 3 only)<br />
(Exemption from GST only)<br />
EX<br />
EX<br />
GST/M<br />
18-50<br />
(Exemption from Tax/PST 1 & Tax/PST 2)<br />
(Exemption from Tax/PST 1 & GST)<br />
(Exemption from Tax/PST 2 & GST)<br />
(Exemption from Tax/PST 1 & Tax/PST 3)<br />
(Exemption from Tax/PST 2 & Tax/PST 3)<br />
(Exemption from Tax/PST 3 & GST)<br />
EX<br />
EO1-11137<br />
18.30 Tax Exemption<br />
NOTES: 1. For finalizing the transaction, only the [AT/TL] key can be used. (i.e. only cash can be paid out)<br />
2. The Paid Out operation can be programmed to require the MGR position of the Control Lock.<br />
(Refer to Chapter 22. SYSTEM OPTION SETTING, Address 4 - Bit 2 on page 22-6.)<br />
18.30 Tax Exemption<br />
TX1/M<br />
TX2/M<br />
TX3/M<br />
GST/M<br />
TX1/M<br />
TX1/M<br />
TX2/M<br />
TX1/M<br />
TX2/M<br />
TX3/M<br />
EX<br />
TX1/M<br />
GST/M<br />
GST/M<br />
TX3/M<br />
GST/M<br />
TX2/M<br />
EX (Tax Exempt Key)<br />
TXBL<br />
All the items are entered ( ST or TL )<br />
for the customer.<br />
EX<br />
EX<br />
EX<br />
EX<br />
EX<br />
EX<br />
EX<br />
TAX1EX 7.00 Sale portion subject to the<br />
tax exemption (Tax/PST 1)<br />
TAX1EX 17.50<br />
TAX2EX 8.50<br />
Sale portion subject<br />
to the Tax/PST 1<br />
Sale portion subject<br />
to the Tax/PST 2<br />
NOTES: 1. After depressing the [EX] key, the sale must only be finalized (for payment through media keys<br />
including the [CUR] keys).<br />
2. Tax Exemption transaction cannot be item-corrected.<br />
3. If the “Non-taxable Amount Limit” is set for certain areas in Canada, using the [GST/M] key will<br />
cause an error and GST Exemption is not allowed.
18. SETTING PREPARATION OF EACH KEY, AND TRANSACTION ENTRIES<br />
18.31 Foreign Currency Keys<br />
18-51<br />
CUR 1<br />
EO1-11137<br />
18.31 Foreign Currency Keys<br />
Foreign currencies may be tendered for payment of a sale. A maximum of four Foreign Currency keys are<br />
available.<br />
18.31.1 Programming regarding the Foreign Currency Keys<br />
Before operating the keys, the following programming operations are necessary.<br />
■ Setting Foreign Currency Exchange Rate<br />
Set the exchange rate of the currency. Change the rate daily, if necessary.<br />
Condition for Programming: Any time outside a sale. Must be signed off in the Cashier Signing Method. (In other<br />
methods, a Cashier Key may or may not be set to ON.) Refer to Chapter 16.<br />
Programming Procedure: Turn the Control Lock to the SET position using the MA key.<br />
.<br />
Exchange Rate; max. 10 digits; 0.000001 to 9999.999999 NOTE 1,2<br />
.<br />
.<br />
.<br />
CUR 1<br />
to (Foreign Currency 1 to 4 Keys)<br />
CUR 4<br />
CUR 2<br />
CUR 3<br />
CUR 4<br />
NOTES: 1. Obtain the rate by calculating in the subsidiary currency unit values for both the domestic and the<br />
foreign currency. (In case of calculating the rete from the domestic to a foreign currency with the<br />
same zero-suppress form, such as from US$ to Frency Franc, it will be no problem. However, in<br />
case of exchanging from a domestic currency such as US$ to a foreign currency such as<br />
Japanese yen, this rule must be obeyed; otherwise a wrong rate will result.)<br />
2. Calculate the required foreign currency value equivalent to the domestic currency value “1”. Then<br />
the obtained value is the Exchange Rate value to be entered in the setting operation above.<br />
Example) Domestic Currency is US$:<br />
1 cent = XXXX . XXXXXX centimes (French Franc)<br />
= XXXX . XXXXXX pfennigs (Deutsche <strong>Ma</strong>rk)<br />
= XXXX . XXXXXX yen (Japanese Yen)<br />
etc.<br />
Enter this value as the foreign currency exchange rate.<br />
3. If “0” is set as the exchange rate, that key cannot be used in sale entries.
18. SETTING PREPARATION OF EACH KEY, AND TRANSACTION ENTRIES<br />
Example) 0.7143 for the [CUR 1] key:<br />
. . . . . . . .<br />
0 . 7 1 4 3 CUR 1<br />
CUR 1<br />
18-52<br />
AT/TL<br />
<strong>TEC</strong> STORE<br />
1343 PEACH DRIVE<br />
PHONE: 87-6437<br />
Open 8:00am to 7:00pm<br />
Closed: every Wednesday<br />
11-28-1997 #112300<br />
P00<br />
CUR1 0.7143*<br />
EO1-11137<br />
18.31 Foreign Currency Keys<br />
0104 12:38TM<br />
■ Setting Foreign Currency Amount Division Position (Display Form)<br />
Select the appropriate amount division position for each foreign currency - - “0.00” (initial status) such as US$ or<br />
“0” such as Japanese yen. The currency tender amount is displayed in the selected form.<br />
Refer to Chapter 22. SYSTEM OPTION SETTING, Address 20 on page 22-22:<br />
Bit 1 for Foreign Currency 1 ([CUR 1])<br />
Bit 2 for Foreign Currency 2 ([CUR 2])<br />
Bit 3 for Foreign Currency 3 ([CUR 3])<br />
Bit 4 for Foreign Currency 4 ([CUR 4])<br />
18.31.2 Sale Paid in Foreign Currency<br />
All the items are entered<br />
for the customer.<br />
TXBL<br />
TL<br />
NOTE 1<br />
(or ST )<br />
CUR 1<br />
NOTE 2<br />
Displays the sale<br />
total in the domestic<br />
currency.<br />
Can be cleared by the [C] key<br />
. . . . . . . .<br />
Displays the sale<br />
total in the foreign<br />
currency.<br />
. . .<br />
Foreign Currency<br />
Amount tendered;<br />
max. 8 digits<br />
. . . . . . . .<br />
NOTE 2<br />
Displays the amount<br />
as it is entered.<br />
. . . . . . . .<br />
(or other tenderallow<br />
media keys)<br />
NOTE 5<br />
Displays the domestic<br />
currency value equivalent to<br />
the tendered foreign currency.<br />
. . . . . . . .<br />
The sale is finalized if<br />
over-tendered, or not<br />
finalized if short-tendered.<br />
NOTE 3
18. SETTING PREPARATION OF EACH KEY, AND TRANSACTION ENTRIES<br />
18-53<br />
EO1-11137<br />
18.32 No-sale Exchange from a Foreign Currency to the Domestic Currency<br />
SUBTL 14.00<br />
TAX 1.22<br />
TOTAL 15.22<br />
CATEND 28.00<br />
CHANGE 12.78<br />
JONES 0216 18:55TM<br />
Sale total in domestic currency<br />
Domestic currency value equivalent<br />
to the tendered foreign currency<br />
Change due in the domestic currency<br />
The system option allows the register to print foreign currency tendered<br />
amount and foreign currency exchange rate on the receipt. (Refer to Chapter<br />
22. SYSTEM OPTION SETTING, Address 20 - Bits 5 & 6 on page 22-22.)<br />
NOTES: 1. The [TXBL TL] (or [ST]) key is not required after a short-tender entry. The [ST] key can be used<br />
for this transaction only when the system option “ Taxable Total Display by the [ST] key” has<br />
been selected. (Refer to Chapter 22. SYSTEM OPTION SETTING, Address 18 - Bit 4 on page<br />
22-20.)<br />
2. The [CUR2], [CUR3] and [CUR4] keys operate the same fashion as the [CUR1] key for<br />
tendering the foreign currencies 2, 3 and 4 respectively.<br />
3. When over-tendered:<br />
The sale is finalized, the drawer opens, and the change due is displayed in the domestic<br />
currency which is to be returned to the customer.<br />
When short-tendered:<br />
The sale is not finalized. Any other media tendering may follow (refer to the section<br />
“Multi-tender, Split Tender” on page 18-43).<br />
4. The tendered amount is processed into the following in the report memory:<br />
• Domestic media (of the key operated — Cash, Check, Charge, Miscellaneous Media,<br />
Media-Coupon) total<br />
• Foreign Currency in the foreign currency value.<br />
• The amount is not processed into the corresponding media-in-drawer total.<br />
5. The final media key must be programmed to allow tendering.<br />
6. A negative-balance sale or a sale of zero cannot be finalized with a Foreign Currency key.<br />
7. The Foreign Currency keys cannot be used to finalize Received-on-Account, Paid Out and<br />
Previous Balance entries.<br />
18.32 No-sale Exchange from a Foreign Currency to the Domestic Currency<br />
CUR 1<br />
CUR 1<br />
#/NS<br />
NS<br />
<br />
to CUR 4 (Foreign Currency 1 to 4 Keys)<br />
(Non-add Number Print/No-sale Key)<br />
(No-sale Key)<br />
. . .<br />
Amount of Foreign<br />
Currency to be<br />
exchanged<br />
#/NS<br />
. . .<br />
NOTE: The [CUR2], [CUR3] and [CUR4] keys operate<br />
the same fashion as the [CUR1] key for<br />
exchanging the foreign currencies 2, 3 and 4<br />
to the domestic currency.<br />
(or NS )<br />
The drawer opens to enable exchange. Displays the domestic<br />
currency amount equivalent to the entered foreign currency amount.<br />
CUR1 100.00<br />
CHANGE 140.00<br />
JONES 0222 13:39TM
18. SETTING PREPARATION OF EACH KEY, AND TRANSACTION ENTRIES<br />
18.33 Validation Print<br />
VALI<br />
DATE<br />
A required sale Insert a slip to the<br />
item or media is Validation Slot.<br />
entered. (NOTE 3) (See the sketch below.)<br />
(Validation Print Key)<br />
18-54<br />
VALI<br />
DATE<br />
EO1-11137<br />
18.33 Validation Print<br />
NOTES: 1. On this register, depressing the<br />
[VALIDATE] key will execute printing<br />
regardless of presence/absence of a<br />
slip. Before depressing the key, be<br />
certain to insert a slip to the Validation<br />
Slot. (If no slip is inserted, the validation<br />
print will occur over the last printed line<br />
on the receipt.)<br />
2. After validation print, be certain to<br />
remove the slip from the Validation Slot.<br />
3. If the “SLIP” lamp flickers during<br />
registrations, it indicates that the last<br />
item just entered has been programmed<br />
to require validation print. In this case,<br />
no other operations can follow until the<br />
validation print of the item is performed.<br />
4. The following options are selective in relation to validation print:<br />
1) Print Format<br />
a) Consecutive No. Print/Non-print (Refer to Chapter 22. SYSTEM OPTION SETTING,<br />
Address 15 - Bit 2 on page 22-17.)<br />
b) Cashier No. Print/Non-print (Refer to Chapter 22. SYSTEM OPTION SETTING,<br />
Address 15 - Bit 3 on page 22-17.)<br />
2) Number of times for validation print of the same item Single-validation (only once allowed),<br />
or Multi-validation (any number of times allowed) (Refer to Chapter 22. SYSTEM OPTION<br />
SETTING, Address 15 - Bit 1 on page 22-17.)<br />
3) Validation Print Content after each non-cash media tender (Refer to Chapter 22. SYSTEM<br />
OPTION SETTING, Addresses 6 to 9 on pages 22-8 to 11.)<br />
4) Validation Counter on the Financial Report Print/Non-print (Refer to Chapter 22. SYSTEM<br />
OPTION SETTING, Address 1 - Bit 6 on page 22-3.)<br />
5) Validation Compulsory status on the following keys:<br />
[AT/TL] (Address 5 - Bit 8)<br />
[CHECK TEND] (Address 6 - Bit 8)<br />
[chg] (Address 7 - Bit 8)<br />
[MISC] (Address 8 - Bit 8)<br />
[CPN] (Address 9 - Bit 8)<br />
[FSTL TEND] (Address 12 - Bit 1)<br />
[TRF] (Address 12 - Bit 2)<br />
[VND CPN] (Address 12 - Bit 6)<br />
[STR CPN] (Address 12 - Bit 8)<br />
[RTN MDSE] (Address 13 - Bit 1)<br />
[PO] (Address 13 - Bit 2)<br />
[R/A] (Address 13 - Bit 3)<br />
[ITEM CORR] (Address 13 - Bit 4)<br />
[VOID] (Address 13 - Bit 5)<br />
[DOLL DISC] (Address 13 - Bit 6)<br />
[%-] (Address 13 - Bit 7)<br />
Negative Departments and PLUs (Address 13 - Bit 8)
18. SETTING PREPARATION OF EACH KEY, AND TRANSACTION ENTRIES<br />
-- Receipt Print --<br />
DP06 500.00<br />
CASH 500.00<br />
JONES 0224 13:57TM<br />
<strong>TEC</strong> STORE<br />
1343 PEACH DRIVE<br />
PHONE: 87-6437<br />
Open 8:00am to 7:00pm<br />
Closed: every Wednesday<br />
11-28-1997 #112300<br />
MEAT 7.00 TF<br />
3X 5.00 @<br />
Salmon 15.00 TF<br />
8X 3.00/ 8<br />
Bun-A 3.00 T<br />
DRINK 15.00 T<br />
SUBTL 40.00<br />
TAX 4.25<br />
Chg 44.25<br />
JONES 0225 14:44TM<br />
⎯⎯⎯⎯→<br />
18-55<br />
Validation Print<br />
EO1-11137<br />
18.34 Remote Slip Printer (hardware option) Operation<br />
Date Receipt Department No. Amount<br />
(Month-Day-Year) Consecutive No.<br />
11-28-1997 1CL 0224 DP06 500.00<br />
Cashier No.<br />
11-28-1997 1CL 0224 CASH 500.00<br />
18.34 Remote Slip Printer (hardware option) Operation<br />
Media Sale Total or<br />
Tendered Amount<br />
The <strong>TEC</strong> Remote Slip Printer DRS-207 may be connected to the MA-<strong>1350</strong>-1 series ECR as an optional device.<br />
The Remote Slip Printer will operate printing if a slip is properly inserted, regardless of the Mode Lock position<br />
(except that no print will occur in the “SET” mode or during program verification in the “X” mode).<br />
1. The remote slip printer will automatically activate printing when the slip has properly been set to the printer<br />
table.<br />
2. The gap of the slip inlet is usually opened, and the slip may be inserted or withdrawn freely outside a receipt/<br />
journal print sequence.<br />
When a slip is properly set to the remote slip printer and the ECR is operated, the gap will be closed and printing<br />
will be performed. When the sale is finalized and the receipt is issued, the gap of the DRS-207 will be<br />
opened to allow the slip withdrawal. (The gap keeps closed during sale item entries.)<br />
3. The RELEASE key on the DRS-207 may be used to open the closed gap in order to withdraw the slip and skip<br />
unnecessary item printer is in a printing action.<br />
4. Printing on the remote slip will be performed alternately with printing on the receipt/journal of the ECR.<br />
-- Receipt Print --<br />
⎯⎯⎯⎯→<br />
Remote Slip Print<br />
MEAT 7.00 TF<br />
3X 5.00 @<br />
Salmon 15.00 TF<br />
8X 3.00/ 8<br />
Bun-A 3.00 T<br />
DRINK 15.00 T<br />
SUBTL 40.00<br />
TAX 4.25<br />
Chg 44.25<br />
11-28-1997 1CL 0224 JONES 0225 14:44TM
19. OPERATIONS IN “MGR” MODE<br />
19. OPERATIONS IN “MGR” MODE<br />
19-1<br />
EO1-11137<br />
19.1 Items programmed to require <strong>Ma</strong>nager Intervention<br />
This chapter describes operations to be performed in the MGR position of the Control Lock, which the Store<br />
<strong>Ma</strong>nager can access using the MGR or MA key.<br />
19.1 Items programmed to require <strong>Ma</strong>nager Intervention<br />
During daily sale entry operations, the cashier may call for <strong>Ma</strong>nager Intervention. The following is the operation<br />
flow of <strong>Ma</strong>nager Intervention.<br />
1) During operations, the cashier comes across an item that requires <strong>Ma</strong>nager Intervention. The cashier, already<br />
informed of it, may immediately call for <strong>Ma</strong>nager Intervention. Or the cashier, without knowing of it, attempts<br />
the operation, and an error results, clears the error by the [C] key, and then calls for <strong>Ma</strong>nager Intervention.<br />
2) The Store <strong>Ma</strong>nager goes to the cashier counter with the MGR or MA key.<br />
3) The cashier explains what kind of operation is to be entered and removes the REG key from the Control Lock<br />
at the REG position.<br />
4) The Store <strong>Ma</strong>nager insert the MGR or MA key and turns it to the MGR position.<br />
5) The cashier operates the required item.<br />
6) The Store <strong>Ma</strong>nager returns the MGR or MA key to the REG position and pulls it out.<br />
7) The cashier returns the REG key to the REG position and continues sale entry operations.<br />
The following are the tables of the keys and operations that are programmable with <strong>Ma</strong>nager Intervention. Fill in<br />
the tables by marking in the “Not required” or “Required” column of each item, referring to the System Option<br />
Setting addresses (Chapter 22). Or only to read the set status of each Address and Bit, refer to Chapter 23.<br />
PROGRAM DATA VERIFICATION.<br />
Keys and <strong>Ma</strong>nager Intervention Status<br />
MGR Position Reference<br />
KEY Not required Required (Refer to Chapter 22.<br />
SYSTEM OPTION SETTING.)<br />
Page<br />
[RTN MDSE] Address 4 - Bit 1 22-6<br />
[PO] Address 4 - Bit 2 22-6<br />
[DOLL DISC] Address 4 - Bit 3 22-6<br />
[%-] (% I, % II) Address 4 - Bit 4 22-6<br />
[EX] Address 4 - Bit 6 22-6<br />
[ALL VOID] Address 4 - Bit 8 22-6<br />
[VND CPN] Address 12 - Bit 5 22-13<br />
[STR CPN] Address 12 - Bit 7 22-13
19. OPERATIONS IN “MGR” MODE<br />
19.2 Listing Capacity Release<br />
Operations and <strong>Ma</strong>nager Intervention Status<br />
19-2<br />
EO1-11137<br />
19.2 Listing Capacity Release<br />
MGR Position Reference<br />
KEY Not required Required (Refer to Chapter 22.<br />
SYSTEM OPTION SETTING.)<br />
Page<br />
Credit Balance (oversubtraction<br />
of the sale<br />
by [DOLL DISC], [VND<br />
CPN], [STR CPN] and<br />
[VOID] keys)<br />
Address 2 - Bit 5 22-4<br />
Negative Department<br />
or negative PLU Entries<br />
Address 4 - Bit 5 22-6<br />
Negative-balance Sale<br />
Finalization by Noncash<br />
Media Keys.<br />
Address 4 - Bit 7 22-6<br />
Listing Capacities (amount limits) may be programmed on Departments (each open-price PLU is ruled by the<br />
Listing Capacity of its link Department) and Tender Media. These LCs (Listing Capacities) are programmed to<br />
check an excessively high amount entry by cashier’s mistake at the earliest stage. Guide your cashiers as in the<br />
following procedure:<br />
1) During sale entries by a cashier, an error occurs when a Department or PLU item has been entered, or a<br />
media key has been depressed.<br />
2) The cashier clears the error by the [C] key. The cashier confirms the amount and operates the item again.<br />
3) If the same error occurs again, the cashier attempts to enter the amount using the [LC OPEN] or [OPEN] key.<br />
4) If the operation results in an error again, it means that the amount still cannot be entered by the [LC OPEN] or<br />
[OPEN] key function.<br />
5) The cashier calls for <strong>Ma</strong>nager Intervention.<br />
The procedure thereafter is the same as Steps 2) to 7) for the Items programmed to require <strong>Ma</strong>nager Intervention<br />
on the preceding page.<br />
Reference: For reading the Listing Capacity of each Department:<br />
Chapter 23. PROGRAM DATA VERIFICATION — Department LC and Status Read<br />
For setting the Listing Capacities of specific Departments:<br />
Programming Department LCs on page 18-7<br />
For reading the Listing Capacity of each Tender Media Key:<br />
Chapter 23. PROGRAM DATA VERIFICATION — Other Programmed Data Read<br />
For setting the Listing Capacities of the specific Tender Media Keys:<br />
Listing Capacity Setting for Tender Media on page 18-45
20. OPERATIONS IN “ - ” MODE<br />
20. OPERATIONS IN “ - ” MODE<br />
20-1<br />
EO1-11137<br />
20. OPERATIONS IN “ - ” MODE<br />
This chapter describes operations to be performed in the “ - ” position of the Control Lock, which the Store<br />
Owner or a person so authorized can access using the MA key.<br />
Instead of using the [RTN MDSE] or [VOID] keys in the REG or MGR mode for deleting individual sale items, the<br />
“ - ” mode automatically processes positive items into negative and negative into positive. To operate, turn the<br />
Mode Lock to the “ - ” position using the MA key, and enter the items, one by one, just as in the REG mode as<br />
reading the sale receipt (issued at the time of the purchase) or tracing the returned items as if the REG mode. A<br />
positive balance resulted in the “ - ” mode indicates the amount to be paid back to the customer. The “ - ”<br />
mode operation may occur from time to time during the day, on the cashier’s request, just as in the case of<br />
ordinary <strong>Ma</strong>nager Interventions, when a customer comes to the cashier counter to return or cancel all the items<br />
that were once purchased and finalized (in which case the All Void operation is no longer effective).<br />
Receipt Samples in REG and “ - ”<br />
Receipt issued in REG or MGR Mode Receipt issued in “ - ” Mode<br />
MEAT 7.00 TF<br />
%-<br />
5% 0.35-<br />
FISH 5.50 TF<br />
%+<br />
10% 0.55<br />
SUBTL 12.70<br />
TAX 0.90<br />
CASH 13.60<br />
JONES 0240 11:20TM<br />
These two receipts contain the<br />
same sale items and media finalization.<br />
The operations are also the<br />
same except the Control Lock position.<br />
The cashier merely follows the purchase<br />
receipt (on the left) and enters<br />
the same items in the<br />
“ - ” mode finalizing with the same<br />
media, in case the customer has<br />
returned or canceled the entire sale<br />
after once finalized that sale.<br />
∗REG- ∗<br />
MEAT 7.00 TF<br />
%-<br />
5% 0.35-<br />
FISH 5.50 TF<br />
%+<br />
10% 0.55<br />
SUBTL 12.70<br />
TAX 0.90<br />
CASH 13.60<br />
∗REG- ∗<br />
JONES 0243 11:21TM<br />
NOTE: In the “ - ” mode the Listing Capacities and the status requiring <strong>Ma</strong>nager Intervention will all be<br />
released, i.e., the same handing as in the MGR mode.<br />
“ - ”<br />
mode<br />
Receipt<br />
Header
21. READ AND RESET REPORTS<br />
21. READ AND RESET REPORTS<br />
21-1<br />
#/NS<br />
AT/TL<br />
AT/TL<br />
EO1-11137<br />
21.1 Hourly Range Table Programming<br />
This chapter describes the operation to take each report and its contents. The report function is one of the most<br />
beneficial features of the register. As sales data are entered, the register processes the data into appropriate<br />
totals and counters in the report memory. The reports are not only a form of sales data records but will also be a<br />
valuable guide to management of your store.<br />
21.1 Hourly Range Table Programming<br />
Condition for Programming: After Hourly Sales Reset (Refer to NOTE on “Condition” on page 11-1)<br />
Programming Procedure: Turn the Control Lock to the SET position using the MA key.<br />
7<br />
@/FOR<br />
Declaration of Program<br />
No. 7 for Hourly Range<br />
Table programming<br />
Repeat for setting next Hourly Ranges (max. 24 hourly ranges)<br />
Hour Minute<br />
(0 to 23) (00 to 59)<br />
Enter the time that ends the Hourly Range,<br />
in the 24-hour system using the military<br />
time. (The time to start is the time entered<br />
for the preceding Hourly Range.)<br />
(See NOTES 2, 3)<br />
NOTES: 1. A maximum of 24 hourly ranges may be set.<br />
2. Do not set an hourly range across 24:00, such as “from 23:00 to 1:00”. Such setting does not<br />
cause an error in programming but the sales data will not be processed into that hourly range.<br />
3. If an hourly value of more than 23 or a minute value of more than 59 is set, it will not result in an<br />
error but the data will not be processed into that hourly range.<br />
4. To change the table of hourly ranges once set, partially or entirely, do the entire setting operation<br />
over again.<br />
5. To clear the hourly range table once set, operate in SET mode:<br />
7 @/FOR<br />
0<br />
#/NS
21. READ AND RESET REPORTS<br />
Hourly Range Table Program Receipt Format:<br />
Hourly Range Table Key Operation<br />
Control Lock: SET<br />
7 @/FOR<br />
up to 8:00<br />
8:01 to 9:00<br />
9:01 to 10:00<br />
10:01 to 13:00<br />
13:01 to 16:30<br />
16:31 to 19:00<br />
1<br />
1<br />
1 6 3 0<br />
1<br />
8<br />
9<br />
0<br />
3<br />
9<br />
0<br />
0<br />
0<br />
0<br />
0<br />
0<br />
0<br />
0<br />
0<br />
0<br />
21-2<br />
#/NS<br />
#/NS<br />
#/NS<br />
#/NS<br />
#/NS<br />
#/NS<br />
AT/TL<br />
21.2 Selecting Print/Non-print Items on Reports<br />
EO1-11137<br />
21.2 Selecting Print/Non-print Items on Reports<br />
<strong>TEC</strong> STORE<br />
1343 PEACH DRIVE<br />
PHONE: 87-6437<br />
Open 8:00am to 7:00pm<br />
Closed: every Wednesday<br />
11-28-1997 #0<br />
P07<br />
08:00TM<br />
09:00TM<br />
10:00TM<br />
13:00TM<br />
16:30TM<br />
19:00TM<br />
0040 08:34TM<br />
The following table shows the items on reports that can be programmed to be printed or non-printed according to<br />
your store’s requirements. For further details of the programming, refer to Chapter 22. SYSTEM OPTION<br />
SETTING. If you have started sales transactions on the register without this programming operation performed,<br />
print or non-print status of each item is determined by the “Initial Status” in the following table. It is recommended,<br />
therefore, to change Print/Non-print status of each item after taking all the reports.<br />
Item Initial Status System Option<br />
Address No. - Bit No.<br />
Page<br />
GT (Grand Total) Print Address 1 - Bit 4 22-3<br />
Department Customer Count Print Address 1 - Bit 5 22-3<br />
Validation Count Non-print Address 1 - Bit 6 22-3<br />
No-sale Count Non-print Address 1 - Bit 7 22-3<br />
Sum of Negative Departments Data Non-print Address 1 - Bit 8 22-3<br />
Department Gross Profit Data Print Address 2 - Bit 7 22-4<br />
Department Sales Ratio Data Print Address 2 - Bit 8 22-4<br />
Check In-drawer Amount Print Address 6 - Bit 6 22-8<br />
Charge In-drawer Amount Non-print Address 7 - Bit 6 22-9<br />
Miscellaneous Media In-drawer Amount Print Address 8 - Bit 6 22-10<br />
Coupon In-drawer Amount Print Address 9 - Bit 6 22-11<br />
Sum of All Departments and all Department Groups Data Non-print Address 11 - Bit 3 22-12<br />
Sum of Other <strong>Inc</strong>ome Departments Data Non-print Address 11 - Bit 4 22-12<br />
Department Group Sales Ratio Data Print Address 11 - Bit 7 22-12<br />
Net Sale with Tax Print Address 16 - Bit 1 22-18<br />
Net Sale without Tax Non-print Address 16 - Bit 2 22-18<br />
Net GT Non-print Address 16 - Bit 3 22-18<br />
GST Non-taxable Amount Print Address 16 - Bit 5 22-18<br />
NS (N. NS) Print Address 16 - Bit 6 22-18
21. READ AND RESET REPORTS<br />
21-3<br />
EO1-11137<br />
• The Read (X) reports allow to read the totals but not clear the memory, while the Reset (Z) reports allow to<br />
read the totals and, at the same time, clear all the resettable totals when the report has been taken.<br />
• The symbol “X” is printed at the top of Read Reports, while “Z” is printed on Reset Reports to indicate the type<br />
of report.<br />
• Reset Report Counter is printed on each Reset Report only.<br />
• The daily report covers data obtained during a certain period on that day until the corresponding Reset Report<br />
was printed, while the periodic report covers data obtained during a certain period defined by the store.<br />
• When you take a read report, the “R OFF” lamp must be extinguished. If it is illuminated, press the [LOG/<br />
RECEIPT] key to extinguish the lamp. As for a reset report, it can be issued even if the “R OFF” lamp is<br />
illuminated.<br />
CAUTION: Whenever you turn the Control Lock to “Z” position, be sure that you are taking Reset Reports<br />
(final reports) and that the sales data will be cleared by the operation to follow.<br />
21.3 Daily Reports<br />
Report Name Key Operation Sample<br />
Page<br />
* Financial Read Control Lock: X<br />
* Financial Reset Control Lock: Z<br />
Hourly Sales Read Control Lock: X<br />
Hourly Sales Reset Control Lock: Z<br />
All Department Read (NOTE 2) Control Lock: X<br />
All Department Reset (NOTE 2) Control Lock: Z<br />
Department Gross Profit Read<br />
All PLU Sales Read Control Lock: X<br />
All PLU Sales Reset Control Lock: Z<br />
Zone PLU Sales Read Control Lock: X<br />
Zone PLU Sales Reset Control Lock: Z<br />
* Media Sales and In-drawer Read<br />
WARNING!<br />
When opening the cash drawer, be careful not to let the drawer hit any person.<br />
Control Lock: X<br />
* Individual Cashier Read (NOTE 3) Control Lock: X Cashier Signing Method<br />
* Individual Cashier Reset (NOTE 3) Control Lock: Z<br />
→<br />
→<br />
→<br />
→<br />
AT/TL<br />
1<br />
1<br />
0<br />
1<br />
AT/TL<br />
AT/TL<br />
Control Lock: X 1 2 AT/TL<br />
→ PLU<br />
→ @/FOR PLU<br />
→<br />
⎯→<br />
Zone-start<br />
PLU Code<br />
#/NS<br />
LOG<br />
RECEIPT<br />
Cashier Code:<br />
1 to 8<br />
→<br />
Zone-end<br />
PLU Code<br />
(or #/CID , # )<br />
Cashier Key Method<br />
Set the required Cashier<br />
Key ON, then 1 AT/TL<br />
21.3 Daily Reports<br />
21-5<br />
21-11<br />
21-12<br />
21-13<br />
21-13<br />
21-13<br />
21-11<br />
21-14
21. READ AND RESET REPORTS<br />
21.4 Periodic Reports<br />
21-4<br />
EO1-11137<br />
Report Name Key Operation Sample<br />
Page<br />
* Financial Read Control Lock: X<br />
* Financial Reset Control Lock: Z<br />
* All Cashier Read (NOTE 3) Control Lock: X<br />
* All Cashier Reset (NOTE 3) Control Lock: Z<br />
All Department Read (NOTE 2) Control Lock: X<br />
All Department Reset (NOTE 2) Control Lock: Z<br />
Department Gross Profit Read<br />
Control Lock: X<br />
→ 2<br />
→<br />
4<br />
→ 2<br />
→<br />
2<br />
0<br />
1<br />
AT/TL<br />
AT/TL<br />
2<br />
AT/TL<br />
AT/TL<br />
NOTES: 1. The cash drawer will open on the final key of the key operation for the reports marked with “*”.<br />
2. All Department Read and Reset Reports can be issued when the system option “Issuing<br />
Department Reports separately from Financial Reports” is selected. (Refer to Chapter 22.<br />
SYSTEM OPTION SETTING, Address 21 - Bit 4 on page 22-23.)<br />
3. Cashier Read and Reset Reports can be issued only when the Cashier Identifying Option<br />
(Signing Method; Cashier Sign ON & Sign OFF, Cashier Key Method; Push LED Key, Barrel<br />
Lock, [CLK] Key) is selected. Refer to Chapter 16.<br />
21.5 Report Sample Format<br />
21.4 Periodic Reports<br />
On the following pages are sample formats of respective reports. In referring to those formats, please note the<br />
following conditions:<br />
• In each report format, all the items that can be programmed to print are placed.<br />
• The data contents are merely examples to show the report format. The numeric data may not balance<br />
correctly. (For the actual and correct Memory Balance, refer to pages 21-8 to 10.)<br />
21-5<br />
21-15<br />
21-12<br />
21-13
21. READ AND RESET REPORTS<br />
21.5.1 Financial Read or Reset Report (Daily or Periodic)<br />
NOTE on<br />
page 21-7<br />
<strong>TEC</strong> STORE<br />
1343 PEACH DRIVE<br />
PHONE: 87-6437<br />
Open 8:00am to 7:00pm<br />
Closed: every Wednesday<br />
11-28-1997 #112300<br />
Z<br />
GT<br />
10105581.31<br />
NET GT<br />
10106672.51<br />
GS 185<br />
988.46<br />
MEAT 44<br />
31CU 244.10<br />
46.97%<br />
FISH 40<br />
18CU 134.61<br />
25.90%<br />
DRINK 25<br />
31CU 59.90<br />
11.53%<br />
BAKERY 33<br />
12CU 81.11<br />
15.61%<br />
DP05 5<br />
5CU -7.50<br />
DP06 3<br />
3CU 1200.00<br />
TOTAL 142<br />
512.22<br />
FRESH F 84<br />
22.12% 378.71<br />
DR & BA 58<br />
8.24% 141.01<br />
OTHERS 8<br />
69.65% 1192.50<br />
TOTAL 150<br />
1712.22<br />
%+ 1<br />
1.50<br />
NS 142<br />
513.72<br />
GST 0.00<br />
TAX1 18.13<br />
TAX2 17.63<br />
TAX3 18.13<br />
TAX4 17.63<br />
EX GST 0.00<br />
NS 142<br />
549.60<br />
HASH TL 3<br />
1200.00<br />
%- 2<br />
2.80<br />
V.CPN 1<br />
1.00<br />
DISC 1<br />
0.40<br />
TOTAL<br />
60CU 1745.40<br />
Date, Register No.<br />
Report Type Symbol<br />
Grand Total (non-resettable) (Initial Status: Print)<br />
NET GT (non-resettable) (Initial Status: Non-print)<br />
Gross Sale: Item Count<br />
Amount<br />
Department 1 (MEAT): Item Count<br />
Customer Count (Initial Status: Print), Amount<br />
Sales Ratio (Initial Status: Print)<br />
Department 2 (FISH) Data<br />
Department 3 (DRINK) Data<br />
Department 4 (BAKERY) Data<br />
21-5<br />
EO1-11137<br />
Department 5 Data; Negative status department is excluded from the sales ratio calculation.<br />
Department 6 Data; Other income department is excluded from the sales ratio calculation.<br />
Total of all departments (excluding negative and other income depts.): Item Count<br />
(Initial Status: Non-print) Amount<br />
Department Group 1 (FRESH F): Item Count<br />
Sales Ratio (Initial Status: Print), Amount<br />
Department Group 2 (DR & BA) Data<br />
Department Group 3 (OTHERS) Data<br />
Total of all department groups (Initial Status: Non-print): Item Count<br />
Amount<br />
Percent Charge: Count<br />
Amount<br />
Net Sales without Tax (Initial Status: Non-print): Item Count<br />
Amount<br />
GST (exclusive) Amount (Print for the GST feature)<br />
Tax 1 Amount<br />
Tax 2 Amount<br />
Tax 3 Amount<br />
<strong>Ma</strong>nual Tax Amount<br />
Exempted GST (inclusive) Amount (Print for the GST feature)<br />
Net Sales with Tax (Initial Status: Print): Item Count<br />
Amount<br />
Total of Other <strong>Inc</strong>ome Departments: Item Count<br />
(Initial Status: Non-print) Amount<br />
Percent Discount on Subtotal: Count<br />
Amount<br />
Vendor Coupon: Count<br />
Amount<br />
Dollar Discount: Count<br />
Amount<br />
All Media Total: Customer Count, Amount<br />
X: Daily Read<br />
Z: Daily Reset<br />
GTX: Periodic Read<br />
GTZ: Periodic Reset<br />
21.5 Report Sample Format
21. READ AND RESET REPORTS<br />
CASH<br />
44CU 773.43<br />
CHECK<br />
3CU 550.88<br />
Chg<br />
8CU 336.36<br />
MISC<br />
1CU 1745.40<br />
CPN<br />
0CU 773.43<br />
FS TL<br />
1CU 550.88<br />
R/A 6<br />
45.00<br />
PO 3<br />
6.50<br />
CASH ID 603.16<br />
CHECK ID 7<br />
572.00<br />
Chg ID 8<br />
336.36<br />
MISC ID 3<br />
23.00<br />
CPN ID 3<br />
15.00<br />
FSID 3<br />
18.00<br />
FS CG 0.40<br />
CORR 2<br />
6.50<br />
VOID 2<br />
14.00<br />
MISC VD 0<br />
0.00<br />
ALL VD 2<br />
37.40<br />
%- 3<br />
1.70<br />
S.CPN 1<br />
1.00<br />
-DP TL 5<br />
7.50<br />
RTN 5<br />
22.10<br />
-TAX 0.45<br />
REG- 1<br />
13.95<br />
TRF TL 20.19<br />
TRF+ GT 20.19<br />
TRF- GT 0.00<br />
TRF+ 20.19<br />
TRF- 0.00<br />
PB TL<br />
3CU 30.99<br />
PB R/A 10.80<br />
PB PO 0.00<br />
NON GST 0.00<br />
GST TXBL 222.43<br />
GST INC 15.57<br />
TXBL1 362.31<br />
TXBL2 85.60<br />
TXBL3 0.00<br />
TAX EX<br />
2CU<br />
GST EX 0.00<br />
TAX1EX 24.50<br />
TAX2EX 8.50<br />
TAX3EX 0.00<br />
Cash Sales: Customer Count, Amount<br />
Check Sales: Customer Count, Amount<br />
Charge Sales: Customer Count, Amount<br />
Miscellaneous Media Sales: Customer Count, Amount<br />
Media-coupon Sales: Customer Count, Amount<br />
21-6<br />
EO1-11137<br />
Food Stamp Sales (Print for the Food Stamp feature):<br />
Customer Count, Amount<br />
Received-on-Account: Count<br />
Amount<br />
Paid Out: Count<br />
Amount<br />
Cash-in-drawer Amount<br />
Check-in-drawer: Count<br />
These items<br />
Amount (Initial Status: Print)<br />
are printed<br />
Charge-in-drawer: Count<br />
on Daily Re-<br />
Amount (Initial Status: Non-print)<br />
ports only<br />
Miscellaneous Media-in-drawer: Count<br />
but not on<br />
Amount (Initial Status: Print)<br />
Media-coupon-in-drawer: Count<br />
Periodic<br />
Amount (Initial Status: Print)<br />
Reports.<br />
Food Stamp-in-drawer: Count<br />
Amount (Print for the Food Stamp feature)<br />
Food Stamp Change Amount (Print for the Food Stamp feature)<br />
Item Correct: Count<br />
Amount<br />
Void: Count<br />
Amount<br />
Misc. Void (Item Correct and Void on other items than Departments and PLUs): Count<br />
All Void: Count<br />
Amount<br />
Percent Discount on Line Item: Count<br />
Amount<br />
Store Coupon: Count<br />
Amount<br />
Total of Negative Departments: Item Count (Initial Status: Non-print)<br />
Amount<br />
Returned Merchandise: Item Count<br />
Amount<br />
Negative Tax Amount<br />
Negative Mode (“ - ” position): Count<br />
Amount<br />
Transfer Total (non-resettabale)<br />
Transfer (+) GT (non-resettable)<br />
Transfer (-) GT (non-resettable)<br />
Transfer (+) Daily<br />
Transfer (-) Daily<br />
Previous Balance Sales: Customer Count, Amount<br />
Previous Balance R/A Amount<br />
Previous Balance PO Amount<br />
GST Non-taxable Amount (Print for the GST feature; Initial Status: Print)<br />
Sale Total subject to GST (Print for the GST feature)<br />
GST (inclusive) Amount (Print for the GST feature)<br />
Sale Total subject to Tax 1<br />
Sale Total subject to Tax 2<br />
Sale Total subject to Tax 3<br />
Tax Exempted Customer Count<br />
GST Exempt Amount (Print for the GST feature)<br />
Tax 1 Exempt Amount<br />
Tax 2 Exempt Amount<br />
Tax 3 Exempt Amount<br />
21.5 Report Sample Format<br />
Amount
21. READ AND RESET REPORTS<br />
FS EX1 0.00<br />
FS EX2 0.00<br />
FS EX3 0.00<br />
N. NS 0.00<br />
CUR1 2<br />
120.00<br />
CUR2 1<br />
15.00<br />
NO SALE 2<br />
VALI CTR 6<br />
MEAT<br />
10.00% 24.41<br />
FISH<br />
15.00% 20.19<br />
DRINK<br />
20.00% 11.98<br />
BAKERY<br />
25.00% 20.27<br />
TOTAL<br />
14.79% 76.85<br />
0006Z<br />
0263 20:37TM<br />
Food Stamp Tax 1 Exempt Amount (Printed only when ILLINOIS or<br />
Food Stamp Tax 2 Exempt Amount NEW JERSEY type of Food<br />
Food Stamp Tax 3 Exempt Amount Stamp feature is selected.)<br />
New Net Sales Amount (Print for the GST feature)<br />
Foreign Currency 1-in-drawer: Count<br />
Amount<br />
Foreign Currency 2-in-drawer: Count<br />
Amount<br />
No-sale Count (Initial Status: Non-print)<br />
Validation Print Count (Initial Status: Non-print)<br />
Department 1 (MEAT)<br />
Gross Profit Rate, Amount<br />
Department 2 (FISH)<br />
Gross Profit Rate, Amount<br />
Department 3 (DRINK)<br />
Gross Profit Rate, Amount<br />
Department 4 (BAKERY)<br />
Gross Profit Rate, Amount<br />
Average Gross Profit Rate, Total of Gross Profit Amount<br />
Reset Count of this Reset Report (printed on Reset Report only)<br />
Receipt Consecutive No., Current Time<br />
NOTE: Initially, department and department group data is printed on the Financial Report as shown in the<br />
sample. However, the data can be issued separately from the Financial Report. (Refer to All<br />
Departments Read or Reset Report shown on page 21-12.)<br />
21-7<br />
EO1-11137<br />
21.5 Report Sample Format
21. READ AND RESET REPORTS<br />
Memory Balance applicable to the US Version<br />
Grand Total = Sum of Daily Gross Sales<br />
NET GT = Sum of Daily All Media Sales<br />
- Memory Balance -<br />
Gross Sales = (Sum of Depts.; NOTE 1) + (Sum of Taxes) + (Percent Charge)<br />
+ (Percent Discount on Line Item) + (Sum of Negative Depts.) + (Item Correct)<br />
+ (Void) + (Returned Merchandise) + (“ - ” Mode) + (Store Coupon)<br />
+ (All Void; NOTE 2) + (Negative Tax)<br />
Net Sales with Tax = (Sum of Depts.; NOTE 1) + (Sum of Taxes) + (Percent Charge)<br />
= (Gross Sales) - (Item Correct) - (Void) - (Percent Discount on Line Item)<br />
- (Store Coupon) - (Negative Tax) - (Sum of Negative Depts.)<br />
- (Returned Merchandise) - (“ - ” Mode) - (All Void; NOTE 2)<br />
All Media Sales = (Net Sales with Tax) - (Percent Discount on Subtotal) - (Vendor Coupon)<br />
- (Dollar Discount) + (Sum of Other <strong>Inc</strong>ome Depts.)<br />
= (Cash Sales) + (Check Sales) + (Charge Sales)<br />
+ (Miscellaneous Media Sales) + (Media-coupon Sales)<br />
+ (Food Stamp Sales) + (Previous Balance Sales)<br />
Sum of Hourly Range Sales = Net Sales with Tax (US Balance; NOTE 3)<br />
Sum of Hourly Range Sales = Net Sales without Tax (CA Balance)<br />
“ - ” Mode = (Gross Sales) in the “ - ” Mode<br />
Sum of NEG 1 = (Percent Discount on Line Item) + (Sum of Negative Depts.) + (Item Correct) + (Void)<br />
+ (Returned Merchandise) + (Negative Tax) + (“ - ” Mode) + (All Void; NOTE 2)<br />
+ (Store Coupon)<br />
Sum of NEG 2 = (Percent Discount on Subtotal) + (Dollar Discount) + (Misc. Void) + (Vendor Coupon)<br />
21-8<br />
EO1-11137<br />
21.5 Report Sample Format<br />
NOTES: 1. (Sum of Depts.) = (Sum of Positive Depts.) + (Sum of Negative Depts.)<br />
* Other <strong>Inc</strong>ome Depts. Excluded<br />
2. (All Void) = (Sum of Positive Depts.) + (<strong>Ma</strong>nual Tax) + (Percent Charge)<br />
3. Applicable when the Daily Financial Reset Report and the Daily Hourly Range Reset Report are<br />
taken at the same time.<br />
4. The same amount processed into the Gross Sales memory is processed into the All Void<br />
memory.
21. READ AND RESET REPORTS<br />
Memory Balance applicable to the CA GST (Exclusive) Version<br />
Grand Total = Sum of Daily Gross Sales<br />
NET GT = Sum of Daily All Media Sales<br />
Gross Sales = (Net Sales with Tax) + (Percent Discount on Line Item) + (Sum of Negative Depts.)<br />
+ (Item Correct) + (Void) + (Returned Merchandise) + (“ - ” Mode) + (Store Coupon)<br />
+ (All Void; NOTE 2) + (Negative Tax)<br />
Net Sales with Tax = (Sum of Depts.; NOTE 1) + (Percent Charge) + (GST) + (PST; NOTE 3)<br />
= (Gross Sales) - (Item Correct) - (Void) - (Percent Discount on Line Item)<br />
- (Store Coupon) - (Negative Tax) - (Sum of Negative Depts.)<br />
- (Returned Merchandise) - (“ - ” Mode) - (All Void; NOTE 2)<br />
All Media Sales = (Net Sales with Tax) - (Percent Discount on Subtotal) - (Vendor Coupon)<br />
- (Dollar Discount) + (Sum of Other <strong>Inc</strong>ome Depts.)<br />
= (Cash Sales) + (Check Sales) + (Charge Sales) + (Miscellaneous Media Sales)<br />
+ (Media-coupon Sales) + (Previous Balance Sales)<br />
Sum of Hourly Range Sales = (Sum of Depts.; NOTE 1) + (Percent Charge)<br />
= N.NS (New Net Sales)<br />
“ - ” Mode = (Gross Sales) in the “ - ” Mode<br />
Sum of NEG 1 = (Percent Discount on Line Item) + (Sum of Negative Depts.) + (Item Correct) + (Void)<br />
+ (Returned Merchandise) + (Negative Tax) + (“ - ” Mode) + (All Void; NOTE 2)<br />
+ (Store Coupon)<br />
Sum of NEG 2 = (Percent Discount on Subtotal) + (Dollar Discount) + (Misc. Void) + (Vendor Coupon)<br />
NOTES: 1. (Sum of Depts.) = (Sum of Positive Depts.) + (Sum of Negative Depts.)<br />
* Other <strong>Inc</strong>ome Depts. Excluded<br />
2. (All Void) = (Sum of Positive Depts.) + (<strong>Ma</strong>nual Tax) + (Percent Charge)<br />
3. PST = (Sum of Taxes; Taxes 1 to 3 and <strong>Ma</strong>nual Tax)<br />
4. The same amount processed into the Gross Sales memory is processed into the All Void<br />
memory.<br />
21-9<br />
EO1-11137<br />
21.5 Report Sample Format
21. READ AND RESET REPORTS<br />
Memory Balance applicable to the CA GST (<strong>Inc</strong>lusive) Version<br />
Grand Total = Sum of Daily Gross Sales<br />
NET GT = Sum of Daily All Media Sales<br />
Gross Sales = (Net Sales with Tax) + (Percent Discount on Line Item) + (Sum of Negative Depts.)<br />
+ (Item Correct) + (Void) + (Returned Merchandise) + (“ - ” Mode) + (Store Coupon)<br />
+ (All Void; NOTE 2) + (Negative Tax) + (Exempted GST)<br />
Net Sales with Tax = (Sum of Depts.; NOTE 1) + (Percent Charge) + (PST; NOTE 3) - (Exempted GST)<br />
= (Gross Sales) - (Item Correct) - (Void) - (Percent Discount on Line Item)<br />
- (Store Coupon) - (Negative Tax) - (Sum of Negative Depts.)<br />
- (Returned Merchandise) - (“ - ” Mode) - (All Void; NOTE 2)<br />
All Media Sales = (Net Sales with Tax) - (Percent Discount on Subtotal) - (Vendor Coupon)<br />
- (Dollar Discount) + (Sum of Other <strong>Inc</strong>ome Depts.)<br />
= (Cash Sales) + (Check Sales) + (Charge Sales) + (Miscellaneous Media Sales)<br />
+ (Media-coupon Sales) + (Previous Balance Sales)<br />
Sum of Hourly Range Sales = (Sum of Depts.; NOTE 1) + (Percent Charge) - (Exempted GST)<br />
- (GST included in Depts.)<br />
= N.NS (New Net Sales)<br />
“ - ” Mode = (Gross Sales) in the “ - ” Mode<br />
Sum of NEG 1 = (Percent Discount on Line Item) + (Sum of Negative Depts.) + (Item Correct) + (Void)<br />
+ (Returned Merchandise) + (Negative Tax) + (“ - ” Mode) + (All Void; NOTE 2)<br />
+ (Store Coupon)<br />
Sum of NEG 2 = (Percent Discount on Subtotal) + (Dollar Discount) + (Misc. Void) + (Vendor Coupon)<br />
NOTES: 1. (Sum of Depts.) = (Sum of Positive Depts.) + (Sum of Negative Depts.)<br />
* Other <strong>Inc</strong>ome Depts. Excluded<br />
2. (All Void) = (Sum of Positive Depts.) + (<strong>Ma</strong>nual Tax) + (Percent Charge)<br />
3. PST = (Sum of Taxes; Taxes 1 to 3 and <strong>Ma</strong>nual Tax)<br />
4. The same amount processed into the Gross Sales memory is processed into the All Void<br />
memory.<br />
21-10<br />
EO1-11137<br />
21.5 Report Sample Format
21. READ AND RESET REPORTS<br />
21.5.2 Daily Hourly Sales Read or Reset Report<br />
<strong>TEC</strong> STORE<br />
1343 PEACH DRIVE<br />
PHONE: 87-6437<br />
Open 8:00am to 7:00pm<br />
Closed: every Wednesday<br />
11-28-1997 #112300<br />
Z10<br />
08:00TM<br />
1CU 5.00<br />
09:00TM<br />
4CU 43.35<br />
10:00TM<br />
14CU 78.55<br />
13:00TM<br />
24CU 240.96<br />
16:30TM<br />
18CU 186.74<br />
19:00TM<br />
0001Z<br />
0252 20:04TM<br />
<strong>TEC</strong> STORE<br />
1343 PEACH DRIVE<br />
PHONE: 87-6437<br />
Open 8:00am to 7:00pm<br />
Closed: every Wednesday<br />
11-28-1997 #112300<br />
X<br />
TOTAL<br />
60CU 1745.40<br />
CASH ID 603.16<br />
CHECK ID 7<br />
572.00<br />
Chg ID 8<br />
336.36<br />
MISC ID 3<br />
23.00<br />
CPN ID 3<br />
15.00<br />
FSID 3<br />
18.00<br />
CUR1 2<br />
120.00<br />
CUR2 1<br />
15.00<br />
0250 20:00TM<br />
Report Type Symbol<br />
21-11<br />
EO1-11137<br />
Sales Data in Hourly Range from 19 : 01 yesterday to 8 : 00 No sales recorded<br />
Sales Data (Customer Count & Amount) in Hourly Range from 8 : 01 to 9 : 00<br />
Sales Data (Customer Count & Amount) in Hourly Range from 9 : 01 to 10 : 00<br />
Sales Data (Customer Count & Amount) in Hourly Range from 10 : 01 to 13 : 00<br />
Sales Data (Customer Count & Amount) in Hourly Range from 13 : 01 to 16 : 30<br />
Sales Data (Customer Count & Amount) in Hourly Range from 16 : 31 to 19 : 00<br />
Reset Count of this Reset Report (printed on Reset Reports only)<br />
Receipt Consecutive No., Current Time<br />
21.5.3 Daily Media Sales & In-drawer Read Report<br />
X10: Daily Read<br />
Z10: Daily Reset<br />
Report Type Symbol (Daily Read Report only)<br />
Total Customer Count, All Media Sales Amount<br />
Cash-in-drawer Amount<br />
Check-in-drawer: Count<br />
Amount (Initial Status: Print)<br />
Charge-in-drawer: Count<br />
Amount (Initial Status: Non-print)<br />
Miscellaneous Media-in-drawer: Count<br />
Amount (Initial Status: Print)<br />
Media-coupon-in-drawer: Count<br />
Amount (Initial Status: Print)<br />
Food Stamp-in-drawer: Count<br />
Amount (Print for the Food Stamp feature)<br />
Foreign Currency 1-in-drawer: Count<br />
Amount<br />
Foreign Currency 2-in-drawer: Count<br />
Amount<br />
Receipt Consecutive No., Current Time<br />
21.5 Report Sample Format
21. READ AND RESET REPORTS<br />
21.5.4 All Departments Read or Reset Report (Daily or Periodic)<br />
(Initial<br />
Status:<br />
Print)<br />
NOTE 2<br />
<strong>TEC</strong> STORE<br />
1343 PEACH DRIVE<br />
PHONE: 87-6437<br />
Open 8:00am to 7:00pm<br />
Closed: every Wednesday<br />
11-28-1997 #112300<br />
X11<br />
MEAT 44<br />
31CU 244.10<br />
46.97%<br />
FISH 40<br />
18CU 134.61<br />
25.90%<br />
DRINK 25<br />
13CU 59.90<br />
11.53%<br />
BAKERY 33<br />
12CU 81.11<br />
15.61%<br />
DP05 5<br />
5CU -7.50<br />
DP06 3<br />
3CU 1200.00<br />
TOTAL 142<br />
512.22<br />
FRESH F 84<br />
22.12% 378.71<br />
DR & BA 58<br />
8.24% 141.01<br />
OTHERS 8<br />
69.65% 1192.50<br />
TOTAL 150<br />
1712.22<br />
MEAT<br />
10.00% 24.41<br />
FISH<br />
15.00% 20.19<br />
DRINK<br />
20.00% 11.98<br />
BAKERY<br />
25.00% 20.27<br />
TOTAL<br />
14.79% 76.85<br />
0254 20:10TM<br />
Report Type Symbol<br />
Department 1 (MEAT): Item Count<br />
Customer Count (Initial Status: Print), Amount<br />
Sales Ratio (Initial Status: Print)<br />
Department 2 (FISH) Data<br />
Department 3 (DRINK) Data<br />
Department 4 (BAKERY) Data<br />
21-12<br />
EO1-11137<br />
Department 5 Data; Negative status department is excluded from the sales ratio<br />
calculation.<br />
Department 6 Data; Other income department is excluded from the sales ratio calculation.<br />
Total of all departments<br />
(excluding negative and other income depts.) (Initial Status: Non-print): Item Count<br />
Amount<br />
Department Group 1 (FRESH F): Item Count<br />
Sales Ratio (Initial Status: Print), Amount<br />
Department Group 2 (DR & BA) Data<br />
Department Group 3 (OTHERS) Data<br />
Total of all department groups (Initial Status: Non-print): Item Count<br />
Amount<br />
Department 1 (MEAT)<br />
Gross Profit Rate, Amount<br />
Department 2 (FISH)<br />
Gross Profit Rate, Amount<br />
Department 3 (DRINK)<br />
Gross Profit Rate, Amount<br />
Department 4 (BAKERY)<br />
Gross Profit Rate, Amount<br />
Average Gross Profit Rate, Total of Gross Profit Amount<br />
Receipt Consecutive No., Current Time<br />
X11: Daily Read<br />
Z11: Daily Reset<br />
GTX21: Periodic Read<br />
GTZ21: Periodic Reset<br />
21.5 Report Sample Format<br />
NOTES: 1. Initially, department and department group data is printed on the Financial Report as shown in<br />
the Financial Report sample on page 21-5. However, the data can be issued separately from the<br />
Financial Report by the program option. (Refer to Chapter 22. SYSTEM OPTION SETTING,<br />
Address 21 - Bit 4 on page 22-23.)<br />
2. Data concerning the Department Gross Profit is not printed for the following Departments.<br />
• Negative Status Department<br />
• Other <strong>Inc</strong>ome Department<br />
• Department which has no sales data<br />
• Department of which sales data is negative
21. READ AND RESET REPORTS<br />
21.5.5 Department Gross Profit Read (Daily or Periodic)<br />
NOTE<br />
X12<br />
MEAT<br />
10.00% 24.41<br />
FISH<br />
15.00% 20.19<br />
DRINK<br />
20.00% 11.98<br />
BAKERY<br />
25.00% 20.27<br />
TOTAL<br />
14.79% 76.85<br />
0255 20:13TM<br />
Report Type Symbol<br />
Department 1 (MEAT)<br />
Gross Profit Rate, Amount<br />
Department 2 (FISH)<br />
Gross Profit Rate, Amount<br />
Department 3 (DRINK)<br />
Gross Profit Rate, Amount<br />
Department 4 (BAKERY)<br />
Gross Profit Rate, Amount<br />
Average Gross Profit Rate, Total of Gross Profit Amount<br />
Receipt Consecutive No., Current Time<br />
21-13<br />
X12: Daily Read<br />
GTX22: Periodic Read<br />
NOTE: Data concerning the Department Gross Profit is not printed for the following Departments.<br />
• Negative Status Department<br />
• Other <strong>Inc</strong>ome Department<br />
• Department which has no sales data<br />
• Department of which sales data is negative<br />
21.5.6 Daily PLU Read or Reset Report (All or Zone)<br />
■ Daily All PLU Read or Reset Report<br />
Z<br />
0100 Pork<br />
8 16.00<br />
0101 Beef<br />
3 9.00<br />
0200 Salmon<br />
6 30.00<br />
0201 Shrimp<br />
9 18.00<br />
0300 Coke-A<br />
15 12.00<br />
0301 Boke-B<br />
4 4.00<br />
0400 Bun-A<br />
12 4.51<br />
0401 Bun-B<br />
11 5.50<br />
0500 PLU500<br />
1 -0.50<br />
TOTAL<br />
68 98.51<br />
0001Z<br />
0256 20:15TM<br />
Report Type Symbol<br />
PLU Code 100 (Pork)<br />
Item Count, Amount<br />
PLU Code 101 (Beef)<br />
Item Count, Amount<br />
PLU Code 200 (Salmon)<br />
Item Count, Amount<br />
PLU Code 201 (Shrimp)<br />
Item Count, Amount<br />
PLU Code 300 (Coke-A)<br />
Item Count, Amount<br />
PLU Code 301 (Coke-B)<br />
Item Count, Amount<br />
PLU Code 400 (Bun-A)<br />
Item Count, Amount<br />
PLU Code 401 (Bun-B)<br />
Item Count, Amount<br />
PLU Code 500<br />
Item Count, Amount<br />
X: Daily Read<br />
Z: Daily Reset<br />
Total of all PLUs<br />
Item Count (Positive PLUs only), Amount (Positive PLUs + Negative PLUs)<br />
Reset Count of this Reset Report (including the Zone Reset)<br />
(printed on Reset Reports only)<br />
Receipt Consecutive No., Current Time<br />
EO1-11137<br />
21.5 Report Sample Format<br />
■ Daily Zone PLU Read or Reset Report<br />
The format is the same as “All PLU Read or Reset Report” above. The only difference is that the Zone<br />
Read or Reset Report outputs only the PLUs in the zone designated by the key operation to take the report.
21. READ AND RESET REPORTS<br />
21.5.7 Cashier Read or Reset Report (Daily or Periodic)<br />
■ Daily Cashier Read or Reset Report<br />
<strong>TEC</strong> STORE<br />
1343 PEACH DRIVE<br />
PHONE: 87-6437<br />
Open 8:00am to 7:00pm<br />
Closed: every Wednesday<br />
11-28-1997 #112300<br />
Z<br />
SMITH<br />
GS 6<br />
26.68<br />
NS 3<br />
18.00<br />
NS 3<br />
18.48<br />
HASH TL 0<br />
0.00<br />
TOTAL<br />
4CU 18.48<br />
CASH ID -2.52<br />
CHECK ID 1<br />
10.00<br />
Chg ID 0<br />
0.00<br />
MISC ID 0<br />
0.00<br />
CPN ID 0<br />
0.00<br />
FSID 2<br />
11.00<br />
NEG1 8.20<br />
NEG2 0.00<br />
PO 0.00<br />
TAX 0.48<br />
0002Z<br />
0258 20:22TM<br />
Report Type Symbol<br />
Cashier Name<br />
Gross Sales: Item Count<br />
Amount<br />
Net Sales without Tax (Initial Status: Non-print): Item Count<br />
Amount<br />
Net Sales with Tax (Initial Status: Print): Item Count<br />
Amount<br />
Other <strong>Inc</strong>ome Department Sales (Initial Status: Non-print): Item Count<br />
Amount<br />
Total Customer Count, All Media Sales Amount<br />
Cash-in-drawer Amount<br />
Check-in-drawer: Count<br />
Amount (Initial Status: Print)<br />
Charge-in-drawer: Count<br />
Amount (Initial Status: Non-print)<br />
Miscellaneous Media-in-drawer: Count<br />
Amount (Initial Status: Print)<br />
Media-coupon-in-drawer: Count<br />
Amount (Initial Status: Print)<br />
Food Stamp-in-drawer: Count<br />
Amount (Print for the Food Stamp feature)<br />
NEG 1 Data<br />
NEG 2 Data<br />
Paid Out Amount<br />
Tax Amount (Initial Status: Non-print)<br />
Reset Count of this Reset Report (printed on Reset Reports only)<br />
Receipt Consecutive No., Current Time<br />
21-14<br />
X: Daily Read<br />
Z: Daily Reset<br />
EO1-11137<br />
21.5 Report Sample Format
21. READ AND RESET REPORTS<br />
■ Periodic Cashier Read or Reset Report<br />
<strong>TEC</strong> STORE<br />
1343 PEACH DRIVE<br />
PHONE: 87-6437<br />
Open 8:00am to 7:00pm<br />
Closed: every Wednesday<br />
11-28-1997 #112300<br />
Z04<br />
JONES<br />
GS 179<br />
627.52<br />
NS 139<br />
495.72<br />
NS 139<br />
531.12<br />
HASH TL 3<br />
1200.00<br />
TOTAL<br />
56CU 1726.92<br />
NEG1 96.40<br />
NEG2 4.20<br />
PO 6.50<br />
TAX 35.40<br />
SMITH<br />
GS 6<br />
26.68<br />
NS 3<br />
18.00<br />
NS 3<br />
18.48<br />
HASH TL 0<br />
0.00<br />
TOTAL<br />
4CU 18.48<br />
NEG1 8.20<br />
NEG2 0.00<br />
PO 0.00<br />
TAX 0.48<br />
3CL<br />
4CL<br />
5CL<br />
6CL<br />
7CL<br />
8CL<br />
0002Z<br />
0259 20:24TM<br />
Report Type Symbol<br />
Sales Data by Cashier 1 (JONES)<br />
(format same as in Daily Report)<br />
Sales Data by Cashier 2 (SMITH)<br />
When a cashier has no sales data, only cashier No.<br />
(or name if progarmmed) will be printed.<br />
Reset Count of this Reset Report (printed on Reset Reports only)<br />
Receipt Consecutive No., Current Time<br />
21-15<br />
X04: Periodic All Cashier Read<br />
Z04: Periodic All Cashier Reset<br />
EO1-11137<br />
21.5 Report Sample Format
22. SYSTEM OPTION SETTING<br />
22. SYSTEM OPTION SETTING<br />
ST<br />
To access Addresses 1 to 17:<br />
22-1<br />
#/NS<br />
EO1-11137<br />
22. SYSTEM OPTION SETTING<br />
This operation is provided for your selections of the register’s basic functions according to the market and your<br />
requirements.<br />
Programming Procedure<br />
The System Options are divided into 22 addresses (Addresses 1 to 23; Address 10 is vacant) and each address<br />
is further divided into a maximum of 8 bits (Bits 1 to 8). Each address table is placed on the following pages.<br />
Condition for Programming: After Daily Financial Reset (Refer to NOTE on “Condition” on page 11-1)<br />
Programming Procedure: Turn the Control Lock to the SET position using the MA key.<br />
or<br />
Turn the Control Lock to the BLIND position using the S key.<br />
REG<br />
OFF<br />
SET<br />
REG<br />
OFF<br />
SET<br />
X<br />
X<br />
MGR<br />
Address No. (max.<br />
2 digits; 1 to 23)<br />
-<br />
MGR<br />
-<br />
Z<br />
Z<br />
(BLIND)<br />
To access Addresses 1 to 13:<br />
To access all Addresses 1 to 23:<br />
Repeat for Bit status changes in all the required Addresses.<br />
Bit Nos. that are set to “SET” status<br />
(max. 8 Bit Nos. combination of 1 to 8)<br />
1 1<br />
1 8<br />
1 8<br />
@/FOR<br />
(or #/CID , # )<br />
Enter a maximum of eight-digit number composed of Bit Nos. whose status must be set to the “SET” status in the<br />
Address. If there is no Bit Nos. to be set to the “SET” status, enter “0” for the Address.<br />
Examples) To set Bit 2 only .......................................... Enter 2.<br />
To set Bits 2 and 3 ...................................... Enter 23.<br />
To set all the Bits ........................................ Enter 12345678.<br />
To reset all the Bits ..................................... Enter 0.<br />
To change any Bit in an address, enter the Address No. and enter all the SET Bit Nos. again. If a Bit No. is not<br />
included in the SET Bit Nos., the Bit will be RESET.<br />
AT/TL
22. SYSTEM OPTION SETTING<br />
@/FOR<br />
AT/TL<br />
22-2<br />
EO1-11137<br />
NOTES: 1. Do not program any Bit No. shaded and filled with “vacant” in the Address tables on the following<br />
pages. If programmed, performance of the register will not be guaranteed.<br />
2. The Initial Status of each Bit is indicated by a dotted frame such as:<br />
If you have never changed the Bit statuses in the Address before, the Initial Status is active.<br />
Therefore, only the Bit status changes of the required Addresses may be entered. If the All<br />
Memory Clear is operated, all the Bits in all the Addresses automatically regain the Initial Status.<br />
Programming Example) To select the following options:<br />
Address 1 (refer to the next page)<br />
Bit 1: Time NON-PRINT (SET status)<br />
Bit 5: Department Customer Count NON-PRINT (SET status)<br />
Other Bits are selected to all RESET (PRINT)<br />
Control Lock: SET<br />
1 8<br />
1<br />
1 5<br />
ST<br />
#/NS<br />
<strong>TEC</strong> STORE<br />
1343 PEACH DRIVE<br />
PHONE: 87-6437<br />
Open 8:00am to 7:00pm<br />
Closed: every Wednesday<br />
11-28-1997 #0<br />
P18<br />
#01 15<br />
0046<br />
22. SYSTEM OPTION SETTING
22. SYSTEM OPTION SETTING<br />
Address: 1<br />
(Non-print Options 1)<br />
Initial SET Bit Nos.<br />
Your Selection<br />
Bit Content Selective Status<br />
22-3<br />
2<br />
EO1-11137<br />
No. RESET SET<br />
1 Time on Journal and every Receipt in REG, X, MGR, - , Z,<br />
SET modes<br />
PRINT NON-PRINT<br />
2 Purchased Item Count on Sale Receipts<br />
PRINT NON-PRINT<br />
3 <strong>Ma</strong>nual Subtotal on Sales Receipts<br />
4 GT (Grand Total) on Financial Reports (in X and Z modes)<br />
5 Department Customer Count on Financial Report<br />
(in X and Z modes)<br />
6 Validation Count on Financial Report (in X and Z modes)<br />
7 No-sale Count on Financial Report (in X and Z modes)<br />
8 Sum of Negative Department Data on Financial Report<br />
(in X and Z modes)<br />
22. SYSTEM OPTION SETTING<br />
PRINT NON-PRINT<br />
PRINT NON-PRINT<br />
PRINT NON-PRINT<br />
PRINT NON-PRINT<br />
PRINT NON-PRINT<br />
PRINT NON-PRINT<br />
6<br />
7<br />
8
22. SYSTEM OPTION SETTING<br />
Address: 2<br />
(Optional Functions 1)<br />
Initial SET Bit Nos.<br />
Your Selection<br />
Bit Content Selective Status<br />
22-4<br />
EO1-11137<br />
No. RESET SET<br />
1 Fraction Rounding Process on Quantity Extension or %<br />
Calculations<br />
ROUND OFF ROUND UP<br />
2 Fraction Rounding Process on Quantity Extension or %<br />
Calculations<br />
Follow Bit 1 status. ROUND DOWN<br />
3 SPP Fraction Round-up Process<br />
4 Print Line Item Names for %- and %+ on the Percent<br />
Discount/Charge Entry<br />
5 Credit Balance (over-subtraction of the sale by [DOLL DISC],<br />
[VOID] keys, etc.) in REG mode<br />
6 Obtaining Taxable Total (sale total including taxes) by<br />
[TXBL TL] or [ST] key before finalizing a sale<br />
7 Department Gross Profit Data on the Financial (or Department)<br />
Report (in X and Z modes)<br />
8 Department Sales Ratio on the Financial (or Department) Report<br />
(in X and Z modes)<br />
Supplementary Description for Address 2:<br />
Bit 1 & 2: If both RESET, ROUND OFF status is obtained.<br />
If both SET, Bit 2 status prevails, i.e., ROUND DOWN.<br />
(Fraction Rounding Process on tax calculations is fixed to ROUND OFF, out of the application of<br />
the process selected here as for GST, refer to Address 17-Bits 2 and 3.)<br />
Bit 3: ex.) When a customer wants 2 items (Purchased Quantity) of 3 items (Whole Package<br />
Quantity) of $1.00 (Whole Package Price):<br />
RESET status ........... (ROUND UP PRODUCT) {100 (Whole Package Price) ÷ 3 (Whole<br />
Package Quantity)} x 2 = 66.666... Round up to $0.67<br />
SET status ................ (ROUND UP ITEM PRICE) 100 (Whole Package Price) ÷ 3 (Whole<br />
Package Quantity) = 33.333... Round up to $0.34 (Item Price), then $0.34<br />
x 2 = $0.68<br />
Bit 4: If SET status is selected, only the rate and the discount/charge amount will be printed in the<br />
Percent Discount/Charge entry.<br />
Bit 5: The [RTN MDSE] key is operable to turn the sale into negative regardless of this bit status<br />
selection.<br />
Bit 7: If RESET status is selected, Department Gross Profit Data (each gross profit rate and amount of<br />
the departments and the gross profit amount total) will be printed on the Financial (or<br />
Department) Read/Reset Report. Department Gross Profit Read Report can be always issued<br />
regardless of this bit status selection.<br />
Bit 8: Department Sales Ratio = Department Amount ÷ Sum of Positive Departments<br />
22. SYSTEM OPTION SETTING<br />
ROUND UP PRODUCT ROUND UP ITEM PRICE<br />
PRINT NON-PRINT<br />
PROHIBITED ALLOWED<br />
NOT COMPULSORY COMPULSORY<br />
PRINT NON-PRINT<br />
PRINT NON-PRINT<br />
0
22. SYSTEM OPTION SETTING<br />
Address: 3<br />
(Tax Status, Food Stamp Status)<br />
Initial SET Bit Nos.<br />
Your Selection<br />
Bit Content Selective Status<br />
No. RESET SET<br />
1 [%+] (%I) key PST/Tax Status<br />
NON-TAXABLE TAXABLE<br />
2 [%-] (%II) key PST/Tax Status<br />
3 [DOLL DISC] key PST/Tax Status<br />
4 [%+] (%I) key GST or Food Stamp Status<br />
5 [%-] (%II) key GST or Food Stamp Status<br />
6 [DOLL DISC] key GST or Food Stamp Status<br />
7, 8<br />
Supplementary Description 3:<br />
22-5<br />
EO1-11137<br />
22. SYSTEM OPTION SETTING<br />
NON-TAXABLE TAXABLE<br />
NON-TAXABLE TAXABLE<br />
GST NON-TAXABLE, GST TAXABLE, or<br />
or Non-Food-stampable Food-stampable<br />
GST NON-TAXABLE, GST TAXABLE, or<br />
or Non-Food-stampable Food-stampable<br />
GST NON-TAXABLE, GST TAXABLE, or<br />
or Non-Food-stampable Food-stampable<br />
Bit 1 & 2: RESET status ........... The key always operate as Non-taxable.<br />
SET status ................ The key become PST/Tax Taxable if they are used after depressing the<br />
[ST] key. The keys obey Department PST/Tax status if they are used after<br />
entering a Department or PLU item.<br />
Bit 3: RESET status ........... The key always operates as Tax Non-taxable.<br />
SET status ................ The key always operates as Taxable.<br />
Whether “GST” Status is applied or “Food Stamp” Status is applied for Bits 4 to 6 here is<br />
determined by the Address 17 - Bit 8 status selection.<br />
Bit 4 & 5: RESET status ........... The key always operate as GST Non-taxable or Non-food-stampable.<br />
SET status ................ The key become GST Taxable or Food-stampable if they are used after<br />
depressing the [ST] key. The keys obey Department GST or Food Stamp<br />
status if they are used after entering a Department or PLU item.<br />
Bit 6: RESET status ........... The key always operates as GST Non-taxable or Non-food stampable.<br />
SET status ................ The key always operates as GST Taxable or Food-stampable.<br />
0
22. SYSTEM OPTION SETTING<br />
Address: 4<br />
(MGR Intervention Requirement)<br />
Initial SET Bit Nos.<br />
Your Selection<br />
Bit Content Selective Status<br />
22-6<br />
EO1-11137<br />
No. RESET SET<br />
1 [RTN MDSE] key<br />
NOT REQUIRED REQUIRED<br />
2 [PO] key<br />
3 [DOLL DISC] key<br />
4 [%-] (% I, % II) key<br />
5 Negative Departments and Negative PLUs<br />
6 [EX] key<br />
7 Non-cash Media Keys to finalize a negative-balance sale<br />
8 [ALL VOID] key<br />
Supplementary Description for Address 4:<br />
22. SYSTEM OPTION SETTING<br />
NOT REQUIRED REQUIRED<br />
NOT REQUIRED REQUIRED<br />
NOT REQUIRED REQUIRED<br />
NOT REQUIRED REQUIRED<br />
NOT REQUIRED REQUIRED<br />
NOT REQUIRED REQUIRED<br />
NOT REQUIRED REQUIRED<br />
Bit 1 to 6, 8: RESET status ........... The key can operate in “REG” mode.<br />
SET status ................ Operating the key in “REG” mode will cause an error. The Control Lock<br />
must be turned to “MGR” position (or “ - ” position for reverse process).<br />
Bit 7: RESET status ........... Non-cash media keys ([CHECK TEND], [chg], [MISC], [CPN]) can finalize<br />
a negative-balance sale in “REG”, “MGR” and “ - ” modes.<br />
SET status ................ Non-cash media keys cannot finalize a negative-balance sale in “REG”<br />
mode. However, they can finalize it in “MGR” and “ - ” modes.<br />
The [AT/TL] key can always finalize a negative-balance sale in “REG”,<br />
“MGR” and “ - ” modes regardless of this bit selection.<br />
0
22. SYSTEM OPTION SETTING<br />
Address: 5<br />
([AT/TL] Key Function)<br />
Bit Content Selective Status<br />
22-7<br />
EO1-11137<br />
No. RESET SET<br />
1 Total Function<br />
Follow Bit 2 status. TOTAL FUNCTION only<br />
2 Tender Function<br />
3 to 7 -- vacant --<br />
8 Validation Compulsory<br />
Supplementary Description for Address 5:<br />
Initial SET Bit Nos.<br />
Your Selection<br />
Bit 1 & 2: If both RESET or both SET, the [AT/TL] key functions as tender and total key.<br />
22. SYSTEM OPTION SETTING<br />
Follow Bit 1 status. TENDER FUNCTION only<br />
NOT COMPULSORY COMPULSORY<br />
Bit 8: SET status ................ When the [AT/TL] key is operated, the SLIP lamp will flicker to prohibit all<br />
the operations (including control lock position change and cashier key<br />
change) other than the validation print. The status of this bit is applicable in<br />
the REG or MGR position, and is not applicable in the “ - ” position. When<br />
the [AT/TL] key is depressed, the drawer will not open. It will open when<br />
the [VALIDATE] key is depressed.<br />
0
22. SYSTEM OPTION SETTING<br />
Address: 6<br />
([CHECK TEND] Key Function)<br />
Initial SET Bit Nos.<br />
Your Selection<br />
Bit Content Selective Status<br />
22-8<br />
EO1-11137<br />
No. RESET SET<br />
1 Total Function<br />
Follow Bit 2 status. TOTAL FUNCTION only<br />
2 Tender Function<br />
3 Validation Print Contents on Over-tendering<br />
4 Cashing with no purchase, using this key<br />
5 Over-tendering (tendering an amount larger than the<br />
sale total, resulting in calculation of change due)<br />
6 In-drawer Print on Reports<br />
7 Finalization of R/A transaction<br />
8 Validation Compulsory<br />
Supplementary Description for Address 6:<br />
22. SYSTEM OPTION SETTING<br />
Follow Bit 1 status. TENDER FUNCTION only<br />
SALE TOTAL TENDERED AMOUNT<br />
PROHIBITED ALLOWED<br />
ALLOWED PROHIBITED<br />
PRINT NON-PRINT<br />
ALLOWED PROHIBITED<br />
NOT COMPULSORY COMPULSORY<br />
Bit 1 & 2: If both RESET or both SET, the [CHECK TEND] key functions as tender and total key.<br />
Bit 3: RESET status ........... Prints the sale total amount.<br />
SET status ................ Prints the tendered amount.<br />
In case of a short-tender, the tendered amount is always printed regardless of this bit status<br />
selection.<br />
Bit 4: RESET status ........... Customers’ checks cannot be cashed outside a sale.<br />
SET status ................ Customers’ checks can be cashed with no purchase outside a sale.<br />
Bit 5: This Bit status selection is effective only in tendering operation.<br />
SET status ................ If this bit is SET and also Address 11 - Bit 1 is SET (for Short-tendering<br />
Prohibited), an amount equal to the sale total is always required for<br />
tendering.<br />
Bit 8: SET status ................ When the [CHECK TEND] key is operated, the SLIP lamp will flicker to<br />
prohibit all the operations (including control lock position change and<br />
cashier key change) other than the validation print. The status of this bit is<br />
applicable in the REG or MGR position, and is not applicable in the “ - ”<br />
position. When the [CHECK TEND] key is depressed, the drawer will not<br />
open. It will open when the [VALIDATE] key is depressed.<br />
2<br />
3<br />
4
22. SYSTEM OPTION SETTING<br />
Address: 7<br />
([chg] Key Function)<br />
Initial SET Bit Nos.<br />
Your Selection<br />
Bit Content Selective Status<br />
22-9<br />
EO1-11137<br />
No. RESET SET<br />
1 Total Function<br />
Follow Bit 2 status. TOTAL FUNCTION only<br />
2 Tender Function<br />
3 Validation Print Contents on Over-tendering<br />
4 Cashing with no purchase, using this key<br />
5 Over-tendering (tendering an amount larger than the<br />
sale total, resulting in calculation of change due)<br />
6 In-drawer Print on Reports<br />
7 Finalization of R/A transaction<br />
8 Validation Compulsory<br />
Supplementary Description for Address 7:<br />
Bit 1 & 2: If both RESET or both SET, the [chg] key functions as tender and total key.<br />
Bit 3: RESET status ........... Prints the sale total amount.<br />
SET status ................ Prints the tendered amount.<br />
In case of a short-tender, the tendered amount is always printed regardless of this bit status<br />
selection.<br />
Bit 4: RESET status ........... Cashing with no purchase is prohibited.<br />
SET status ................ Cashing with no purchase is allowed outside a sale.<br />
22. SYSTEM OPTION SETTING<br />
Follow Bit 1 status. TENDER FUNCTION only<br />
SALE TOTAL TENDERED AMOUNT<br />
PROHIBITED ALLOWED<br />
ALLOWED PROHIBITED<br />
PRINT NON-PRINT<br />
ALLOWED PROHIBITED<br />
NOT COMPULSORY COMPULSORY<br />
Bit 5: This Bit status selection is effective only when the [chg] key has tender function.<br />
SET status ................ If this bit is SET and also Address 11 - Bit 1 is SET (for Short-tendering<br />
Prohibited), an amount equal to the sale total is always required for<br />
tendering.<br />
Bit 8: SET status ................ When the [chg] key is operated, the SLIP lamp will flicker to prohibit all the<br />
operations (including control lock position change and cashier key change)<br />
other than the validation print. The status of this bit is applicable in the<br />
REG or MGR position, and is not applicable in the “ - ” position. When the<br />
[chg] key is depressed, the drawer will not open. It will open when the<br />
[VALIDATE] key is depressed.<br />
1<br />
6<br />
7
22. SYSTEM OPTION SETTING<br />
Address: 8<br />
([MISC] Key Function)<br />
Initial SET Bit Nos.<br />
Your Selection<br />
Bit Content Selective Status<br />
22-10<br />
EO1-11137<br />
No. RESET SET<br />
1 Total Function<br />
Follow Bit 2 status. TOTAL FUNCTION only<br />
2 Tender Function<br />
3 Validation Print Contents on Over-tendering<br />
4 Cashing with no purchase, using this key<br />
5 Over-tendering (tendering an amount larger than the<br />
sale total, resulting in calculation of change due)<br />
6 In-drawer Print on Reports<br />
7 Finalization of R/A transaction<br />
8 Validation Compulsory<br />
Supplementary Description for Address 8:<br />
Bit 1 & 2: If both RESET or both SET, the [MISC] key functions as tender and total key.<br />
22. SYSTEM OPTION SETTING<br />
Follow Bit 1 status. TENDER FUNCTION only<br />
SALE TOTAL TENDERED AMOUNT<br />
PROHIBITED ALLOWED<br />
ALLOWED PROHIBITED<br />
PRINT NON-PRINT<br />
ALLOWED PROHIBITED<br />
NOT COMPULSORY COMPULSORY<br />
Bit 3: RESET status ........... Prints the sale total amount.<br />
SET status ................ Prints the tendered amount.<br />
In case of a short-tender, the tendered amount is always printed regardless of this bit status<br />
selection.<br />
Bit 4: RESET status ........... Customers’ miscellaneous media cannot be cashed outside a sale.<br />
SET status ................ Customers’ miscellaneous media can be cashed with no purchase outside<br />
a sale.<br />
Bit 5: This Bit status selection is effective only in tendering operation.<br />
SET status ................ If this bit is SET and also Address 11 - Bit 1 is SET (for Short-tendering<br />
Prohibited), an amount equal to the sale total is always required for<br />
tendering.<br />
Bit 8: SET status ................ When the [MISC] key is operated, the SLIP lamp will flicker to prohibit all<br />
the operations (including control lock position change and cashier key<br />
change) other than the validation print. The status of this bit is applicable in<br />
the REG or MGR position, and is not applicable in the “ - ” position. When<br />
the [MISC] key is depressed, the drawer will not open. It will open when<br />
the [VALIDATE] key is depressed.<br />
2<br />
3
22. SYSTEM OPTION SETTING<br />
Address: 9<br />
([CPN] Key Function)<br />
Initial SET Bit Nos.<br />
Your Selection<br />
Bit Content Selective Status<br />
22-11<br />
EO1-11137<br />
No. RESET SET<br />
1 Total Function<br />
Follow Bit 2 status. TOTAL FUNCTION only<br />
2 Tender Function<br />
3 Validation Print Contents on Over-tendering<br />
4 Cashing with no purchase, using this key<br />
5 Over-tendering (tendering an amount larger than the<br />
sale total, resulting in calculation of change due)<br />
6 In drawer Print on Reports<br />
7 Finalization of R/A transaction<br />
8 Validation Compulsory<br />
Supplementary Description for Address 9:<br />
Bit 1 & 2: If both RESET or both SET, the [CPN] key functions as tender and total key.<br />
22. SYSTEM OPTION SETTING<br />
Follow Bit 1 status. TENDER FUNCTION only<br />
SALE TOTAL TENDERED AMOUNT<br />
PROHIBITED ALLOWED<br />
ALLOWED PROHIBITED<br />
PRINT NON-PRINT<br />
ALLOWED PROHIBITED<br />
NOT COMPULSORY COMPULSORY<br />
Bit 3: RESET status ........... Prints the sale total amount.<br />
SET status ................ Prints the tendered amount.<br />
In case of a short-tender, the tendered amount is always printed regardless of this bit status<br />
selection.<br />
Bit 4: RESET status ........... Customers’ coupon cannot be cashed outside a sale.<br />
SET status ................ Customers’ coupon can be cashed with no purchase outside a sale.<br />
Bit 5: This Bit status selection is effective only in tendering operation.<br />
SET status ................ If this bit is SET and also Address 11 - Bit 1 is SET (for Short-tendering<br />
Prohibited), an amount equal to the sale total is always required for<br />
tendering.<br />
Bit 8: SET status ................ When the [CPN] key is operated, the SLIP lamp will flicker to prohibit all<br />
the operations (including control lock position change and cashier key<br />
change) other than the validation print. The status of this bit is applicable in<br />
the REG or MGR position, and is not applicable in the “ - ” position. When<br />
the [CPN] key is depressed, the drawer will not open. It will open when the<br />
[VALIDATE] key is depressed.<br />
-- Address 10 is vacant. --<br />
2<br />
3<br />
5
22. SYSTEM OPTION SETTING<br />
Address: 1 1<br />
(Optional Functions 2)<br />
Initial SET Bit Nos.<br />
Your Selection<br />
Bit Content Selective Status<br />
22-12<br />
EO1-11137<br />
No. RESET SET<br />
1 Short-tendering using any media key. (applicable to [AT/TL],<br />
[CHECK TEND], [chg], [MISC], [CPN], [$5.00], [$10.00], [CASH3]<br />
ALLOWED PROHIBITED<br />
2 -- vacant --<br />
3 Sum of all Departments (except Other <strong>Inc</strong>ome Departments) and<br />
all Department Groups on Financial Reports<br />
4 Sum of Other <strong>Inc</strong>ome Department on Financial Reports<br />
5 Department/Financial Items Zero-skip<br />
6 -- vacant --<br />
7 Department Group Sales Ratio on the Financial (or Department)<br />
Report (in X and Z modes)<br />
8 -- vacant --<br />
Supplementary Description for Address 11:<br />
22. SYSTEM OPTION SETTING<br />
NON-PRINT PRINT<br />
NON-PRINT PRINT<br />
Prints All Data Zero-skip<br />
PRINT NON-PRINT<br />
Bit 5: If SET status is selected, the Department/Financial Items with sales data 0 will not be printed.<br />
This bit status selection is applied to all the reports except the PLU Read Report.<br />
Bit 7: Department Group Sales Ratio = Department Group Amount ÷ Sum of All Department Groups<br />
• If “Sum of All Department Groups” is negative value, the sales ratio will not be calculated, and<br />
“0.00%” will be printed.<br />
• If “Department Group Amount” is negative amount, the negative mark “ - ” will be attached.<br />
• Fraction rounding for the decimal portion of the calculated result is fixed to Round Off.<br />
• “Sum of All Department Groups” also includes the amounts of Other <strong>Inc</strong>ome and Negative<br />
Status Departments.)<br />
0
22. SYSTEM OPTION SETTING<br />
Address: 1 2<br />
(Optional Functions 3)<br />
Bit Content Selective Status<br />
22-13<br />
EO1-11137<br />
No. RESET SET<br />
1 Validation Compulsory for the [FS TL TEND] key<br />
NOT COMPULSORY COMPULSORY<br />
2 Validation Compulsory for the [TRF] key (New Balance)<br />
3, 4 -- vacant --<br />
5 MGR Intervention Requirement for the [VND CPN] key<br />
6 Validation Compulsory for the [VND CPN] key<br />
7 MGR Intervention Requirement for the [STR CPN] key<br />
8 Validation Compulsory for the [STR CPN] key<br />
Supplementary Description for Address 12:<br />
Initial SET Bit Nos.<br />
Your Selection<br />
22. SYSTEM OPTION SETTING<br />
NOT COMPULSORY COMPULSORY<br />
NOT REQUIRED REQUIRED<br />
NOT COMPULSORY COMPULSORY<br />
NOT REQUIRED REQUIRED<br />
NOT COMPULSORY COMPULSORY<br />
Bits 1, 2, 6, 8: SET status ........... When each key is operated, the SLIP lamp will flicker to prohibit all the<br />
operations (including control lock position change and cashier key change)<br />
other than the validation print. The status of this bit is applicable in the<br />
REG or MGR position, and is not applicable in the “ - ” position.<br />
Bits 5, 7: RESET status ........... The key can operate in “REG” mode.<br />
SET status ................ Operating the key in “REG” mode will cause an error. The Control Lock<br />
must be turned to “MGR” position (or “ - ” position for reverse process).<br />
0
22. SYSTEM OPTION SETTING<br />
The following shows the Validation Compulsory status combination and the Validation Print Content in case of<br />
finalizing a sale with a previous balance.<br />
22-14<br />
EO1-11137<br />
22. SYSTEM OPTION SETTING<br />
SYSTEM OPTION SELECTION RESULTING RESULTING<br />
CASE Media’s New Balance’s VALIDATION VALIDATION<br />
NO. Validation Validation COMPULSORY PRINT<br />
Compulsory Compulsory STATUS CONTENT<br />
1 FREE FREE FREE New Balance<br />
2 COMPULSORY FREE COMPULSORY Media<br />
3 FREE COMPULSORY COMPULSORY New Balance<br />
4 COMPULSORY COMPULSORY COMPULSORY New Balance<br />
OPERATION SAMPLE PRINT FORM SAMPLE<br />
250 [PB +]<br />
80 [DEPT 1]<br />
[chg]<br />
100 [R/A]<br />
100 [CHECK TEND]<br />
[VALIDATE]<br />
In case of CASE No. 2, prints :<br />
In case of CASE No. 1, 3, and 4 :<br />
PB+ 2.50<br />
DP01 0.80<br />
Chg 3.30<br />
R/A 1.00<br />
CHECK 1.00<br />
CHANGE 0.00<br />
NEW BAL 2.30<br />
1CL 0079 19:40TM<br />
CHECK 1.00<br />
NEW BAL 2.30
22. SYSTEM OPTION SETTING<br />
Address: 1 3<br />
Initial SET Bit Nos.<br />
Your Selection<br />
Bit Content Selective Status<br />
22-15<br />
EO1-11137<br />
No. RESET SET<br />
1 [RTN MDSE] key<br />
NOT COMPULSORY COMPULSORY<br />
2 [PO] key<br />
3 [R/A] key<br />
(Validation Compulsory 1)<br />
4 [ITEM CORR] key<br />
5 [VOID] key<br />
6 [DOLL DISC] key<br />
7 [%-] key (% I, % II)<br />
8 Negative Departments and Negative PLUs<br />
Supplementary Description for Address 13:<br />
22. SYSTEM OPTION SETTING<br />
NOT COMPULSORY COMPULSORY<br />
NOT COMPULSORY COMPULSORY<br />
NOT COMPULSORY COMPULSORY<br />
NOT COMPULSORY COMPULSORY<br />
NOT COMPULSORY COMPULSORY<br />
NOT COMPULSORY COMPULSORY<br />
NOT COMPULSORY COMPULSORY<br />
Bits 1 to 8: SET status ................ When each key is operated, the SLIP lamp will flicker to prohibit all the<br />
operations (including control lock position change and cashier key change)<br />
other than the validation print. However, Item Correct can be performed to<br />
the item-correctable transactions. The status of this bit is applicable in the<br />
REG or MGR position, and is not applicable in the “ - ” position.<br />
• All Void during the validation compulsory status can be performed.<br />
0
22. SYSTEM OPTION SETTING<br />
Address: 1 4<br />
(Optional Functions 4)<br />
Supplementary Description for Address 14:<br />
Initial SET Bit Nos.<br />
Your Selection<br />
Bit 1: RESET status ........... The key always operates as PST/Tax Non-taxable.<br />
SET status ................ The key always operates as PST/Tax Taxable.<br />
22-16<br />
NON-TAXABLE TAXABLE<br />
Any number of times Only Once<br />
EO1-11137<br />
22. SYSTEM OPTION SETTING<br />
Bit Content Selective Status<br />
No. RESET SET<br />
1 [VND CPN] key PST/Tax Status<br />
NON-TAXABLE TAXABLE<br />
2 [STR CPN] key PST/Tax Status<br />
3 [VND CPN] key GST or Food Stamp Status<br />
4 [STR CPN] key GST or Food Stamp Status<br />
5, 6 -- vacant --<br />
7 Non-add Number Entry allowed within one sale transaction<br />
8 -- vacant --<br />
GST NON-TAXABLE, GST TAXABLE,<br />
or Non-Food-stampable or Food-stampable<br />
GST NON-TAXABLE, GST TAXABLE,<br />
or Non-Food-stampable or Food-stampable<br />
Bit 2: RESET status ........... The key always operates as PST/Tax Non-taxable regardless of<br />
Department Status. Even if the [TX/M] key is used, the [STR CPN] key will<br />
operate as PST/Tax Non-taxable.<br />
SET status ................ The key status is determined by Department Status.<br />
Whether “GST” Status is applied or “Food Stamp” Status is applied for Bits 3 & 4 here is<br />
determined by the Address 17 - Bit 8 status selection.<br />
Bit 3: RESET status ........... The key always operates as GST Non-taxable or Non-food-stampable.<br />
SET status ................ The key always operates as GST Taxable or Food-stampable.<br />
Bit 4: RESET status ........... The key always operates as GST Non-taxable or Non-food-stampable<br />
regardless of Department Status. Even if the [GST/M] or [FS/M] key is<br />
used, the [STR CPN] key will operate as GST Non-taxable or Non-foodstampable.<br />
SET status ................ The key status is determined by Department Status.<br />
0
22. SYSTEM OPTION SETTING<br />
Address: 1 5<br />
(Validation)<br />
Initial SET Bit Nos.<br />
Your Selection<br />
Bit Content Selective Status<br />
22-17<br />
EO1-11137<br />
No. RESET SET<br />
1 Validation allowed for same item<br />
Only Once Any number of times<br />
2 Receipt Consecutive No. on Validation<br />
3 Cashier ID on Validation<br />
4 to 7 -- vacant --<br />
8 Validation Slip Detection Function<br />
Supplementary Description for Address 15:<br />
22. SYSTEM OPTION SETTING<br />
PRINT NON-PRINT<br />
PRINT NON-PRINT<br />
Active Non-active<br />
Bit 8: If SET status is selected, validation slip inserted into the validation slot will not be detected.<br />
Therefore, in this case, the validation print transaction cannot be performed.<br />
0
22. SYSTEM OPTION SETTING<br />
Address: 1 6<br />
(Non-print Options 2)<br />
Initial SET Bit Nos. 2<br />
Your Selection<br />
Bit Content Selective Status<br />
22-18<br />
EO1-11137<br />
No. RESET SET<br />
1 “Net Sale With Tax” Line on Financial Reports<br />
PRINT NON-PRINT<br />
2 “Net Sale Without Tax” Line on Financial Reports<br />
3 “NET GT” Line on Financial Reports<br />
4 Tax (PST) Amount Line(s) on Sale Receipts when Tax (PST) 1<br />
to Tax (PST) 3 are programmed.<br />
5 “GST Non-taxable Amount” Line on Financial Reports<br />
6 “NS (N.NS)” Line on Financial Reports<br />
7, 8 -- vacant --<br />
Supplementary Description for Address 16:<br />
22. SYSTEM OPTION SETTING<br />
PRINT NON-PRINT<br />
PRINT NON-PRINT<br />
CONSOLIDATED LINE SEPARATE<br />
(into one tax amount) PRINT LINES<br />
PRINT NON-PRINT<br />
PRINT NON-PRINT<br />
Bit 4: RESET status ........... The TAX amount is printed on one lime, consolidating the amounts of<br />
three taxes into one.<br />
SET status ................ The amounts of three taxees are printed on individual lines. As for the GST<br />
Feature, this salection is effective only when Address 17 - Bit 6 is SET<br />
(for GST separate print from PST.)<br />
Bits 5 and 6: These bits status selections are effective only when the GST Feature has been selected in<br />
Address 17 - Bit 8.<br />
NOTE: Memory contents in case of the GST Feature<br />
Bit 1: Net Sale With Tax includes PST and GST (inclusive, exclusive).<br />
Bit 2: Net Sale Without Tax includes GST (inclusive).<br />
Bit 6: NS (N. NS) = (Sum of All Departments) + (%+) - (Exempted GST) -<br />
(GST included in Departments)<br />
• Other <strong>Inc</strong>ome Department is not included in “Sum of All Depart ments”.<br />
• Exempted GST of Other <strong>Inc</strong>ome Department is not processed to<br />
“Exempted GST”.<br />
3
22. SYSTEM OPTION SETTING<br />
Address: 1 7<br />
(GST Options)<br />
Initial SET Bit Nos.<br />
Your Selection<br />
Bit Content Selective Status<br />
22-19<br />
EO1-11137<br />
No. RESET SET<br />
1 GST Status<br />
GST (inclusive) GST (exclusive)<br />
2 Fraction Rounding Process on GST Calculations.<br />
3 Fraction Rounding Process on GST Calculations.<br />
4 GST Taxable Total on Sales Receipts<br />
5 GST Amount Line on Sales Receipts<br />
6 PST & GST Amount Lines Print Format on Sales Receipts<br />
(when Bit 4 is SET)<br />
7 Sale amount subject to PST calculation<br />
8 Tax Feature<br />
Supplementary Description for Address 17:<br />
Follow Bit 3 status. ROUND UP<br />
Bits 2 & 3: If both RESET, ROUND OFF status is obtained. If both SET, Bit 3 status prevails, i.e., ROUND<br />
DOWN. (For Fraction Rounding Process on Quantity Extension and % calculations, see Address<br />
2 - Bits 1 & 2. As for fraction rounding process on PST calculations, ROUND OFF status is<br />
fixed.)<br />
Bit 5: GST Amount is printed when Bit 6 of this address has been selected to SET status.<br />
Bit 6: If SET status is selected, you can further select printing of PST1 to PST3 on one consolidated<br />
line or separate line. (See Address 16 - Bit 4.)<br />
Bit 8: RESET status ........... Tax Feature for the United States<br />
SET status ................ Tax Feature for Canada (GST)<br />
When the GST Feature is selected, the following features will be unavailable.<br />
• Group Subtotal<br />
• Food Stamp<br />
22. SYSTEM OPTION SETTING<br />
ROUND OFF ROUND DOWN<br />
NON-PRINT PRINT<br />
NON-PRINT PRINT<br />
CONSOLIDATED SEPARATE<br />
AMOUNT LINE LINES<br />
INCLUDING GST EXCLUDING GST<br />
US Tax GST (Canada Tax)<br />
0
22. SYSTEM OPTION SETTING<br />
Address: 1 8<br />
(Optional Functions 5)<br />
Initial SET Bit Nos.<br />
Your Selection<br />
Bit Content Selective Status<br />
No. RESET SET<br />
1 No-sale Transaction Entry After Non-add Number Print Entries<br />
PROHIBITED ALLOWED<br />
2 Receipt Consecutive No. on Journal and every Receipt in any<br />
mode<br />
3 Receipt Consecutive No. Resetting<br />
4 Amount Display by [ST] key depression during a sale<br />
5 -- vacant --<br />
6 % Calculation on Group Subtotal<br />
7 Key-in during Receipt Issuance after Sale Finalization<br />
8 Sum of Taxes on Cashier Reports<br />
Supplementary Description for Address 18:<br />
Bit 1: RESET status ........... Non-add Numbers cannot be printed on No-sale receipts.<br />
SET status ................ Non-add Numbers can be printed on No-sale receipts.<br />
22-20<br />
EO1-11137<br />
22. SYSTEM OPTION SETTING<br />
PRINT NON-PRINT<br />
NON-RESETTABLE RESETTABLE<br />
SUBTOTAL (Sale Total TAXABLE TOTAL (Sale<br />
excluding Taxes) Total including Taxes)<br />
TOTAL OF ALL TOTAL OF ADDITIONAL<br />
ENTRIES ENTRIES ONLY<br />
PROHIBITED ALLOWED<br />
NON-PRINT PRINT<br />
Bit 3: RESET status ........... The Consecutive No. will increment every time a receipt is issued or a<br />
transaction is finalized. It is non-resettable.<br />
SET status ................ When a Daily Financial Reset Report is issued, the Consecutive NO. is<br />
automatically reset. On the first receipt issued after the rest report, the<br />
consecutive No. “001” will be printed. If this status is selected it is<br />
recommended to take the Daily Financial Reset Report at the end of all<br />
operations on the register for the day (so that the first receipt will always<br />
start with Consecutive No. 0001 every day.)<br />
Bit 4: If SET status is selected, the [ST] key functions as follows.<br />
• Displays sale total including taxes. Whether or not sale total is printed depends on the<br />
selection of Address 1 - Bit 3. (Sale total printed excludes taxes.)<br />
• When SET status is also selected for “Taxable Total Compulsory; Address 2 - Bit 6”, the [ST]<br />
key must always be depressed before operating media keys for sale finalization.<br />
• % operations and Dollar Discount performed after the [ST] key is depressed is calculated on<br />
sale total excluding taxes.<br />
• When Validation Print is performed, Taxable Total Amount will be printed.<br />
• Available to Foreign Currency Tender transaction.<br />
Bit 6: When SET status is selected, be certain to select “Number of times allowed for % entries after<br />
the [ST] key; Address 19 - Bit 6 to RESET status”. This option must not be programmed in the<br />
area where the Food Stamp Feature or the GST Feature is used.<br />
Bit 7: When the Remote Slip Printer is connected and slip is inserted, keying-in will be unconditionally<br />
prohibited during issuance of the sale finalization receipt.<br />
7
22. SYSTEM OPTION SETTING<br />
Address: 1 9<br />
(Optional Function 6)<br />
Initial SET Bit Nos. 2 3<br />
Your Selection<br />
Bit Content Selective Status<br />
22-21<br />
EO1-11137<br />
No. RESET SET<br />
1 Date Set and Print Order.<br />
Follow Bit 2 status. DAY-MONTH-YEAR<br />
2 Date set and Print Order.<br />
3 Drawer-close Compulsory.<br />
4 US Balance or CA Balance for report memory.<br />
5 Canada Tax Spec.<br />
6 [%+] and/or [%-] after a Subtotal ([ST]) Within a Sale.<br />
7 -- vacant --<br />
8 Post-issue Receipt Print Form<br />
Supplementary Description for Address 19:<br />
Bits 1 & 2: Both RESET ............. Year-Month-Day order<br />
Both SET .................. Day-Month-Year order<br />
22. SYSTEM OPTION SETTING<br />
Follow Bit 1 status. MONTH-DAY-YEAR<br />
FREE COMPULSORY<br />
US (United Status) CA (Canada)<br />
Balance Balance<br />
QUEBEC TAX ONTARIO TAX<br />
ANY NUMBER OF ONLY ONCE<br />
TIMES ALLOWED ALLOWED<br />
ITEMIZED TOTAL<br />
RECEIPT RECEIPT<br />
Bits 3: RESET Status .......... Any operation is possible with the drawer kept open.<br />
SET Status ............... If any operation except the Validation Print is attempted in REG, MGR, or<br />
“ - ” mode with the drawer kept open, an error will result<br />
Bits 4: If SET status is selected, the Hourly Range memory will exclude tax amounts (GST, PST 1 to 3,<br />
<strong>Ma</strong>nual Tax).<br />
6
22. SYSTEM OPTION SETTING<br />
Address: 2 0<br />
(Foreign Currency Option)<br />
Initial SET Bit Nos.<br />
Your Selection<br />
Bit Content Selective Status<br />
22-22<br />
EO1-11137<br />
No. RESET SET<br />
1 [CUR 1] (Foreign Currency 1) Zero-suppress Display.<br />
0.00 . 0<br />
(Ordinary Currency) (Ordinary Currency)<br />
2 [CUR 2] Zero-suppress Display.<br />
3 [CUR 3] Zero-suppress Display.<br />
4 [CUR 4] Zero-suppress Display.<br />
5 Foreign Currency Tender Amount Print in a payment of a sale.<br />
6 Foreign Currency Exchange Rate Print in payment or No-sale<br />
Exchange.<br />
7, 8 -- vacant --<br />
22. SYSTEM OPTION SETTING<br />
0.00 . 0<br />
0.00 . 0<br />
0.00 . 0<br />
NON-PRINT PRINT<br />
NON-PRINT PRINT<br />
0
22. SYSTEM OPTION SETTING<br />
Address: 2 1<br />
(Optional Function 7)<br />
Initial SET Bit Nos.<br />
Your Selection<br />
Bit Content Selective Status<br />
22-23<br />
EO1-11137<br />
No. RESET SET<br />
1 Sales Detail Items Print on Journal (IPD/INPD)<br />
PRINT (IPD) NON-PRINT (INPD)<br />
2 Drawer Warning Spec.<br />
3 Multi Drawer Spec.<br />
4 All Department Report Separate from Daily or GT Financial<br />
Report<br />
5 Decimal Point in Item Count and Rate<br />
6 Decimal Point in Amount (for the “0.00” zero-suppress versions)<br />
7 Amount Division Symbol between 3rd and 4th for . 0 type<br />
8 Store Name Print by Rubber Stamp or Dot Printer<br />
Supplementary Description for Address 21:<br />
22. SYSTEM OPTION SETTING<br />
NON ACTIVE ACTIVE<br />
SINGLE DRAWER 2 DRAWERS<br />
PRINT ALONG WITH SEPARATE<br />
FINANCIAL REPORT ISSUE<br />
, (POINT) , (COMMA)<br />
, (POINT) , (COMMA)<br />
, (POINT) , (COMMA)<br />
RUBBER STAMP DOT PRINTER<br />
Bit 1: IPD ............................ Items Printed in Details<br />
INPD ......................... Items not Printed in Details (Department/PLU item Entry except Returned<br />
Merchandise, Item Correct, Negative Department/PLU, Void and All Void<br />
will not be printed on Journal.<br />
Bit 2: SET status: ............... An error will result when the drawer is kept open for the programmed<br />
seconds. Drawer Warning Time “15 seconds” is initially programmed. You<br />
can change the initial value “15 seconds” to another value; refer to the next<br />
page.<br />
• In case that both this bit and Bit 3 (Multi Drawer Spec.) are selected to SET status.<br />
1) When a cashier key is changed after the drawer opens, the drawer open/close condition,<br />
which has been assigned to the changed cashier will be judged.<br />
2) Drawer 1 condition is judged for the cashier keys 1 and 2, and Drawer 2 condition is<br />
judged for the cashier keys 3 and more. Drawer 1 condition is judged during the cashier<br />
key OFF status.<br />
Bit 3: If SET status is selected, Drawer 1 will be assigned to the cashiers 1 and 2, and Drawer 2 to the<br />
cashiers 3 and more.<br />
7
22. SYSTEM OPTION SETTING<br />
Drawer Warning Time Setting:<br />
22-24<br />
EO1-11137<br />
Condition for Programming: Any time outside a sale. Must be signed off in the Cashier Signing Method. (In other<br />
methods, a Cashier Key may or may not be set to ON.) Refer to Chapter 16.<br />
Programming Procedure: Turn the Control Lock to the SET position using the MA key.<br />
3 9 @/FOR<br />
AT/TL<br />
Declaration of Program No. 39 for<br />
Drawer Warning Time Setting<br />
<strong>Ma</strong>x. 2 digits;<br />
1 to 99 (seconds)<br />
<strong>TEC</strong> STORE<br />
1343 PEACH DRIVE<br />
PHONE: 87-6437<br />
Open 8:00am to 7:00pm<br />
Closed: every Wednesday<br />
11-28-1997 #0<br />
P39<br />
20<br />
0093 12:21TM<br />
22. SYSTEM OPTION SETTING<br />
Time length (seconds) set for drawer warning<br />
NOTES: 1. The value of 0 second cannot be programmed. (To clear Warning Mode, reset the Warning<br />
option itself.)<br />
2. After the All Memory Clear operation, the value of 15 seconds is set automatically as standard<br />
value.<br />
3. This setting will be effective only when the following options are selected in System Option<br />
Setting:<br />
Address 21 - Bit 2: Drawer Warning Alarm “ACTIVE” (SET status)<br />
Address 19 - Bit 3: Drawer-close “COMPULSORY” (SET status)
22. SYSTEM OPTION SETTING<br />
Address: 2 2<br />
(Optional Functions 8)<br />
Initial SET Bit Nos.<br />
Your Selection<br />
Bit Content Selective Status<br />
22-25<br />
EO1-11137<br />
No. RESET SET<br />
1 Negative Mode ( - ) Operations<br />
ALLOWED PROHIBITED<br />
2 [% I] Key Use<br />
3 [% II] Key Use<br />
4 Customer’s Display Method<br />
5 [RECEIPT ISSUE] key Function<br />
6 Sales Total Amount Print on Receipt<br />
7 FOOD STAMP (Illinois)<br />
8 FOOD STAMP (New Jersey)<br />
Supplementary Description for Address 22:<br />
Bits 2 & 3: Selection of the % I and % II keys use. If SET status is selected to Bit 2, both % I and % II will be<br />
used as [% -]. If SET status is selected to Bit 3, both % I and % II will be used as [% +]. Be<br />
certain to change the Financial Total Names corresponding to each % key if changed as shown<br />
above.<br />
Bit 6: If SET status is selected, Sales Total Amount will be printed on the last line of the receipt. Nosale,<br />
Received-on-Account, Paid Out and Previous Balance transactions are excluded.<br />
Bits 7 & 8: If both RESET, General Type Feature can be obtained.<br />
22. SYSTEM OPTION SETTING<br />
USED AS [%+] KEY USED AS [%-] KEY<br />
USED AS [%-] KEY USED AS [%+] KEY<br />
ORDINARY TYPE PUT-AWAY TYPE<br />
(<strong>Inc</strong>remental Display) (Holding Display)<br />
Effective only when the R Regardless of the R OFF<br />
OFF lamp is illuminated. lamp status<br />
NON-PRINT PRINT<br />
GENERAL TYPE,<br />
or follow bit 8 status.<br />
GENERAL TYPE,<br />
or follow bit 7 status.<br />
Illinois TYPE<br />
0<br />
New Jersey TYPE
22. SYSTEM OPTION SETTING<br />
Address: 2 3<br />
(Optional Functions 9)<br />
Initial SET Bit Nos.<br />
Your Selection<br />
Bit Content Selective Status<br />
22-26<br />
EO1-11137<br />
No. RESET SET<br />
1 No. of PLUs Available<br />
<strong>Ma</strong>x 500PLU <strong>Ma</strong>x 1000PLU<br />
2 Cashier Identifying Function<br />
3, 4 -- vacant --<br />
5 Display of DPT Portion Selection 1<br />
6 Display of DPT Portion Selection 2<br />
7 Cashier Identifying Type Selection 1<br />
8 Cashier Identifying Type Selection 2<br />
Supplementary Description for Address 23:<br />
Active Non-active<br />
Department/PLU Code<br />
or follow Bit 6 status<br />
Department/PLU Code<br />
or follow Bit 5 status<br />
Code Entry or follow<br />
Bit 7 status<br />
22. SYSTEM OPTION SETTING<br />
Cashier No.<br />
Code Entry or follow Barrel Lock, Push<br />
Bit 8 status LED Key<br />
Bit 1: To select this bit to SET status, RAM of the capacity 128KB is necessary. This option must not be<br />
programmed when the capacity of the RAM is 32KB.<br />
Bit 2: If SET status is selected, the register will operate without any cashier identifying operation. For<br />
selecting the SET status, Be certain to take Daily and Periodical Cashier Reset Reports<br />
beforehand to clear the cashier memory data. If those reports are not taken before changing the<br />
bit to SET status, the cashier memory contents will not be guaranteed. The following will result if<br />
SET status is selected.<br />
• Cashier Read/Reset report function cannot be used. An error will result on attempt to issue<br />
any kind of cashier report.<br />
• An error will result when the [LOG/RECEIPT] key is depressed with a prior numeric entry in<br />
sale entry mode.<br />
• Cashier No. (or name) print area on receipt, journal or validation slip will appear as blank<br />
spaces.<br />
Bits 5 & 6: If both RESET or both SET, Department/PLU Code is displayed on the DPT portion of the<br />
display. If Bit 5 is selected to SET status, Cashier No. assigned to the cashier who is in ON status<br />
will be always displayed. This selection is applied to all the cashier types.<br />
• Even when Department/PLU item is entered, code assigned to each sales iem will not be<br />
displayed, and Cashier No. will be kept displaying.<br />
• Even when the Food Stamp Feature is selected, Food Stamp Change will not be displayed. If<br />
Bit 6 is selected to SET status, PLU Price Shift No. will be displayed.<br />
Bit 7 & 8: For details of each cashier type, refer to Chapter 16.<br />
• Be certain to perform the Data Clear when the cashier type has been changed to another to<br />
clear the sales data and perform the cashier OFF process.<br />
0<br />
PLU Price Shift No.<br />
[CLK] Key (SFKC)
23. PROGRAM DATA VERIFICATION<br />
23. PROGRAM DATA VERIFICATION<br />
23-1<br />
EO1-11137<br />
23.1 Operating Procedure<br />
Whenever programming operations are performed, it is recommended to issue Program Verification receipts to<br />
check the programmed data before entering any other operation.<br />
23.1 Operating Procedure<br />
Condition for Programming: Any time outside a sale<br />
Programming Procedure: Turn the Control Lock to the X position using the MGR or MA key.<br />
REG<br />
OFF<br />
SET<br />
X<br />
MGR<br />
-<br />
Z<br />
“R OFF” Illuminated:<br />
Lamp Verification data is printed on journal only.<br />
Extinguished:<br />
Verification data is printed on both journal and receipt.<br />
⎯→<br />
⎯→<br />
⎯→<br />
⎯→<br />
⎯→<br />
⎯→<br />
⎯→<br />
1<br />
2<br />
3<br />
4<br />
5<br />
6<br />
9<br />
ST<br />
ST<br />
ST<br />
ST<br />
ST<br />
ST<br />
ST<br />
←⎯⎯<br />
Reverse the status, if necessary,<br />
by depressing the [LOG/ RE-<br />
CEIPT] key.<br />
* The [RECEIPT ISSUE] key is<br />
not effective in X mode.<br />
Contents to be Printed for Verification Reference<br />
Page<br />
Department Preset Price Read: 23-2<br />
Preset Price of each Department<br />
Department LC and Status Read: 23-2<br />
LC (Listing Capacity) and Status of each Department<br />
PLU Table Read: 23-3<br />
Preset Price and Link Department of each PLU<br />
Other Programmed Data Read: 23-3<br />
%+ & %- Preset Rates, common LC for All Departments,<br />
Drawer Warning Time, Foreign Currency Exchange Rate,<br />
Cash Payment Key Amount, Vendor Coupon Limit Amount,<br />
LC for Tender Media, GST Rate for Canada, Non-taxable<br />
Limit Amount for Canada<br />
System Option Read 1: 23-4<br />
System Option Setting, Addresses 1 to 13<br />
Department Gross Profit Rates Read: 23-4<br />
Gross Profit Rates of each Department<br />
System Option Read 2: 23-4<br />
System Option Setting, Addresses 1 to 24
23. PROGRAM DATA VERIFICATION<br />
23.1.1 Department Preset Price Read<br />
Department Name<br />
Department No.<br />
<strong>TEC</strong> STORE<br />
1343 PEACH DRIVE<br />
PHONE: 87-6437<br />
Open 8:00am to 7:00pm<br />
Closed: every Wednesday<br />
11-28-1997 #112300<br />
PX<br />
01 MEAT 7.00<br />
02 FISH<br />
03 DRINK<br />
04 BAKERY<br />
05 DP05<br />
06 DP06<br />
0319 23:20TM<br />
23.1.2 Department LC and Status Read<br />
Department Name<br />
Department No.<br />
Department Group No.<br />
<strong>TEC</strong> STORE<br />
1343 PEACH DRIVE<br />
PHONE: 87-6437<br />
Open 8:00am to 7:00pm<br />
Closed: every Wednesday<br />
11-28-1997 #112300<br />
PX<br />
01 MEAT 01F 73<br />
01<br />
02 FISH 02F 94<br />
01<br />
03 DRINK 03 57<br />
02<br />
04 BAKERY 01 00<br />
02<br />
05 DP05 10 00-<br />
03<br />
06 DP06 40 00<br />
03<br />
0320 23:20TM<br />
23-2<br />
EO1-11137<br />
23.1 Operating Procedure<br />
Preset Price<br />
(Those with blank price are Open-price Departments.)<br />
Key Type Status<br />
0: Itemized<br />
1: Single-item<br />
4: Other <strong>Inc</strong>ome<br />
5: Other <strong>Inc</strong>ome (Single-item)<br />
Food Stamp Status or GST Status<br />
F: Food Stampable<br />
T: GST Taxable<br />
Positive/Negative Status<br />
-: Negative<br />
Blank: Positive<br />
Individual Department LC<br />
Tax Status<br />
1: Tax 1 taxable<br />
2: Tax 2 taxable<br />
3: Tax 1 & Tax 2 taxable<br />
4: Tax 3 taxable<br />
5: Tax 1 & Tax 3 taxable<br />
6: Tax 2 & Tax 3 taxable<br />
7: Tax 1 & Tax 2 & Tax 3 taxable<br />
0: Non-taxable
23. PROGRAM DATA VERIFICATION<br />
23.1.3 PLU Table Read<br />
PLU Code<br />
PLU Name<br />
<strong>TEC</strong> STORE<br />
1343 PEACH DRIVE<br />
PHONE: 87-6437<br />
Open 8:00am to 7:00pm<br />
Closed: every Wednesday<br />
11-28-1997 #112300<br />
PX<br />
PLU100 01 2.00<br />
Pork<br />
PLU101 01 3.00<br />
Beef<br />
PLU200 02 5.00<br />
Salmon<br />
PLU201 02 2.00<br />
Shrimp<br />
PLU300 03 1.00<br />
Coke-A<br />
PLU301 03 1.00<br />
Coke-B<br />
PLU400 04 3.00/ 8<br />
Bun-A<br />
PLU401 04 1.50/ 3<br />
Bun-B<br />
PLU500 05 0.50<br />
PLU500<br />
0321 23:20TM<br />
23.1.4 Other Programmed Data Read<br />
<strong>TEC</strong> STORE<br />
1343 PEACH DRIVE<br />
PHONE: 87-6437<br />
Open 8:00am to 7:00pm<br />
Closed: every Wednesday<br />
11-28-1997 #112300<br />
PX<br />
V.CPN 20.00<br />
CATEND 34<br />
CHECK 00<br />
Chg 00<br />
MISC 00<br />
CPN 00<br />
FS TL 35<br />
86<br />
%+ 10%<br />
%- 5%<br />
GST 7%<br />
20.00<br />
CUR1 0.7143∗<br />
CUR2 0.5321∗<br />
01 CASH 10.00<br />
02 CASH 20.00<br />
20<br />
0328 23:23TM<br />
Link Department No.<br />
Preset Price<br />
(Blank Price means an Open-price PLU.)<br />
Whole Package Quantity<br />
Vendor Coupon Limit Amount<br />
Respective LCs for each Tender Media<br />
23-3<br />
EO1-11137<br />
23.1 Operating Procedure<br />
Common LC for All Departments<br />
%+ Preset Rate<br />
%- Preset Rate<br />
GST Rate<br />
Non-taxable Limit Amount<br />
Exchange Rate for the [CUR1] Key<br />
Exchange Rate for the [CUR2] Key<br />
Preset Cash Amount for the [$5.00] (Cash Payment 1) Key<br />
Preset Cash Amount for the [$10.00] (Cash Payment 2) Key<br />
Drawer Warning Time
23. PROGRAM DATA VERIFICATION<br />
23.1.5 Department Gross Profit Rates Read<br />
Department Name<br />
Department No.<br />
<strong>TEC</strong> STORE<br />
1343 PEACH DRIVE<br />
PHONE: 87-6437<br />
Open 8:00am to 7:00pm<br />
Closed: every Wednesday<br />
11-28-1997 #112300<br />
PX<br />
01 MEAT 10%<br />
02 FISH 15%<br />
03 DRINK 20%<br />
04 BAKERY 25%<br />
23-4<br />
0329 23:24TM<br />
Gross Profit Rate<br />
23.1.6 System Option Read 1 23.1.7 System Option Read 2<br />
<strong>TEC</strong> STORE<br />
1343 PEACH DRIVE<br />
PHONE: 87-6437<br />
Open 8:00am to 7:00pm<br />
Closed: every Wednesday<br />
11-28-1997 #112300<br />
PX<br />
#01 2678<br />
#02 0<br />
#03 0<br />
#04 0<br />
#05 0<br />
#06 234<br />
#07 167<br />
#08 23<br />
#09 235<br />
#10 0<br />
#11 0<br />
#12 0<br />
#13 0<br />
0024 20:20TM<br />
SET Bit Nos.<br />
Address No.<br />
<strong>TEC</strong> STORE<br />
1343 PEACH DRIVE<br />
PHONE: 87-6437<br />
Open 8:00am to 7:00pm<br />
Closed: every Wednesday<br />
11-28-1997 #112300<br />
PX<br />
#01 2678<br />
#02 0<br />
#03 0<br />
#04 0<br />
#05 0<br />
#06 234<br />
#07 167<br />
#08 23<br />
#09 235<br />
#10 0<br />
#11 0<br />
#12 0<br />
#13 0<br />
#14 0<br />
#15 0<br />
#16 23<br />
#17 0<br />
#18 0<br />
#19 236<br />
#20 0<br />
#21 7<br />
#22 0<br />
#23 0<br />
#24 0<br />
0025 20:01TM<br />
EO1-11137<br />
23.1 Operating Procedure<br />
SET Bit Nos.<br />
Address No.<br />
NOTE: The above samples show the Initial SET Bit Nos. of each Address. For changing any System Option<br />
status, refer to Chapter 22. SYSTEM OPTION SETTING.
24. GENERAL MAINTENANCE<br />
24. GENERAL MAINTENANCE<br />
24.1 Replenishing Ink to the Store Name Stamp<br />
1. Turn the Control Lock to the OFF position using the Control Key.<br />
3. Remove the Store Name Stamp by pulling it in the direction of the arrow mark.<br />
24-1<br />
EO1-11137<br />
24.1 Replenishing Ink to the Store Name Stamp<br />
2. To remove the Printer Cover, insert the Printer Cover Key to the Printer Cover Lock, and then turn it 90°<br />
clockwise.<br />
4. Apply only two or three drops. Stamp may not print dark immediately. Allow time for ink to saturate the stamp.<br />
Apply ink to the<br />
shaded areas.
24. GENERAL MAINTENANCE<br />
5. Install the stamp by inserting it in the direction of the arrow mark.<br />
6. Attach the Printer Cover.<br />
24-2<br />
EO1-11137<br />
24.2 <strong>Ma</strong>nual Drawer Release and Lock<br />
7. After replenishing ink, turn the Control Lock to the REG position, then depress the [#/NS] key to check the<br />
density of the printed message.<br />
* Ordering a Store Name Stamp which contains your store name, address and telephone No., etc. is available.<br />
Refer to Appendix 1 on page A-1.<br />
24.2 <strong>Ma</strong>nual Drawer Release and Lock<br />
The drawer opens automatically when a registration is performed. In the event of a power failure or other trouble,<br />
the drawer can be opened <strong>manual</strong>ly in the following manner.<br />
WARNING!<br />
When opening the cash drawer, be careful not to let the drawer hit any person.
24. GENERAL MAINTENANCE<br />
24.2.1 Releasing<br />
2. When it stops again by the roller fixed in the drawer case, lift it and pull it again.<br />
24-3<br />
EO1-11137<br />
24.3 Removing the Drawer<br />
Remove the CDC Cap.<br />
Insert the Drawer Release Key into the Drawer Release Lock, then turn the key clockwise. The drawer will now<br />
open.<br />
The Drawer Release Key can be taken out by returning it to the original position.<br />
24.2.2 Locking<br />
When the drawer is closed, it is automatically locked and will not open without the Drawer Release Key or<br />
transaction entries.<br />
24.3 Removing the Drawer<br />
1. Pull the drawer out, and when it stops by the stopper, lift the drawer up and pull it again.
24. GENERAL MAINTENANCE<br />
24.4 Media Slot<br />
24-4<br />
EO1-11137<br />
24.4 Media Slot<br />
The Media Slot provided at the front of the drawer is used to put non-cash media such as check in the drawer<br />
without opening it. The non-cash media put from this slot are kept under the Money Case, therefore you can keep<br />
them in secret.<br />
Media Slot<br />
Non-cash media are kept here.<br />
24.5 CDC (Cash Drawer Cover; Option) Lock<br />
24.5.1 Locking<br />
1. Push the Cash Drawer Cover to the back of the drawer.<br />
2. Press the cover lightly, insert the key into the key hole on the cover, and turn it 90° clockwise.<br />
24.5.2 Unlocking<br />
Unlock the cover using the key, and lift the front end.<br />
Money Case
25. IN CASE OF THE POWER FAILURE<br />
25. IN CASE OF THE POWER FAILURE<br />
MEAT 7.00 TF<br />
∗ P.FAIL ∗<br />
MEAT 7.00 TF<br />
The same data<br />
Power Failure Symbol<br />
25-1<br />
EO1-11137<br />
25. IN CASE OF THE POWER FAILURE<br />
If a power failure occurs during business hours, all sales data stored in the memory are automatically protected<br />
by the batteries installed in the register. When any data was being printed on the power failure, the same data is<br />
automatically printed at the power recovery. In case of the power failure, it is suggested to check the receipt print<br />
contents before you hand the receipt to the customer.
26. TROUBLESHOOTING<br />
26. TROUBLESHOOTING<br />
26-1<br />
EO1-11137<br />
26.1 Trouble concerning Power Supply<br />
The following are possible causes and measures against typical troubles. When a trouble occurs, refer to this<br />
chapter to find a cause of the trouble, then take appropriate measures. If a trouble not described here occurs, or<br />
a trouble still exists after taking the following measures, ask the store where purchased. In this case, inform the<br />
store where purchased of your trouble in details.<br />
WARNING!<br />
If you cannot solve a problem with the following solutions, do not attempt to repair it yourself. Turn<br />
the power off, then contact your TOSHIBA <strong>TEC</strong> representative for assistance.<br />
1. Trouble concerning Power Supply<br />
2. Trouble concerning Printer<br />
3. Trouble concerning Keyboard<br />
4. Trouble concerning Drawer<br />
5. Trouble concerning Display<br />
6. Trouble during Normal Operations<br />
7. Trouble in the REG Mode<br />
8. Trouble in the SET Mode<br />
26.1 Trouble concerning Power Supply<br />
■ Power is not turned ON.<br />
Cause 1: Register is not plugged in.<br />
Measure: Plug in an outlet.<br />
Cause 2: Control Lock is in the OFF position.<br />
Measure: Turn the Control Lock to the positions other than OFF using the Control Key.<br />
Cause 3: The outlet does not supply the power.<br />
Measure: Use another outlet.<br />
26.2 Trouble concerning Printer<br />
■ Printer does not perform the paper feeding.<br />
Cause 1: Paper roll is not placed correctly.<br />
Measure: Place the paper roll correctly. (Refer to page 8-1.)<br />
Cause 2: Paper fragment or foreign substance blocks the inside of the paper path.<br />
Measure: Printer provided for this register is a precision machine, therefore ask the store where purchased.<br />
Cause 3: Failure of the printer itself<br />
Measure: Ask the store where purchased.<br />
■ Paper roll wrinkles.<br />
Cause 1: Paper roll is not placed correctly, or placed on the skew.<br />
Measure: Place the paper roll correctly. (Refer to page 8-1.)<br />
Cause 2: Failure of the printer itself<br />
Measure: Ask the store where purchased.
26. TROUBLESHOOTING<br />
■ Printer prints nothing.<br />
Cause 1: Ribbon cassette is not installed.<br />
Measure: Install the ribbon cassette. (Refer to page 9-1.)<br />
Cause 2: Ribbon cassette reaches its life, deteriorates, or is damaged.<br />
Measure: Replace the ribbon cassette with a new one.<br />
26-2<br />
EO1-11137<br />
Cause 3: Status lamp “R OFF” is illuminated. (In case that nothing is printed on the receipt but not the journal)<br />
Measure: Depress the [LOG/RECEIPT] key to extinguish the lamp.<br />
Cause 4: Failure of the printer itself<br />
Measure: Ask the store where purchased.<br />
■ Printing as a whole is too light.<br />
Cause 1: Ribbon cassette reaches its life, deteriorates, or is damaged.<br />
Measure: Replace the ribbon cassette with a new one. (Refer to page 9-1.)<br />
■ Printing gets stained.<br />
Cause 1: Printer gathers paper dust.<br />
Measure: It is necessary to clean the inside of the printer, therefore ask the store where purchased.<br />
■ Printing is uneven or too light.<br />
Cause 1: Ribbon cassette reaches its life, deteriorates, or is damaged.<br />
Measure: Replace the ribbon cassette with a new one. (Refer to page 9-1.)<br />
■ Abnormal sound generates.<br />
Cause 1: Paper roll or Ribbon cassette is not placed correctly.<br />
Measure: Place the paper roll or ribbon cassette correctly. (Refer to page 8-1 or 9-1.)<br />
Cause 2: Failure of the printer itself<br />
Measure: Ask the store where purchased.<br />
■ Stamp does not work.<br />
Cause 1: Stamp is not installed correctly.<br />
Measure: Install the stamp correctly. (Refer to page 24-1.)<br />
Cause 2: Failure of the stamp mechanism<br />
Measure: Ask the store where purchased.<br />
■ Print of the stamp is too light.<br />
Cause 1: Stamp ink is not enough.<br />
Measure: Replenish the ink. (Refer to page 24-1.)<br />
26.2 Trouble concerning Printer
26. TROUBLESHOOTING<br />
26-3<br />
EO1-11137<br />
26.3 Trouble concerning Keyboard<br />
■ Paper jam has occurred.<br />
Cause: Paper roll is placed on the skew, or foreign substance exists in the paper path of the inside of the<br />
printer.<br />
Measure: Remove the jammed paper as follows.<br />
1. To open the upper side of the printer, press simultaneously two levers (green) provided on both sides of the<br />
printer in the direction of the arrow.<br />
2. Raise up the upper side of the printer in the direction of the arrow, then remove the jammed paper. After removing<br />
it, return the upper side of the printer until it clicks.<br />
26.3 Trouble concerning Keyboard<br />
■ Key on the keyboard does not function.<br />
Cause 1: Control Lock is in the OFF position.<br />
Measure: Turn the Control Lock to the positions other than OFF using the Control Key.<br />
Cause 2: Failure of the keyboard itself<br />
Measure: Ask the store where purchased.<br />
26.4 Trouble concerning Drawer<br />
■ Drawer does not open.<br />
Cause 1: Drawer catches foreign substance (coin, etc.).<br />
Measure: Try to open the drawer by removing the foreign substance, using a ruler or something. If not<br />
effective, ask the store where purchased.<br />
Cause 2: Failure of the drawer itself<br />
Measure: Ask the store where purchased.
26. TROUBLESHOOTING<br />
26.5 Trouble concerning Display<br />
■ Display displays nothing.<br />
Cause 1: Register is not securely plugged in.<br />
Measure: Securely plug in an outlet.<br />
Cause 2: Control Lock is in the OFF position.<br />
Measure: Turn the Control Lock to the positions other than OFF using the Control Key.<br />
■ Some segment is not displayed, display shimmers, or illumination of the display is uneven.<br />
Cause 1: Failure of the LED<br />
Measure: Ask the store where purchased.<br />
26.6 Trouble during Normal Operations<br />
NOTE on changing the Control Lock position:<br />
26-4<br />
EO1-11137<br />
Changing the Control Lock position during sales entries or programming causes an error. To clear the error, return<br />
the Control Lock to the original position. However, changing the Control Lock position to the OFF does not<br />
cause an error. Error caused by changing the Control Lock position cannot be cleared by the [C] key.<br />
■ Normal operations cannot be carried out.<br />
Cause 1: Control Lock position does not correspond to the operation you attempted.<br />
Measure: Check whether or not the Control Lock position corresponds to the operation. (Especially, check<br />
whether or not the operation you attempted requires the MGR position. Ask your manager about the<br />
operations which requires the MGR position.)<br />
■ Error tone beeps<br />
Cause 1: Operation procedure is incorrect.<br />
Measure: Depress the [C] key to clear the error, then check the operation procedure you attempted.<br />
Cause 2: Control Lock position is incorrect.<br />
Measure: Turn the Control Lock to the correct position using the Control Key.<br />
26.5 Trouble concerning Display<br />
Cause 3: Operation in the REG position was attempted while the drawer remained open. (In case that the<br />
Drawer-close Compulsory Option has been selected.)<br />
Measure: Close the drawer, then depress the [C] key.
26. TROUBLESHOOTING<br />
26.7 Trouble in the REG Position<br />
■ Operations in the REG position cannot be carried out.<br />
Cause 1: Control Lock is not in the REG position.<br />
Measure: Turn the Control Lock to the REG position using the Control Key.<br />
Cause 2: Cashier Identifying Operation was not performed when the Cashier Identifying Option has been<br />
selected.<br />
Measure: Perform the sign-ON or set the Cashier Key ON. (Refer to page 16-1.)<br />
Cause 3: Operation was attempted while the drawer remained open. (In case that the Drawer-close<br />
Compulsory Option has been selected.)<br />
Measure: Close the drawer, then depress the [C] key.<br />
Cause 4: Operation you attempted requires the MGR position.<br />
Measure: Depress the [C] key, and ask your manager whether the operation requires the MGR position. If<br />
required, ask your manager to turn the Control Lock to the MGR position.<br />
Cause 5: You ignored the validation print when the Validation Compulsory Option has been selected to the<br />
last operation you attempted. (In this case, the status lamp “SLP” flickers.)<br />
Measure: Depress the [C] key, and perform the validation print.<br />
Cause 6: After performing the validation print, you attempted the next operation while the validation slip<br />
remained in the validation slot.<br />
Measure: Depress the [C] key, and pull out the validation slip from the validation slot.<br />
26.8 Trouble in the SET Position<br />
■ Operations in the SET position cannot be carried out.<br />
Cause 1: Control Lock is not in the SET position.<br />
Measure: Turn the Control Lock to the SET position using the Control Key.<br />
Cause 2: Condition for the programming is not satisfied.<br />
Measure: Check the condition for the programming .<br />
Cause 3: Operation procedure is incorrect.<br />
Measure: Check the operation procedure you attempted.<br />
26-5<br />
EO1-11137<br />
26.7 Trouble in the REG Position
27. STATUS CLEAR AND MEMORY CLEAR OPERATIONS<br />
27-1<br />
EO1-11137<br />
27.1 Status Clear<br />
27. STATUS CLEAR AND MEMORY CLEAR OPERATIONS<br />
The operations described in this chapter are provided for initial start-up of the machine or emergency but not to<br />
be operated as part of daily routines.<br />
27.1 Status Clear<br />
The operation defined as “Status Clear” will only clear an error or key-locked condition that disables normal<br />
operations (though it seldom happens). Thus neither the sales data nor the programmed data will be cleared by a<br />
Status Clear (except that when a Status Clear is operated to clear a key-locked condition during a sale, the sale<br />
item data already entered for the current sale will be cleared).<br />
The Status Clear also has the function to obtain the condition “after all sales data resets” (as if all sales data had<br />
been reset) but will not actually affect any sales data. Such a condition is required in some programming<br />
operations and is usually obtained by taking the required reset reports. However, when you do not want the sales<br />
data to be reset because it is still in the business hours,etc., this function of the Status Clear will be effective. But<br />
be careful in using the function; depending on the programming item, sales data resets may really be necessary<br />
instead of a Status Clear, to keep consistency between the programmed data and the sales data.<br />
Operating Procedure<br />
Condition: Any time, outside or during any operation sequence<br />
Operation: Remove the plug of the register’s power cord from the wall outlet (to turn OFF the power).<br />
Use the S Key to turn the<br />
Control Lock to “BLIND”.<br />
REG<br />
OFF<br />
SET<br />
Plug in the cord (to turn ON the power).<br />
A Status Clear receipt is issued.<br />
X<br />
MGR<br />
Status Clear Symbol<br />
Date, Consecutive No.,<br />
and Time are not reset.<br />
-<br />
Z<br />
(BLIND)<br />
<strong>TEC</strong> STORE<br />
1343 PEACH DRIVE<br />
PHONE: 87-6437<br />
Open 8:00am to 7:00pm<br />
Closed: every Wednesday<br />
11-28-1997 #0<br />
STATUS-C<br />
0002 10:26TM
27. STATUS CLEAR AND MEMORY CLEAR OPERATIONS<br />
27.2 Sales Memory Clear<br />
27-2<br />
EO1-11137<br />
27.2 Sales Memory Clear<br />
The operation defined as “Sales Memory Clear” will only clear the sales data accumlated in the register’s memory<br />
(report memory). The programmed data will not be cleared. By operating a Sales Memory Clear , all the sales<br />
data including non-resettable totals and counters, Reset Report Counts, and Receipt Consecutive No. are<br />
cleared.<br />
WARNING!<br />
This clear operation deletes all sales data stored in the register’s memory, so that never perform<br />
this operation as part of daily routines.<br />
Operating Procedure<br />
Condition: Any time, outside or during any operation sequence<br />
Operation:<br />
Use the S Key to turn the<br />
Control Lock to “BLIND”.<br />
REG<br />
OFF<br />
SET<br />
X<br />
MGR<br />
-<br />
Z<br />
(BLIND)<br />
Depress the following Numeric Key according to the display and print format for zero amount:<br />
Numeric Key Zero-amount Version Code<br />
Format (Nation)<br />
1<br />
3<br />
. 0 -----<br />
0 . 0 0 US (The United<br />
States and Canada)<br />
Depress the AT/TL key.<br />
A Sales Memory Clear receipt is issued.<br />
Sales Memory Clear Symbol<br />
Receipt Consecutive No. is reset<br />
to 0001.<br />
(Date and Time remain unreset.)<br />
<strong>TEC</strong> STORE<br />
1343 PEACH DRIVE<br />
PHONE: 87-6437<br />
Open 8:00am to 7:00pm<br />
Closed: every Wednesday<br />
11-28-1997 #0<br />
DATA-C<br />
0001 10:26TM<br />
NOTE: When the Sales Memory Clear is operated, the condition “after all sales data reset” is obtained, just as<br />
“Status Clear” or “All Memory Clear”. Therefore, no Reset Reports need to be taken for starting any<br />
programming operation.
27. STATUS CLEAR AND MEMORY CLEAR OPERATIONS<br />
27.3 All Memory Clear<br />
27-3<br />
EO1-11137<br />
27.3 All Memory Clear<br />
If the register becomes completely inoperative due to battery discharge or malfunction of the program memory,<br />
the All Memory Clear operation must be carried out. When an All Memory Clear is operated, all the memory<br />
contents that have been stored in the RAM will be cleared (i.e., the programmed data and the sales data). Along<br />
with the clearing process, the designated zero-amount format is set and “Initial Data” and “Initial Status” for<br />
respective programming items are automatically set.<br />
Operating Procedure<br />
Condition: Any time, outside or during any operation sequence<br />
Operation:<br />
Use the S Key to turn the<br />
Control Lock to “BLIND”.<br />
REG<br />
OFF<br />
SET<br />
Numeric Key Zero-amount Version Code<br />
Format (Nation)<br />
. 0 -----<br />
0 . 0 0 US (The United<br />
States and Canada)<br />
Depress the AT/TL key.<br />
WARNING!<br />
This clear operation deletes all programmed data and sales data stored in the register’s memory, so<br />
that never perform this operation as part of daily routines. (i.e., the register goes back to initial status.)<br />
X<br />
All Memory Clear Symbol<br />
Receipt Consecutive No. is reset<br />
to 0001.<br />
(Date and Time remain unreset.)<br />
MGR<br />
-<br />
Z<br />
(BLIND)<br />
Depress the following Numeric Key according to the display and print format for zero amount and the nation<br />
where the register is used:<br />
1 9<br />
3<br />
9<br />
A Sales Memory Clear receipt is issued.<br />
<strong>TEC</strong> STORE<br />
1343 PEACH DRIVE<br />
PHONE: 87-6437<br />
Open 8:00am to 7:00pm<br />
Closed: every Wednesday<br />
11-28-1997 #0<br />
RAM-C<br />
0001 10:25TM<br />
NOTE: When the All Memory Clear is operated, the condition “after all sales data reset” is obtained, just as<br />
“Status Clear” or “Sales Memory Clear”. Therefore, no Reset Reports need to be taken for starting any<br />
programming operation.
Appendix<br />
Appendix 1<br />
Dear Customer;<br />
STAMP ORDER<br />
A Receipt Stamp (Electro-stamp) “Thank you Call again” comes with each unit. If you prefer printing your<br />
company name or message to “Thank you Call again” for receipt inprint, please place your order by using the<br />
order form below.<br />
Please complete the order form and mail with your check for $39.50 US Dollar.<br />
Replenishment ink is also available for $3.50 US Dollar for purple ink.<br />
A-1<br />
EO1-11137<br />
Appendix 1<br />
- — - — - — -CUT OFF — - — - — - — - — - — - —CUT OFF — - — - — - — - — - — - CUT OFF - — - — - — -<br />
ORDER TO: CARDA INTERNATIONAL<br />
P.O. Box 2189<br />
Corpus Christi, TX 78403<br />
(800) 354-6416 (Fax)<br />
(800) 322-4515 (Voice)<br />
TOSHIBA <strong>TEC</strong> STAMP ORDER FORM DATE i<br />
SOLD TO: COMPANY NAME I<br />
ADDRESS I<br />
CITY COUNTRY I<br />
YOUR NAME I<br />
PHONE ZIP CODE I<br />
Please show the text of your stamp<br />
here (words only).<br />
TOSHIBA <strong>TEC</strong> MODEL: MA-<strong>1350</strong><br />
Description UNIT PRICE QTY AMOUNT<br />
STAMP $39.50<br />
Replenishment Ink $3.50<br />
TOTAL<br />
Please mail your check with the order form.<br />
For more detail, please contact Carda International.<br />
NOTES: 1. If you order two or more design stamps, please make copies of this form.<br />
2. Carda International is an independent company and is not affiliated with TOSHIBA <strong>TEC</strong>.<br />
3. Carda International also accepts orders for custom logos at an additional cost.
Appendix<br />
Appendix 2<br />
<strong>Ma</strong>ke a copy of this sheet and use it when you input characters directly on the normal keyboard.<br />
JF<br />
DP# RF<br />
U<br />
P<br />
K<br />
F<br />
A<br />
LOG<br />
RECEIPT<br />
V<br />
Q<br />
L<br />
G<br />
B<br />
C<br />
#<br />
M<br />
H<br />
7 8 9<br />
,<br />
W<br />
R<br />
C<br />
ITEM<br />
CORR<br />
A-2<br />
X<br />
S<br />
N<br />
I<br />
4 5 6<br />
@/FOR<br />
–<br />
D<br />
Y<br />
T<br />
O<br />
J<br />
1 2 3<br />
/<br />
SPACE<br />
E<br />
PLU ST AT/TL<br />
Z<br />
0 00 •<br />
EO1-11137<br />
Appendix 2
E<br />
PRINTED IN CHINA<br />
EO1-11137A